
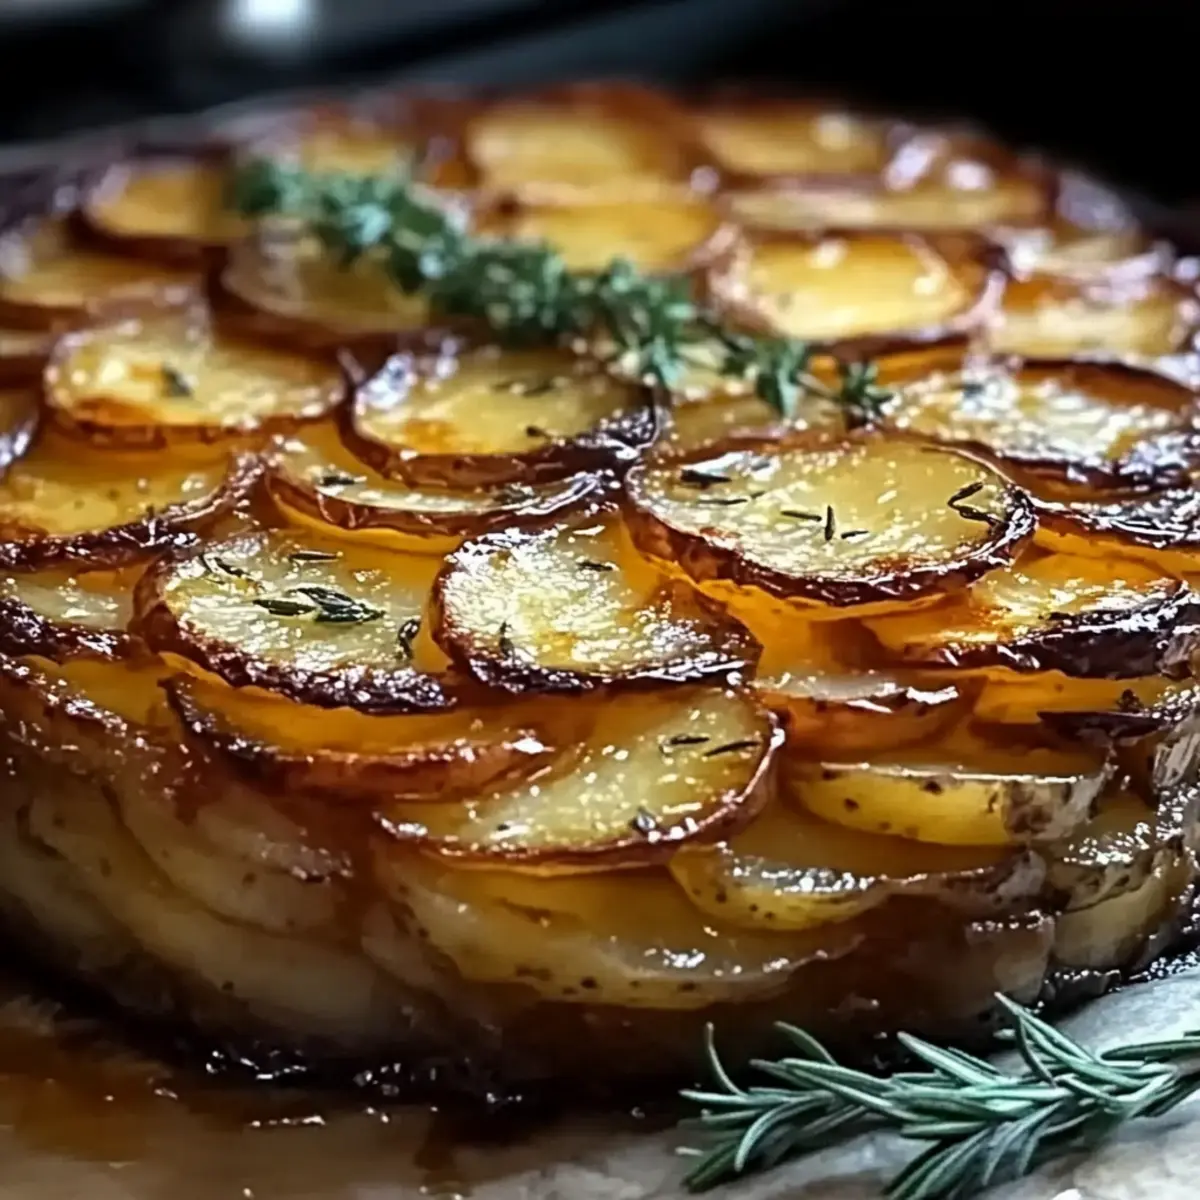
As I stood in my kitchen, the seductive aroma of roasted garlic and fresh rosemary wafted through the air, instantly transporting me to a cozy Italian trattoria. Today, I’m thrilled to share my Crispy Balsamic Potato Torte, a delightful dish that elevates simple ingredients into a showstopping centerpiece. Each layer of tender Yukon Gold potatoes, kissed by a tangy balsamic glaze, offers a lovely contrast between crispy and soft textures that will leave your guests in awe. Not only is this vegetarian side dish quick to prepare, but it also shines at gatherings, making it a perfect fit for any occasion. Whether you’re enjoying a quiet weeknight dinner or celebrating with friends, I have a feeling this torte will become your new go-to recipe. Ready to learn how to master this delicious creation? Let’s dive in!
Why Is This Potato Torte Extraordinary?
Simplicity in preparation makes this Crispy Balsamic Potato Torte a delightful go-to for any home cook. Rich, complex flavors are brought together through tangy balsamic and aromatic herbs, tantalizing your taste buds. Impressive presentation means it’s perfect for special occasions, while still easy enough for weeknight meals. Serve alongside Chicken Bacon Potato for a hearty feast! Texture contrasts wow guests, with crispy edges and creamy layers creating an unforgettable bite. You’ll love how versatile it is; customize with different cheeses or herbs to suit your taste!
Crispy Balsamic Potato Torte Ingredients
- For the Torte
- Yukon Gold Potatoes – The star ingredient that brings creaminess and structure; substitute with red potatoes if desired.
- Balsamic Vinegar – Adds tangy sweetness that enhances the flavor profile of the torte.
- Olive Oil – Helps achieve a crispy texture while preventing sticking; butter can be used for added richness.
- Fresh Rosemary – Provides aromatic herbal notes that elevate the dish beautifully.
- Garlic – Freshly minced for the best flavor depth; essential for deliciousness.
- Parmesan Cheese – Adds a salty umami flavor that also helps to bind the layers together.
- Salt – Enhances the overall flavor; adjust to taste preferences.
- Black Pepper – Offers a mild balance of heat that complements the dish.
- Butter (optional) – Dot on top before baking to add an extra touch of richness.
Now that you have everything you need for your Crispy Balsamic Potato Torte, let’s get to the fun part—preparing this elegant dish!
Step‑by‑Step Instructions for Crispy Balsamic Potato Torte
Step 1: Prep Potatoes
Begin by washing and peeling your Yukon Gold potatoes. Using a mandoline or a sharp knife, slice the potatoes into paper-thin rounds, aiming for uniform thickness for even cooking. Mince the garlic and chop the fresh rosemary, ensuring these aromatic ingredients are ready to elevate the flavor of your Crispy Balsamic Potato Torte.
Step 2: Preheat Oven
Preheat your oven to 400°F (200°C). While the oven warms up, grease a springform pan or an oven-safe skillet with a generous amount of olive oil or butter. This step ensures the torte won’t stick and helps achieve that golden crisp we’re after. The pan should be ready when the oven reaches temperature.
Step 3: Layer Ingredients
Start layering your sliced potatoes in the prepared pan, slightly overlapping each slice for a stunning presentation. Once you’ve placed a layer of potatoes, brush it with olive oil and balsamic vinegar, then sprinkle the minced garlic, chopped rosemary, Parmesan cheese, salt, and black pepper. Repeat this layering process until all ingredients are used, making sure to season each layer for maximum flavor.
Step 4: Press Down
After building your layers, gently press down on the torte with a spatula. This compacting step is crucial as it helps the torte hold together while baking, leading to a beautifully structured Crispy Balsamic Potato Torte. The pressing will take just a minute, but it will make a significant difference in the final product.
Step 5: Bake
Cover the assembled torte with aluminum foil and place it in the preheated oven. Bake for 30 minutes to allow the potatoes to soften. Once this initial baking is done, carefully remove the foil, dot the top with butter if desired, and return the torte to the oven for an additional 20-25 minutes. Look for a golden-brown crust on top as a visual cue that it’s perfectly crisp.
Step 6: Cool and Serve
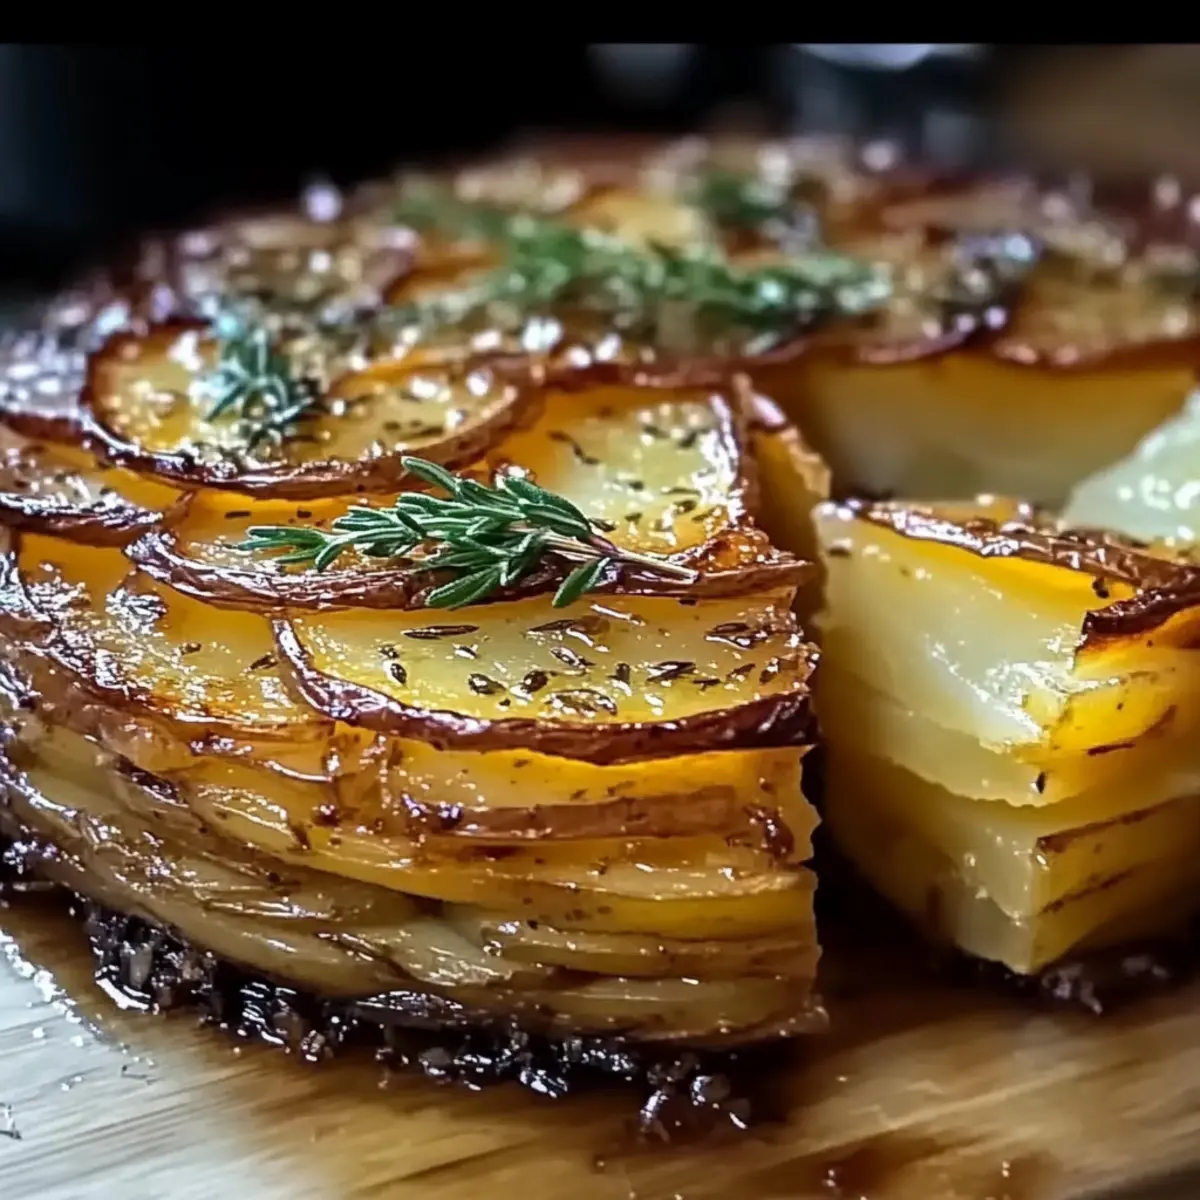
After baking, let your Crispy Balsamic Potato Torte cool for about 10 minutes in the pan. This cooling period makes slicing easier and helps the layers set beautifully. When ready, cut it into wedges and serve warm, allowing your guests to enjoy the delightful contrast of crispy edges and tender layers.
Crispy Balsamic Potato Torte Variations
Ready to add your personal touch to the Crispy Balsamic Potato Torte? Here are some delightful ways to customize this dish!
- Herb Boost: Swap the rosemary for fresh thyme or oregano for a fragrant twist that transforms the flavor profile beautifully.
- Cheesy Delight: Instead of Parmesan, use Gruyère for a creamy interior or mozzarella for a stretchy, gooey texture that’s irresistible.
- Veggie-Laden: Layer in sautéed mushrooms or fresh spinach for added nutrition and a pop of color among the potatoes. It’s a great way to sneak in an extra serving of veggies!
- Spicy Kick: Sprinkle in some red pepper flakes between layers to give your torte a cozy warmth that’ll surprise your taste buds. A little heat goes a long way!
- Vegan Version: Replace Parmesan with nutritional yeast and use a plant-based butter substitute to craft a delicious vegan-friendly version of this classic dish.
- Mustard Kick: Brush a thin layer of Dijon mustard on the layers for a tangy, zesty flavor that complements the balsamic perfectly.
- Sweet Twist: Add thinly sliced caramelized onions for a touch of sweetness that pairs wonderfully with the earthy potatoes. It’s like a hug for your palate!
- Vegetable Medley: Mix in layers of thinly sliced zucchini or roasted bell peppers for a burst of color, flavor, and nutrients.
Experimenting with these variations can open a world of flavor, and if you’re searching for more inspiration, consider pairing your torte with dishes like Chicken Taquitos Wow or Ground Beef Potatoes for a complete meal. Happy cooking!
Make Ahead Options
These Crispy Balsamic Potato Torte are perfect for busy home cooks looking to save time during the week! You can assemble the torte up to 24 hours in advance. After layering the potatoes, brush with olive oil and balsamic, sprinkle the garlic, rosemary, cheese, salt, and pepper, then cover tightly with aluminum foil and refrigerate. This keeps the flavors melded and ensures the potatoes stay fresh. When you’re ready to bake, just pop it in the preheated oven, covered, and bake according to the directions. With this make-ahead technique, you’ll have a restaurant-quality side dish ready to impress without the last-minute rush!
What to Serve with Crispy Balsamic Potato Torte
Transform your meal into a culinary celebration with these delightful pairings that accentuate every bite of the torte’s crispy goodness.
-
Herb-Grilled Chicken: Juicy chicken seasoned with fresh herbs adds a protein-packed contrast, enhancing the torte’s flavors beautifully.
-
Roasted Fish: The light, flaky texture of a roasted fish complements the tender layers of the torte, bringing harmony to your plate.
-
Simple Arugula Salad: A fresh arugula salad with lemon vinaigrette adds a peppery crunch, cutting through the creamy richness of the torte.
-
Garlic Butter Mushrooms: Sautéed mushrooms in garlic and butter infuse earthy flavors that pair well with the aromatic herbs in the potato dish.
-
Classic Tomato Soup: The acidity of a velvety tomato soup balances the richness of the torte, creating a comforting, hearty combination.
-
Light White Wine: A chilled Sauvignon Blanc or Pinot Grigio refreshes your palate, offering crisp notes that beautifully complement the balsamic undertones.
-
Dark Chocolate Mousse: End the meal on a sweet note with a rich chocolate mousse, pairing the bittersweet flavors against the savory torte.
-
Crispy Brussels Sprouts: Roasted Brussels sprouts provide a delightful crunch matching the torte’s texture while their slight bitterness adds depth to the meal.
Storage Tips for Crispy Balsamic Potato Torte
- Fridge: Store leftover Crispy Balsamic Potato Torte in an airtight container in the fridge for up to 4 days. This helps maintain its delightful flavor and texture.
- Freezer: If you want to freeze it, wrap the torte tightly in plastic wrap and then foil, storing it for up to 3 months. Thaw in the fridge before reheating.
- Reheating: To enjoy the torte again, reheat it in a skillet over medium heat or in the oven at 350°F (175°C) until warmed through and crispy again.
- Serving Tip: Cut individual portions before reheating; this allows for quicker warming and better texture retention in each slice!
Expert Tips for Crispy Balsamic Potato Torte
-
Uniform Slices: Use a mandoline slicer for perfectly consistent potato thickness; this ensures even cooking and helps achieve that desired crispy texture.
-
Compact Layers: Remember to press down gently on each layer before baking; this step prevents the torte from falling apart and enhances its stability.
-
Foil Technique: Cover the torte with foil for the first half of baking to allow the potatoes to soften, then remove it to let the top get that beautiful golden crisp.
-
Flavor Boost: Brush each layer with olive oil and balsamic vinegar generously; this will maximize flavor absorption throughout your Crispy Balsamic Potato Torte.
-
Pan Choice: Using a preheated cast iron skillet can give you extra crispy edges—perfectly enhancing the texture of your dish!
-
Resting Time: Allowing the torte to cool for 10 minutes after baking helps the layers set and makes slicing much easier.
Crispy Balsamic Potato Torte Recipe FAQs
How do I choose the right Yukon Gold potatoes for the torte?
Absolutely! When selecting Yukon Gold potatoes, look for firm ones with smooth skin and no dark spots or blemishes. These potatoes have a natural creaminess that helps provide the best texture in your torte. Avoid those with soft spots or sprouting eyes.
What is the best way to store leftover Crispy Balsamic Potato Torte?
To prolong the freshness of your torte, store leftovers in an airtight container in the fridge for up to 4 days. Make sure it’s completely cooled before sealing it to prevent moisture accumulation, which could lead to sogginess.
Can I freeze the torte? If yes, how?
Certainly! To freeze your Crispy Balsamic Potato Torte, wrap it tightly in plastic wrap followed by a layer of aluminum foil to prevent freezer burn. It can be stored for up to 3 months. When you’re ready to enjoy it, thaw it in the fridge overnight before reheating.
What should I do if my torte doesn’t come out crispy?
Very! If your torte lacks crispiness, it’s likely due to insufficient baking time or moisture. Make sure to press down on each layer to compact ingredients before baking. If baking directly in a skillet, preheat it for extra crisp. Also, consider reducing moisture by ensuring your potatoes are dry before layering.
Is this recipe suitable for vegetarians and those with lactose intolerance?
Yes, the Crispy Balsamic Potato Torte is vegetarian as it uses no meat products! If you have lactose intolerance, you can substitute Parmesan cheese with a dairy-free cheese alternative. Always check labels to avoid any allergens and fit dietary needs.
Crispy Balsamic Potato Torte: Elevate Your Side Dish Game
Ingredients
Equipment
Method
- Begin by washing and peeling your Yukon Gold potatoes. Using a mandoline or a sharp knife, slice the potatoes into paper-thin rounds.
- Preheat your oven to 400°F (200°C) and grease a springform pan or an oven-safe skillet with olive oil or butter.
- Start layering your sliced potatoes in the prepared pan, slightly overlapping each slice. Brush with olive oil and balsamic vinegar, then sprinkle with garlic, rosemary, Parmesan, salt, and pepper.
- Gently press down on the torte with a spatula to compact the layers.
- Cover with aluminum foil and bake for 30 minutes. Remove foil, dot with butter, and bake for an additional 20-25 minutes until top is golden brown.
- Let cool for about 10 minutes, then cut into wedges and serve warm.
Leave a Reply