
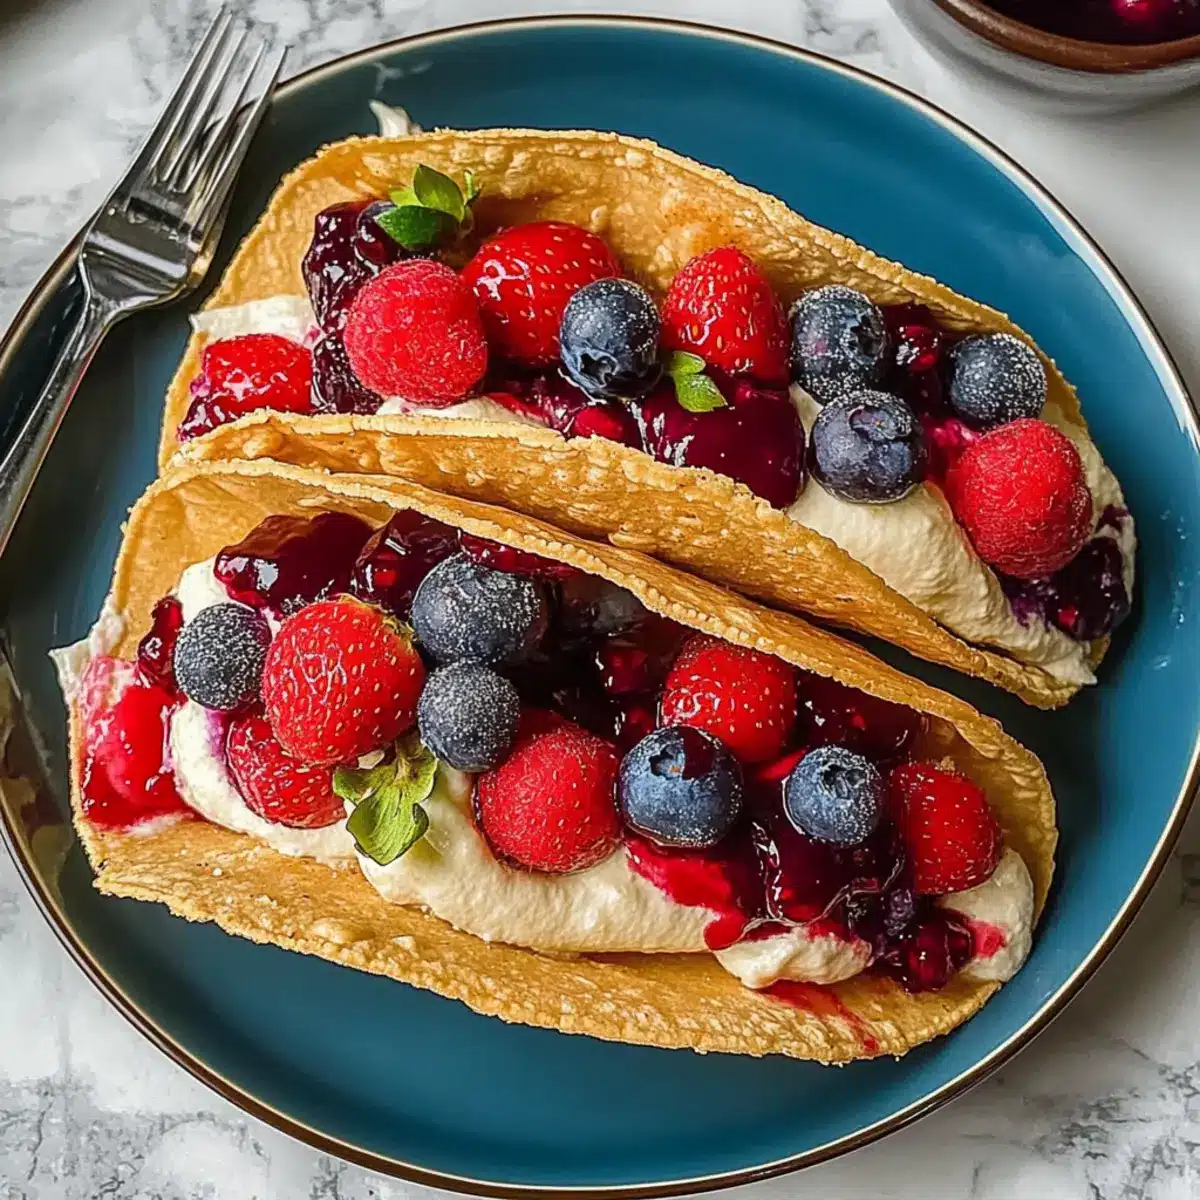
Imagine hosting a gathering where your guests can’t stop smiling as they savor each bite of the latest dessert trend—Berrylicious Cheesecake Tacos. This easy assembly of buttery tortilla shells coated in graham cracker crumbs is filled with a creamy cheesecake mixture that oozes happiness and is crowned with vibrant jams of strawberries and blueberries. Not only do these tacos serve as a delightful crowd-pleaser, but they’re also fully customizable, inviting you to experiment with various fillings and toppings. Trust me, you’ll want to make these magical treats for every occasion. Are you ready to whip up some fun in the kitchen? Let’s dive into this unforgettable recipe!
Why will you crave these tacos?
Uniqueness: These Berrylicious Cheesecake Tacos combine two beloved desserts into one exciting treat, the perfect way to shake off boring fast food!
Customizable Flavors: Tailor this recipe with different jam options or fresh fruit to match your taste, making every batch uniquely yours.
Easy Assembly: Skip the complexity of traditional desserts; these tacos come together quickly, ensuring a stress-free experience in the kitchen.
Crowd-Pleasing Delight: Whether it’s a party or a cozy family dinner, these tacos will impress and satisfy every guest. Plus, they present beautifully!
Versatile Sweetness: Enjoy them as a refreshing summer dessert or add warm spices for a cozy winter treat—perfect for any season!
Make sure to check out my Baked Breakfast Tacos for a fun morning twist on taco treats!
Berrylicious Cheesecake Tacos Ingredients
-
For the Taco Shells
-
8-inch Tortillas – Main structure of the tacos; these create a crispy base. Substitute with gluten-free tortillas for a GF version.
-
1/2 cup Graham Cracker Crumbs – Adds crunch and flavor to the taco shells; can be replaced by crushed vanilla wafers or digestive biscuits for a twist.
-
1/4 cup Unsalted Butter, melted – Binds crumbs to the tortillas and enhances flavor; use coconut oil for a dairy-free option.
-
For the Cheesecake Filling
-
8 oz Cream Cheese, softened – Provides creaminess and tang; consider using flavored cream cheese like strawberry for an extra kick.
-
1/2 cup Heavy Cream – Adds lightness to the filling, creating a silky texture; coconut cream can be used for a vegan alternative.
-
1/3 cup Powdered Sugar – Sweetens the filling; adjust the amount based on your taste preference.
-
1 tablespoon Lemon Juice – Adds tanginess; lime juice can be used as a substitute.
-
1 teaspoon Vanilla Extract – Enhances flavor depth; substitute with almond extract for a different taste.
-
For the Toppings
-
1/4 cup Blueberry Jam – Adds sweetness and a fruity layer; swap for raspberry or peach jam.
-
1/4 cup Strawberry Jam – Complements the cheesecake flavor profile; Nutella can be drizzled instead for a decadent option.
Step‑by‑Step Instructions for Berrylicious Cheesecake Tacos
Step 1: Preheat the Oven
Begin by preheating your oven to 400°F (200°C). This crucial step ensures that your taco shells become perfectly golden and crispy. While the oven heats, gather your 8-inch tortillas and a muffin tin for shaping the shells.
Step 2: Prepare Tortilla Rounds
Using a round cutter, cut your tortillas into approximately 1.5-inch circles. To prevent air bubbles during baking, use a fork to pierce each round gently. This will help ensure your tortilla shells maintain a lovely crispness as they cook.
Step 3: Coat with Butter and Crumbs
Melt 1/4 cup of unsalted butter in a small bowl. Dip each tortilla round into the melted butter, ensuring it’s fully coated, then transfer it to a plate with 1/2 cup of graham cracker crumbs. Press lightly to coat the tortilla with crumbs for added crunch and flavor.
Step 4: Shape Taco Shells
After coating, carefully drape each tortilla over an inverted muffin tin. This will form the shape of your taco shells. Bake in the preheated oven for 10–12 minutes or until they turn golden brown. Once done, remove them from the oven and allow them to cool before filling.
Step 5: Whip Cheesecake Mixture
In a mixing bowl, beat together 8 oz of softened cream cheese, 1 tablespoon of lemon juice, and 1 teaspoon of vanilla extract with a hand mixer until smooth and creamy. This forms the base of your cheesecake filling, bursting with flavor and tang.
Step 6: Whip the Cream
In a separate bowl, whip 1/2 cup of heavy cream alongside 1/3 cup of powdered sugar until stiff peaks form. This light and airy texture will enhance your cheesecake filling, making it sinfully delicious. Be gentle as you fold this into the cream cheese mixture.
Step 7: Combine Mixtures
Gently fold the whipped cream into the cream cheese mixture until it’s fully incorporated and silky smooth. This step is key for achieving a rich, fluffy filling for your Berrylicious Cheesecake Tacos. Refrigerate for 30 minutes to allow the flavors to meld.
Step 8: Fill Taco Shells
Once the taco shells have cooled and the filling is chilled, use a piping bag to fill each taco shell generously with the cheesecake mixture. This fun and easy assembly ensures every bite is bursting with creamy goodness that your guests will love.
Step 9: Add Toppings
Top each filled taco with a delightful drizzle of blueberry and strawberry jam. This not only adds a beautiful, vibrant color but also enhances the sweet flavor profile of the Berrylicious Cheesecake Tacos. Serve immediately or chill briefly to allow the filling to set.
What to Serve with Berrylicious Cheesecake Tacos
Elevate your dessert experience with delightful accompaniments that harmonize flavors and textures, turning this treat into a memorable meal.
- Fresh Fruit Salad: Bright and refreshing, a medley of seasonal fruits enhances the sweetness and adds a vibrant crunch to each bite.
- Whipped Cream: A dollop of light, airy whipped cream pairs perfectly with the rich cheesecake filling, inviting indulgence in every mouthful.
- Chocolate Drizzle: Enhance the flavor profile with a simple drizzle of melted chocolate, creating a beautiful contrast to the fruity toppings.
- Mint Leaves: A sprinkle of fresh mint adds a burst of color and a delightful aromatic element, balancing the sweetness beautifully.
- Mini Pastries: Serve alongside light mini pastries or cream puffs; their flaky textures create a delightful contrast with the creamy tacos.
- Sparkling Lemonade: As a refreshing drink option, sparkling lemonade adds a citrusy zing that refreshes the palate while complementing the dessert’s flavors.
- Coffee or Espresso: Rich, bold coffee or a shot of espresso offers a delightful contrast, making for an elevated tasting experience.
- Ice Cream: Consider a scoop of vanilla or berry-flavored ice cream for added creaminess—ideal for those who enjoy a decadent dessert.
- Nutty Granola: A sprinkle of nutty granola provides crunchy texture and a wholesome element, blending delightfully with the flavor of the tacos.
Berrylicious Cheesecake Tacos Variations
Feel free to let your imagination run wild with these delightful adaptations that will elevate your Berrylicious Cheesecake Tacos!
-
Fresh Berries: Swap jams for fresh mixed berries, adding a burst of juicy flavor with a delicious natural sweetness.
Using fresh fruit not only enhances the flavor but also adds a delightful contrast in texture, making every bite a joy. -
Nutella Drizzle: Switch out the jams for a decadent drizzle of Nutella to satisfy chocolate cravings.
This creamy chocolate goodness pairs beautifully with the cheesecake, creating a rich dessert experience that’s hard to resist. -
Flavored Cream Cheese: Use flavored cream cheese, such as strawberry or blueberry, to amp up the sweetness and add a unique twist.
It’s a simple switch that can transform the entire flavor profile of your tacos, delighting your taste buds with something new. -
Coconut Cream: To make your cheesecake filling dairy-free, substitute heavy cream with whipped coconut cream.
This alternative not only keeps the creaminess intact but also adds a subtle coconut flavor that perfectly complements the fruit toppings. -
Cinnamon Spice: Add a sprinkle of cinnamon or nutmeg to the filling for a warm, cozy twist.
These spices can transport your tacos into fall territory, making them an irresistible treat for chilly evenings. -
Peach Jam Alternative: Experiment with peach or apricot jam instead of the classic berry jams for a fruity and aromatic touch.
This sweet swap can bring a different layer of sweetness that pairs surprisingly well with the creamy filling. -
Gluten-Free Tortillas: Use gluten-free tortillas to cater to dietary needs while still enjoying these tasty treats.
Everyone deserves a bite of happiness, and with this swap, no one feels left out! -
Add Citrus Zest: Grate a little lemon or lime zest into your filling for a refreshing zing that brightens up every bite.
The zest adds a delightful pop of flavor, making your tacos even more inviting and uplifting.
Feel free to explore these variations, and don’t forget to check out my Baked Cheesy Tacos for another fantastic taco adventure! Enjoy your culinary journey!
Make Ahead Options
These Berrylicious Cheesecake Tacos are perfect for busy cooks looking to save time while still impressing family and friends! You can prepare the taco shells up to 24 hours in advance; simply bake them the day before and store them in an airtight container at room temperature to maintain their crispness. The cheesecake filling can also be made ahead and kept in the refrigerator for up to 3 days. When you’re ready to serve, just fill the cooled taco shells with the chilled filling, add your toppings, and enjoy restaurant-quality results with minimal effort. These make-ahead tips ensure your scrumptious dessert is just as delicious as when freshly made!
Helpful Tricks for Berrylicious Cheesecake Tacos
- Shell Preparation: Make your taco shells a day ahead for improved crispness. Store them in an airtight container to keep them fresh.
- Assembly Timing: Assemble the tacos right before serving to maintain the crunchiness of the shells—nobody wants soggy tacos!
- Chill Ingredients: Use chilled cream cheese and heavy cream to ensure your cheesecake filling stays firm and doesn’t soften too much.
- Custom Flavors: Experiment with flavored cream cheeses, like strawberry or lemon, to elevate the taste of your Berrylicious Cheesecake Tacos.
- Optional Sweetness: Adjust the powdered sugar in the filling to suit your sweetness preference, ensuring a balance that hits just right for you.
Storage Tips for Berrylicious Cheesecake Tacos
Room Temperature: Store the baked taco shells in an airtight container at room temperature for up to 2 days to maintain their crisp texture.
Fridge: The cheesecake filling can be kept in the fridge for up to 3 days; ensure it’s tightly covered to prevent any absorption of other odors.
Freezer: If you want to preserve the taco shells longer, freeze them in an airtight container for up to 1 month. When ready to use, reheat in a low oven for remarkable crispiness.
Reheating: For any softened shells, warm them gently in a preheated oven at 300°F (150°C) for 2–3 minutes before filling to restore that delightful crunch!
Berrylicious Cheesecake Tacos Recipe FAQs
How do I choose ripe ingredients for this recipe?
Absolutely! For the best flavor, select strawberries and blueberries that are bright in color and firm to the touch. Avoid those with dark spots or signs of overripeness, as they can affect the overall taste of your tacos.
How should I store leftover cheesecake tacos?
Very well! Baked taco shells should be stored in an airtight container at room temperature for up to 2 days. The cheesecake filling can be kept in the refrigerator for up to 3 days. Just make sure it’s tightly covered to maintain freshness.
Can I freeze the taco shells or cheesecake filling?
Yes, indeed! You can freeze the baked taco shells for up to 1 month in an airtight container or freezer bag. To use them later, simply reheat in a preheated oven at 300°F (150°C) for 2–3 minutes until crispy. The cheesecake filling may also be frozen, but it’s best to consume it fresh or within 3 days for optimal texture.
What if my taco shells are too soft after baking?
Not to worry! If your taco shells lose their crispness, simply return them to a preheated oven (set at 300°F/150°C) for about 2–3 minutes. This will help restore their delightful crunch, making them perfect for filling and serving.
Are there any dietary considerations for this recipe?
Absolutely! These Berrylicious Cheesecake Tacos can be tailored to accommodate various dietary needs. Use gluten-free tortillas to make it gluten-free, and coconut cream can substitute heavy cream for a vegan version. Just be cautious with any allergies when selecting your jams and fillings, ensuring all ingredients are safe for everyone enjoying your delicious tacos.
Can I customize the flavors or ingredients?
Very much so! The beauty of these Berrylicious Cheesecake Tacos is their versatility. Feel free to swap out the jams for things like raspberry or peach, or even add fresh fruit directly into your cheesecake filling. Experimenting with different flavored cream cheeses can also create unique taste experiences that keep everyone guessing and smiling!
Berrylicious Cheesecake Tacos: A Sweet Twist on Dessert
Ingredients
Equipment
Method
- Preheat your oven to 400°F (200°C).
- Cut your tortillas into approximately 1.5-inch circles and pierce each round gently with a fork.
- Dip each tortilla round into melted butter, then coat with graham cracker crumbs.
- Drape each tortilla over an inverted muffin tin and bake for 10–12 minutes.
- In a mixing bowl, beat together cream cheese, lemon juice, and vanilla extract until smooth.
- Whip heavy cream alongside powdered sugar until stiff peaks form, then fold into the cream cheese mixture.
- Refrigerate the mixture for 30 minutes.
- Fill each taco shell with the cheesecake mixture using a piping bag.
- Top each taco with blueberry and strawberry jam.
Leave a Reply