
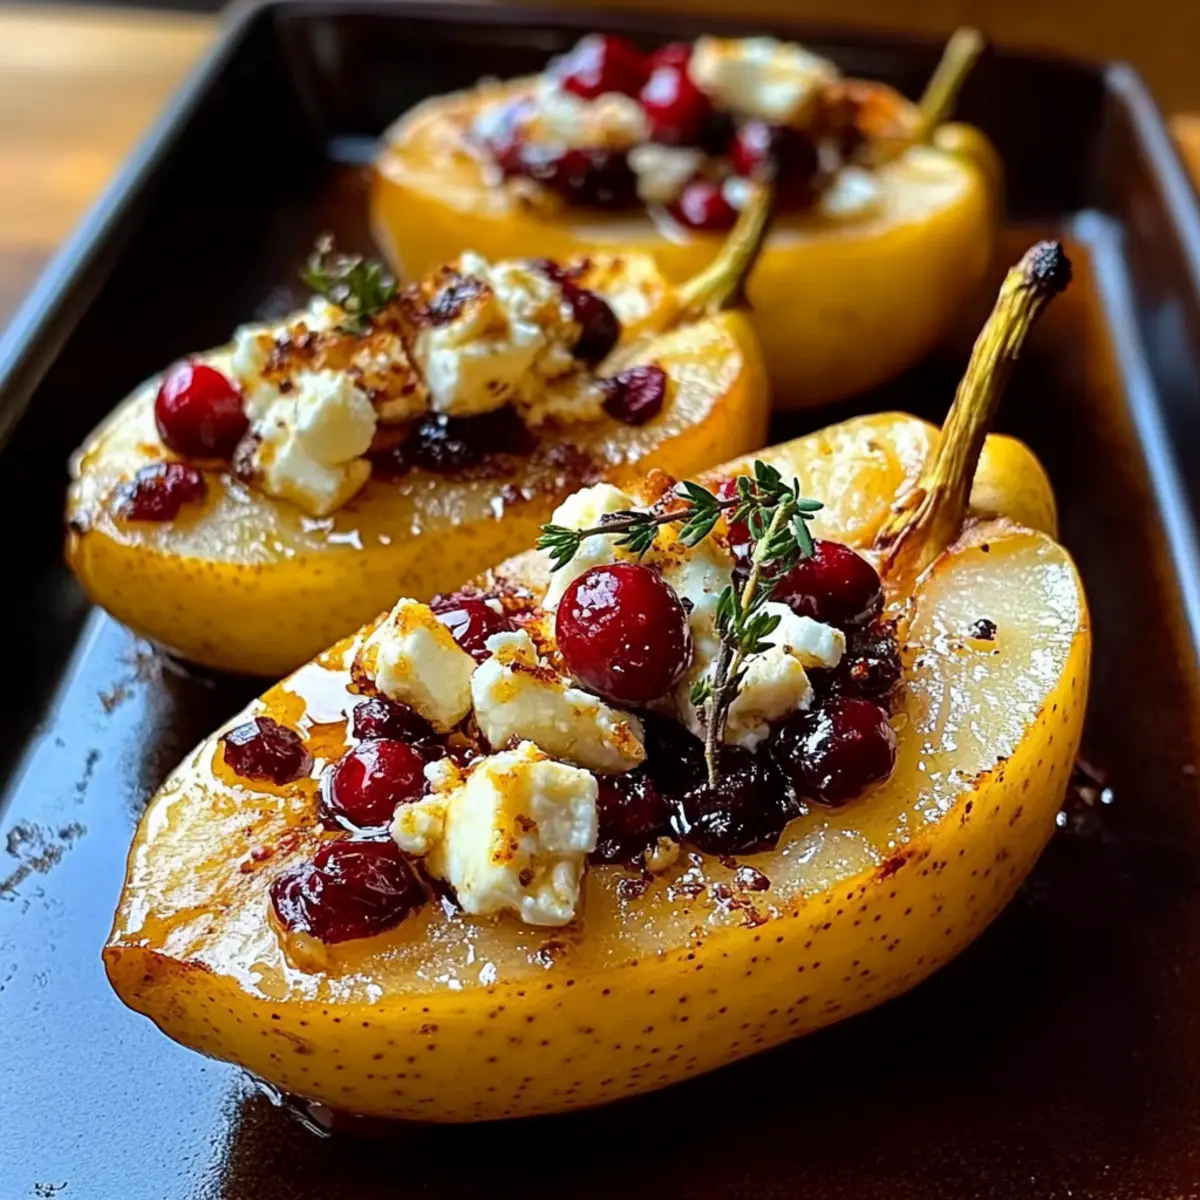
As I strolled through the farmers’ market last week, I was captivated by the display of ripe, juicy pears just begging to be transformed into something magical. That’s when I knew I had to share my favorite recipe for Baked Pears with Feta, Honey & Cranberries. This delightful dessert beautifully blends sweet and savory elements, making it perfect for impressing friends at dinner parties or adding a special touch to a cozy night in. Not only is it easy to whip up, but it’s also a gluten-free treat that feels indulgent without the guilt. Whether you’re a seasoned home chef or just looking to elevate your weeknight meals, this recipe will leave your taste buds singing. Curious how to make these show-stopping baked pears? Let’s dive in!
Why Are Baked Pears with Feta Amazing?
Irresistible Flavor Fusion: The combination of sweet pears, creamy feta, and tart cranberries creates a taste sensation that’s hard to resist.
Effortlessly Elegant: Impress your guests with a dish that looks as beautiful as it tastes, perfect for any gathering or cozy night in.
Customizable Delight: Feel free to experiment! Swap cranberries for figs or add a sprinkle of cardamom for a twist.
Quick & Simple: With just a few steps, you can have this gourmet dessert ready in under 30 minutes.
Nutritious Indulgence: Packed with fresh fruit and protein, this dessert is a guilt-free treat that still satisfies your sweet tooth.
For more delightful ideas, check out our Baked Breakfast Tacos or try these Baked Chicken Chimichangas for a savory meal!
Baked Pears with Feta Ingredients
• Get ready to savor an irresistible dessert!
For the Pears
- Pears – Firm, ripe pears ensure the perfect texture and sweetness when baked.
For the Filling
- Feta Cheese – Creamy and tangy, it pairs beautifully with the sweet pears; substitute with goat cheese for a milder option.
- Cranberries – These add a delightful tartness; consider dried cherries or figs if you want an alternative flavor pop.
- Chopped Nuts (walnuts or pecans) – Introduce a satisfying crunch to the filling; omit for nut-free ease.
- Cinnamon – This spice enhances warmth and comfort; add a pinch of nutmeg for an extra cozy touch!
For the Drizzle
- Honey – A golden glaze that sweetens and elevates the dish; swap with maple syrup to keep it vegan.
Remember, these Baked Pears with Feta can be customized to your liking, so feel free to get creative!
Step‑by‑Step Instructions for Baked Pears with Feta
Step 1: Preheat the Oven
Begin by preheating your oven to 375°F (190°C). This temperature ensures that your Baked Pears with Feta will cook evenly and develop a beautiful golden color. While the oven warms up, gather your baking dish, cutting board, and a sharp knife so you’re prepared for the next steps.
Step 2: Prepare the Pears
Slice the pears in half lengthwise and carefully scoop out the cores using a melon baller or a spoon, creating a perfect pocket for stuffing. Aim for even halves to ensure consistent baking. With the cut sides facing up, place the pear halves in your baking dish, ready to be filled with delicious ingredients.
Step 3: Make the Filling
In a mixing bowl, combine the crumbled feta cheese, tart cranberries, chopped nuts, two tablespoons of honey, and a generous sprinkle of cinnamon. Use a fork to mix until everything is evenly coated and the ingredients are well-distributed. This filling adds a delightful blend of flavors that makes the Baked Pears with Feta truly irresistible.
Step 4: Stuff the Pears
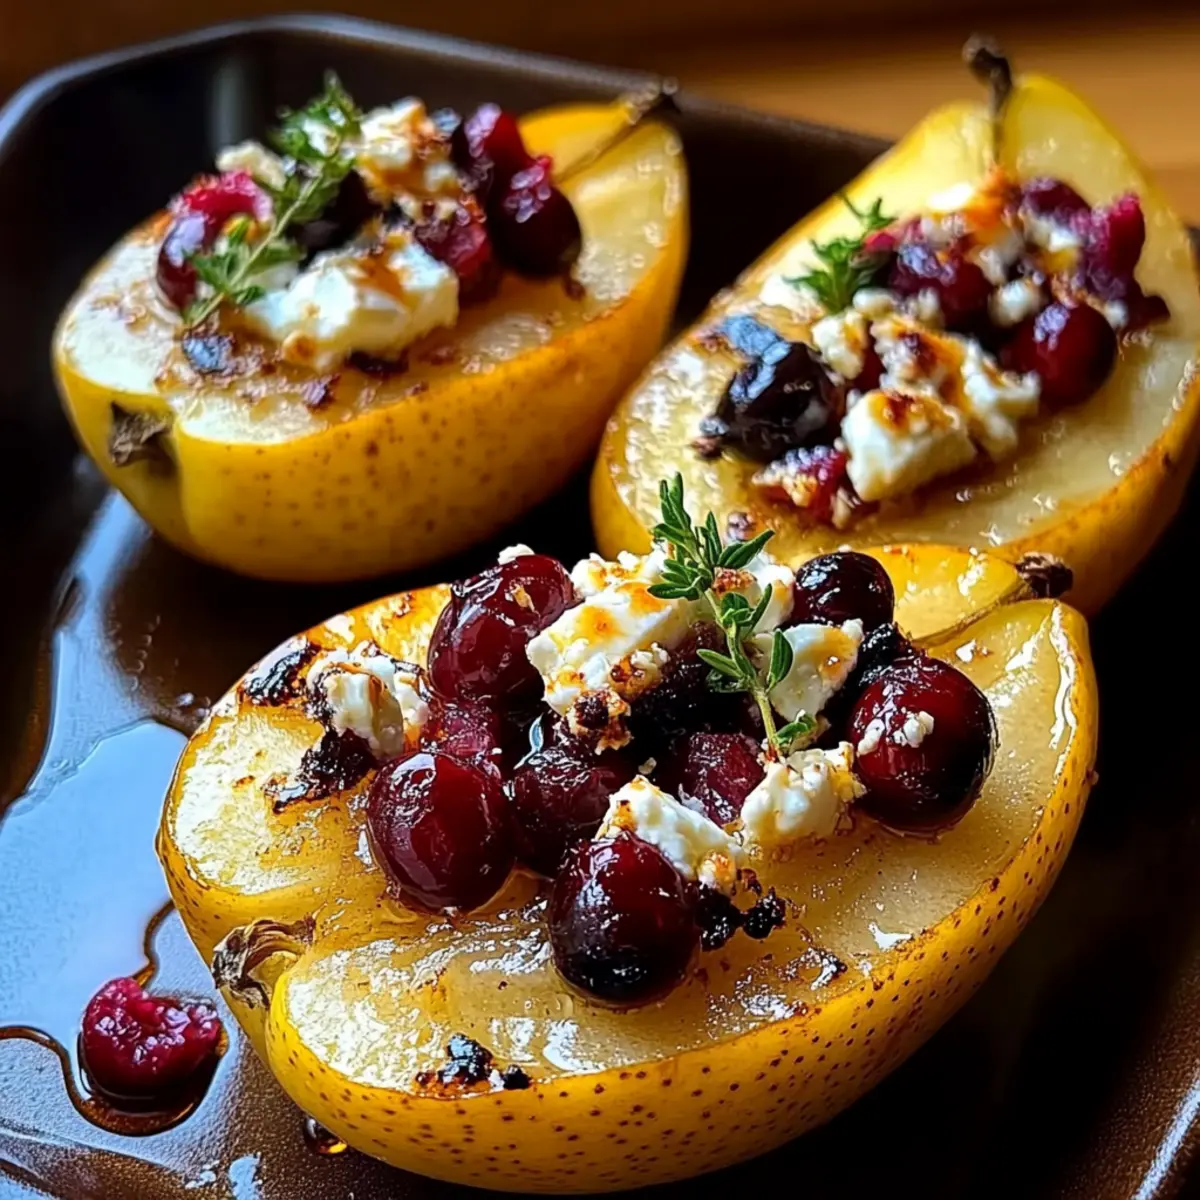
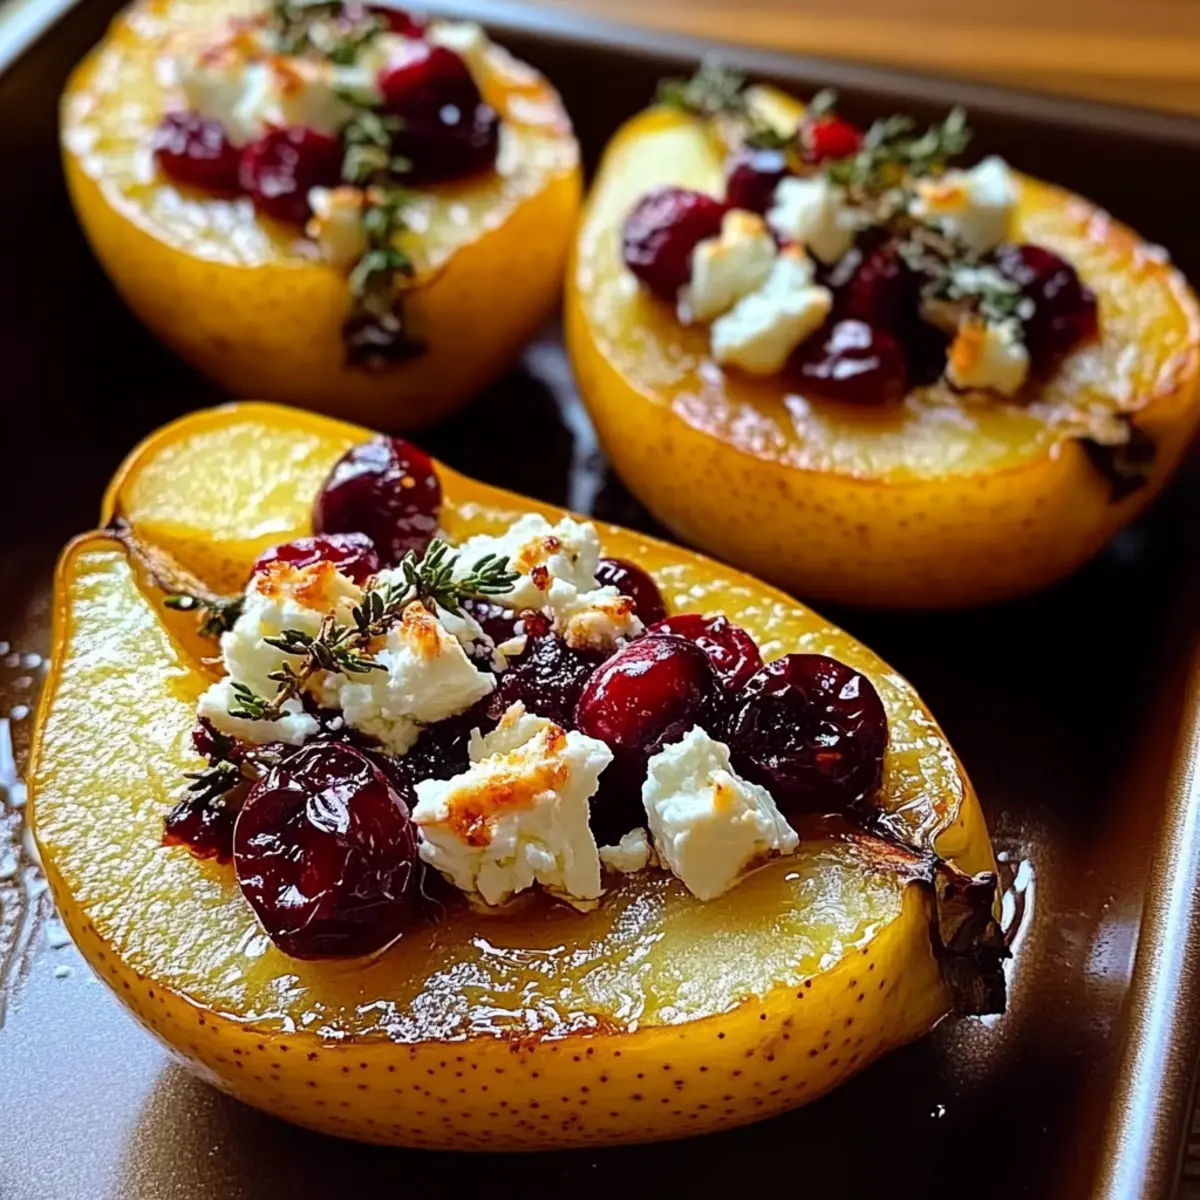
Spoon the creamy feta mixture into the hollow centers of each pear half, generously packing it in to ensure flavor in every bite. Don’t be shy with the filling—let it mound a little over the top for extra caramelization. This step is where the magic begins, as the flavors meld during baking.
Step 5: Drizzle with Honey
Take the remaining honey and drizzle it artfully over the stuffed pears, allowing it to seep into the filling and around the base in the baking dish. This adds an extra layer of sweetness and helps create a luscious glaze as the pears bake. Make sure each pear is evenly coated for maximum flavor.
Step 6: Bake the Pears
Slide the baking dish into the preheated oven and bake for 25-30 minutes. Watch closely as they bake; the pears should become soft and tender, with the tops bubbly and golden. To test for doneness, you can gently pierce a pear with a fork; it should be tender but not falling apart.
Step 7: Cool and Serve
Once baked to perfection, remove the dish from the oven and let it cool for a brief moment. The Baked Pears with Feta will be hot, so let them rest for about 5 minutes before serving. Enjoy them warm with the pan juices drizzled on top, and consider pairing with a scoop of vanilla ice cream or a fresh sprig of thyme for an added touch.
Baked Pears with Feta Variations
Feel free to get creative and make this dessert your own, inviting delightful new flavors to your table!
-
Vegan Option: Swap feta for plant-based feta to enjoy a creamy, dairy-free delight. This adaptation ensures everyone can savor the dish.
-
Fruit Swap: Experiment with different fruits like ripe apples or juicy peaches for a refreshing twist. Each fruit brings its unique flavor to the dish.
-
Add Spice: Introduce a pinch of cardamom for unexpected warmth. This aromatic spice pairs beautifully with the sweetness of the pears.
-
Nut-Free Delight: Omit chopped nuts to make this dessert nut-free, keeping it accessible for all dietary needs while still deliciously satisfying.
-
Sweet Boost: Use maple syrup instead of honey for an equally sweet, vegan version. This swap adds an earthy undertone that complements the fruit nicely.
-
Crispy Topping: Sprinkle toasted breadcrumbs and herbs on top before baking for a crunchy texture contrast that takes your Baked Pears to the next level.
-
Flavor Infusion: Consider adding a splash of vanilla extract to the filling for an even richer taste experience that sings in harmony with the pears.
For more mouthwatering ideas, don’t miss our Baked Chicken Chimichangas or indulge in these delightful Baked Pumpkin Donuts for a cozy treat!
Expert Tips for Baked Pears with Feta
Choose the Right Pears: Use firm, ripe pears for the best texture. Overripe pears can become mushy and lose their shape during baking.
Watch the Baking Time: Baking times can vary based on the ripeness of the pears; check after 20 minutes to avoid overcooking.
Avoid Overstuffing: While it’s tempting to pack in more filling, overstuffing can cause the pears to split, affecting their presentation.
Honey Alternatives: If using maple syrup instead of honey, remember it may caramelize differently, so keep an eye on the pears for burning.
Garnish Ideas: Top your Baked Pears with Feta with a sprinkle of fresh herbs like thyme or mint for added freshness and aesthetic appeal.
Make Ahead Options
These Baked Pears with Feta are perfect for meal prep enthusiasts! You can prepare the filling (crumbled feta, cranberries, chopped nuts, honey, and cinnamon) up to 3 days in advance. Simply store it in an airtight container in the refrigerator to keep the ingredients fresh and flavorful. As for the pears, you can halve and scoop them out up to 24 hours before baking—just toss them in a mixture of lemon juice to prevent browning. When you’re ready to serve, stuff the pears with your prepared filling, drizzle with honey, and bake as directed. This approach not only saves time but ensures you still enjoy a deliciously warm dessert with minimal last-minute fuss!
Storage Tips for Baked Pears with Feta
Fridge: Store leftover Baked Pears with Feta in an airtight container for up to 2 days. They are delightful eaten cold as a unique breakfast treat!
Freezer: For longer storage, freeze the baked pears unstuffed. Wrap them tightly in plastic wrap and then in foil for up to 3 months. Thaw in the fridge before reheating.
Reheating: To enjoy, reheat in the oven at 350°F (175°C) for about 10-15 minutes until warmed through, ensuring the filling remains creamy.
Serving Suggestions: Enhance the experience by drizzling with fresh honey or serving alongside vanilla ice cream after reheating; it enhances the cozy vibe of this dessert!
What to Serve with Baked Pears with Feta?
Elevate your dessert experience by pairing these sweet and savory baked pears with delightful accompaniments that enhance their charm.
-
Vanilla Ice Cream: The creamy texture and sweetness of vanilla ice cream beautifully balance the warm, spiced pears, creating a comforting dessert duo.
-
Toasted Pecans: Their buttery crunch complements the soft pears and creamy feta, adding depth and an enjoyable texture contrast to each bite.
-
Whipped Cream: Light and airy, whipped cream brings a gentle sweetness that beautifully harmonizes with the rich flavors of the baked pears.
-
Caramel Sauce: Drizzling warm caramel over the pears takes indulgence to the next level, enhancing the dessert with a delightful sticky sweetness.
-
Herb-Infused Tea: A cup of chai or herbal tea adds a warm, fragrant pairing to the dish, offering a cozy experience that resonates with the fall flavors.
-
Chocolate Drizzle: For a decadent touch, drizzling dark chocolate over the pears provides a rich counterpoint to the sweet and tangy elements, creating a delightful fusion.
-
Curried Couscous Salad: Serve a light couscous salad on the side for a meal that balances sweet and savory, featuring fresh herbs and spices for brightness.
-
Sparkling Water with Lemon: A glass of sparkling water with a hint of lemon refreshes the palate after enjoying these richly flavored pears, rounding out your meal perfectly.
Finding the right accompaniments transforms your baked pears with feta into an even more memorable experience that you’ll cherish during every cozy gathering.
Baked Pears with Feta, Honey & Cranberries Recipe FAQs
What kind of pears should I use for the best flavor?
Absolutely! For Baked Pears with Feta, it’s best to choose firm, ripe pears like Bosc or Anjou. They hold their shape well when baked and provide a lovely balance of sweetness. Avoid overly ripe pears, as they can turn mushy and affect the texture of your dessert.
How should I store leftover baked pears?
You can store leftover Baked Pears with Feta in an airtight container in the refrigerator for up to 2 days. They might surprise you when enjoyed cold; it makes for a unique breakfast treat! Just be sure to cover them well to maintain their flavor.
Can I freeze baked pears for later use?
Yes, you can freeze the baked pears, but it’s best to freeze them unstuffed. Wrap each pear half tightly in plastic wrap, followed by aluminum foil, and store them in the freezer for up to 3 months. When you’re ready to enjoy, let them thaw in the refrigerator overnight, then reheat in the oven at 350°F (175°C) for about 10-15 minutes.
What should I do if my pears are not baking evenly?
If your Baked Pears with Feta are not baking evenly, the most common cause could be the ripeness of the pears. Ensure they are similar in ripeness for consistent baking. If they’re still unevenly baking, you can rotate the baking dish halfway through the cooking time to promote even heat distribution.
Are there any dietary considerations to keep in mind?
Yes! If you’re making these Baked Pears with Feta for anyone with dietary restrictions, note that feta is a dairy product. You can easily substitute it with plant-based feta for a vegan option. Additionally, if you’re serving these to someone with nut allergies, you can simply omit the chopped nuts without compromising the dish’s overall flavor.
Can I use different types of cheese in this recipe?
Very! This recipe is flexible. While feta offers that classic creamy and tangy flavor, you can substitute it with goat cheese for a milder taste or blue cheese for those who enjoy a stronger flavor. Experimenting with different cheeses can lead to delightful combinations that suit your palate.

Delicious Baked Pears with Feta for a Cozy Night In
Ingredients
Equipment
Method
- Preheat your oven to 375°F (190°C).
- Slice the pears in half lengthwise and scoop out the cores to create a pocket for stuffing.
- In a mixing bowl, combine feta cheese, cranberries, chopped nuts, honey, and cinnamon; mix well.
- Spoon the filling into the hollow centers of each pear half.
- Drizzle the remaining honey over the stuffed pears.
- Bake for 25-30 minutes until the pears are soft and tops are golden.
- Let cool for 5 minutes before serving warm.
Leave a Reply