
As I whisked together the creamy filling, the enchanting aroma of nutmeg wafted through my kitchen, evoking the warmth of holiday gatherings long past. This Nutmeg Eggnog Cheesecake is my go-to dessert when I want to impress family and friends without spending hours in the kitchen. It’s a delightful blend of rich flavors and smooth textures, making it an easy, homemade showstopper that’s perfect for festive celebrations. With minimal prep time and a chance to chill overnight, you can focus on the joy of sharing delicious memories rather than stressing over complex baking techniques. Curious about how to create this perfect holiday treat? Let’s dive into the recipe!
Why is Eggnog Cheesecake a Must-Try?
Decadent, Creamy Texture: Each slice of this cheesecake is smooth and rich, offering an indulgent treat that melts in your mouth.
Holiday Flavor Sensation: The aromatic notes of nutmeg and eggnog capture the festive spirit perfectly, making it an ideal dessert for holiday gatherings.
Easily Customizable: Feeling adventurous? Swap flavors or crusts to create your unique version, whether that be a chocolate twist or a nut-based crust.
Make-Ahead Friendly: Prepare this cheesecake the night before, saving you time and effort the day of your celebration. No last-minute baking stress—just delicious anticipation!
Crowd-Pleaser: Impress friends and family with this showstopper; even those who are typically not cheesecake fans will be asking for seconds! If you’re interested in more delightful holiday dessert recipes, check those out to keep the festive spirit alive!
Nutmeg Eggnog Cheesecake Ingredients
For the Crust
• Graham Cracker Crumbs – Provides the base crust’s structure and crunch; can substitute with gluten-free graham crackers for a gluten-free option.
• Salted Butter – Binds the crust while contributing richness; unsalted butter can be used if you prefer to control salt levels.
• Granulated Sugar – Adds sweetness to the crust and filling; brown sugar may be creatively substituted for a caramel-like flavor.
• Ground Nutmeg – Infuses the crust with classic holiday warmth; a sprinkle of cinnamon can be a suitable substitute for a different spice profile.
For the Filling
• Cream Cheese – Essential for the cheesecake’s creamy texture and flavor; ensure it is at room temperature for best results.
• All-Purpose Flour – Helps stabilize the filling; no direct substitutions are recommended for this ingredient.
• Eggnog – Provides the signature flavor; store-bought eggnog is acceptable, but homemade versions will enhance taste.
• Eggs – Bind the ingredients together; avoid over-mixing to prevent cracks in the cheesecake.
For the Topping
• Heavy Cream – Creates a luscious whipped topping; make sure it’s cold for optimal whipping.
• Powdered Sugar – Sweetens the whipped cream; adjust to taste depending on your sweetness preference.
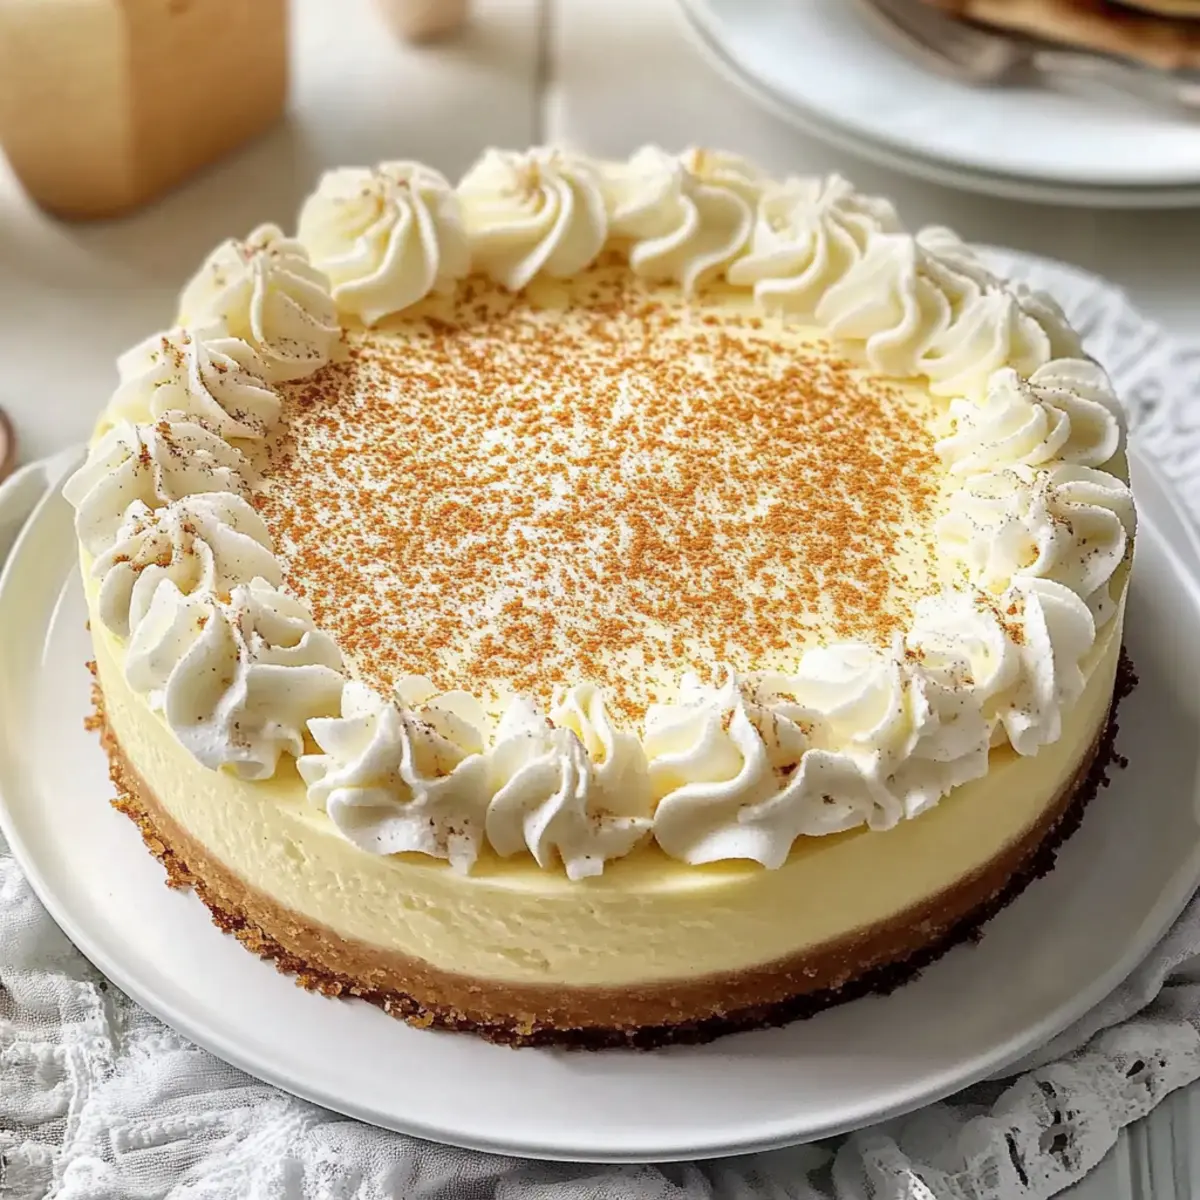
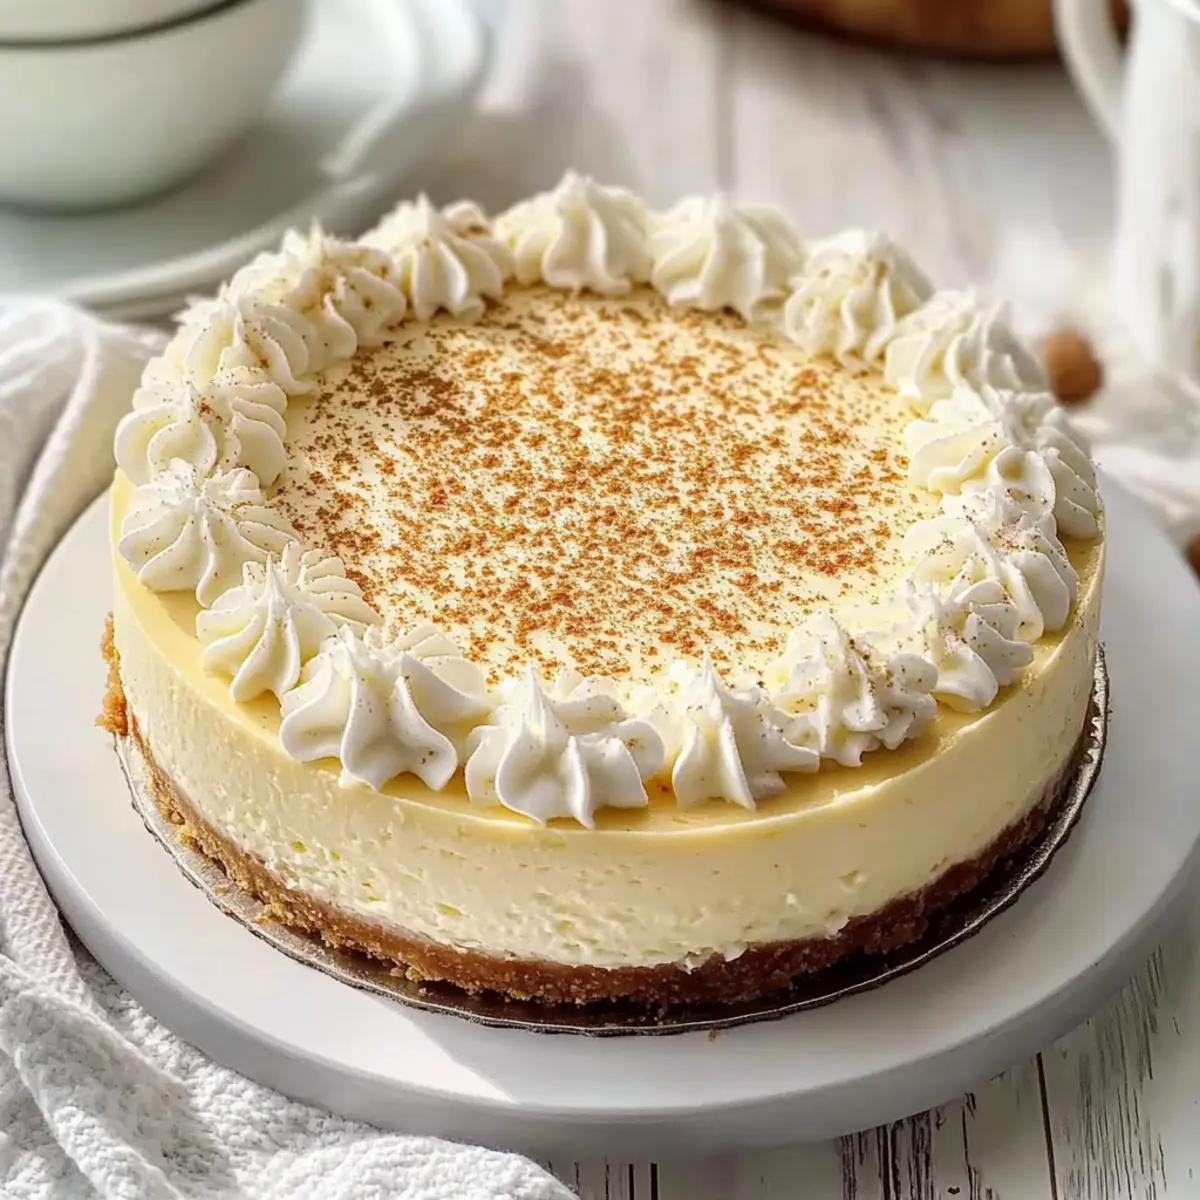
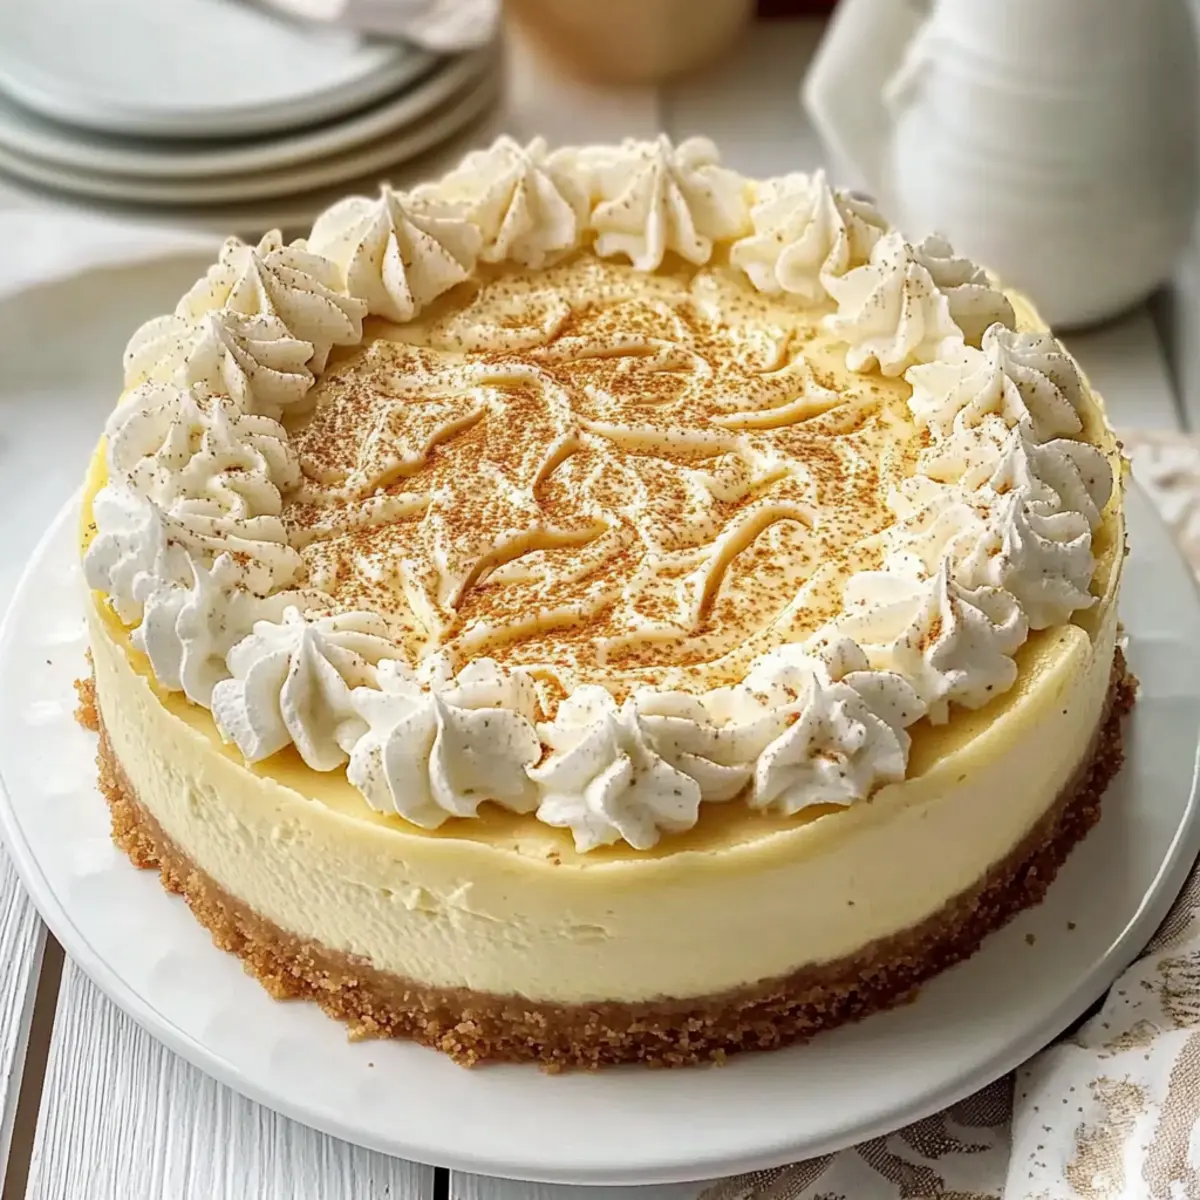
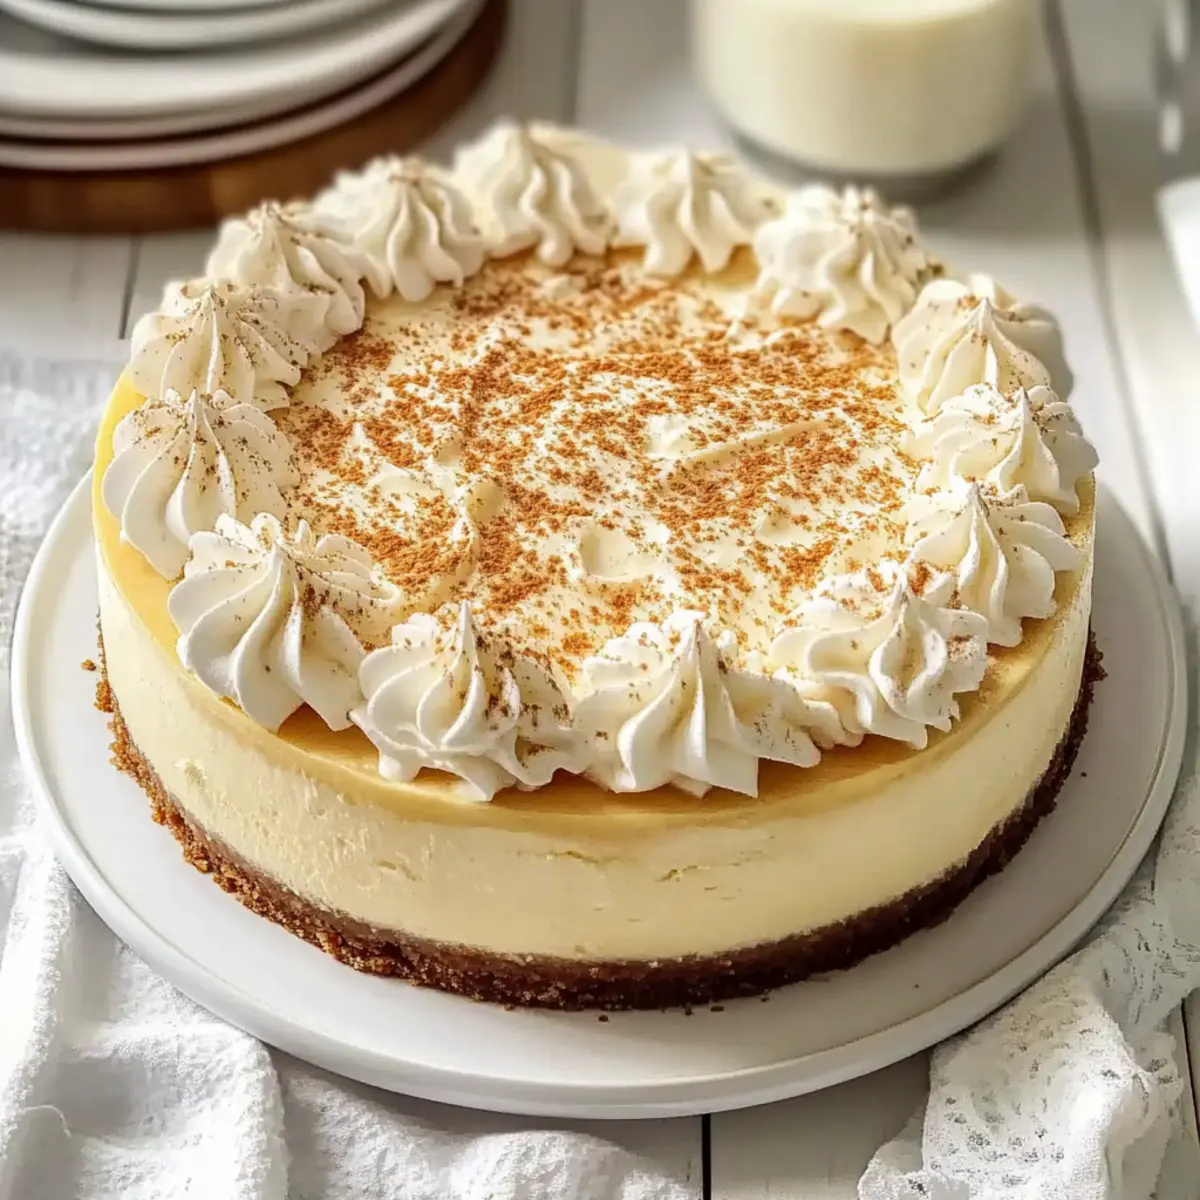
• Extra Nutmeg – Sprinkle on top for a decorative and flavorful finishing touch, ensuring the nutmeg aroma shines through in the Nutmeg Eggnog Cheesecake.
Step‑by‑Step Instructions for Nutmeg Eggnog Cheesecake
Step 1: Crust Preparation
Preheat your oven to 325°F (163°C). Prepare a 9-inch springform pan by greasing it and lining the bottom with parchment paper. In a bowl, combine graham cracker crumbs, melted butter, sugar, and nutmeg until it resembles wet sand. Firmly press this mixture into the bottom of the pan, ensuring an even layer. Bake for 10 minutes until slightly golden, then remove from the oven and let cool.
Step 2: Cheesecake Filling
Lower the oven temperature to 300°F (148°C). In a large mixing bowl, beat the softened cream cheese, granulated sugar, and flour until the mixture is smooth and creamy. Gradually add in the eggnog and ground nutmeg, mixing thoroughly to combine. Incorporate the eggs one at a time, mixing gently after each addition until just combined, being careful not to overmix, which will help prevent cracks in your Nutmeg Eggnog Cheesecake.
Step 3: Pour Filling
Once your cheesecake filling is ready, carefully pour it over the cooled crust in the springform pan. Use a spatula to smooth the top, ensuring an even surface. This filling is rich and creamy, promising a delightful texture. Once poured, set the pan aside while you prepare for the baking step, taking a moment to appreciate your work so far.
Step 4: Baking
To create a water bath, place the springform pan into a larger roasting pan, then fill the outer pan with warm water until it reaches halfway up the sides of your cheesecake pan. This technique helps to maintain moisture and prevent cracking. Bake the Nutmeg Eggnog Cheesecake for 1 hour to 1 hour and 40 minutes, or until the center jiggles slightly yet appears set. The edges should be firm but with a slight softness in the middle.
Step 5: Cooling
When the baking time is complete, turn off the oven and let the cheesecake rest inside with the door closed for 30 minutes. After that, crack the oven door open slightly and allow the cheesecake to cool for an additional 30 minutes. This gradual cooling process helps to minimize cracks. Once done, move the cheesecake to the refrigerator and chill for 5 to 6 hours or overnight until fully set.
Step 6: Whipped Topping
While the cheesecake is cooling, prepare the whipped topping. In a mixing bowl, combine cold heavy cream, eggnog, and powdered sugar. Whip the mixture using an electric mixer on medium-high speed until stiff peaks form. This light and airy topping will perfectly complement the rich flavor of the Nutmeg Eggnog Cheesecake, so take your time to achieve the right texture.
Step 7: Final Assembly
Once the cheesecake is fully chilled and set, carefully remove it from the springform pan. Gently peel away the parchment paper at the bottom. Top the cheesecake with the freshly whipped cream, smoothing it out beautifully across the surface. Finally, sprinkle extra nutmeg on top for an aromatic and festive finishing touch. Keep the cheesecake refrigerated until it’s time to serve this delightful holiday treat!
Nutmeg Eggnog Cheesecake Variations
Feel free to get creative with your Nutmeg Eggnog Cheesecake, adding your own personal touch for a delightful twist!
-
Gluten-Free: Swap out regular graham cracker crumbs for gluten-free alternatives to accommodate gluten sensitivities and enjoy the same delicious crust.
-
Vegan Delight: For a plant-based version, use silken tofu blended until smooth in place of cream cheese, and a vegan egg substitute to maintain the creamy consistency.
-
Choco-Nog: Add chocolate chips or chunks into the filling to create a delightful chocolate-ment eggnog extravaganza, tantalizing both chocolate lovers and cheesecake enthusiasts alike!
-
Nutty Crust: Craving some crunch? Use ground almonds or pecans mixed with melted coconut oil for a nutty twist on the classic graham cracker crust.
-
Spicy Kick: Introduce some warmth by adding a hint of cayenne pepper or ginger into the filling, awakening your taste buds with delightful spice in each bite.
-
Pumpkin Purée: For an autumnal twist, incorporate pumpkin purée into the cheesecake filling, enhancing the holiday flavor and giving it a seasonal flair.
-
Fruit Infusion: Top your cheesecake with a layer of poached pears or cranberry sauce for a burst of fruity brightness that beautifully complements the rich flavors.
-
Coffee Lovers’ Dream: Stir in a tablespoon or two of espresso or coffee extract into the filling to elevate your dessert with a sophisticated coffee flavor that pairs wonderfully with the eggnog.
These variations are your kitchen canvas! Let your creativity shine as you transform this Nutmeg Eggnog Cheesecake into a custom masterpiece, perfect for every holiday gathering. If you’re looking for more inspiration, check out our other delightful holiday dessert recipes. Happy baking!
Storage Tips for Nutmeg Eggnog Cheesecake
-
Fridge: Store your Nutmeg Eggnog Cheesecake in an airtight container for up to 5 days. This keeps it fresh and maintains its delicious creamy texture.
-
Freezer: If you’d like to store it longer, freeze it for up to 3 months. Make sure to remove any whipped cream toppings before freezing to preserve quality.
-
Thawing: To enjoy a piece from the freezer, thaw it overnight in the refrigerator. This way, it will retain its velvety goodness.
-
Reheating: There’s no need to reheat the cheesecake; it’s best enjoyed chilled. Just slice and serve for an elegant dessert any time!
Expert Tips for Nutmeg Eggnog Cheesecake
-
Room Temperature Cream Cheese: Make sure the cream cheese is at room temperature to prevent lumps, ensuring a smooth, creamy filling in your Nutmeg Eggnog Cheesecake.
-
Gentle Mixing: Avoid overmixing after adding eggs. Gently fold them in one at a time to prevent cracks and maintain a beautiful texture.
-
Water Bath Technique: Using a water bath during baking keeps moisture in the oven, which helps to create a creamy cheesecake and avoids cracks on the surface.
-
Cool Gradually: Letting the cheesecake cool in the oven with the door slightly ajar helps it set evenly and minimizes the risk of cracks forming.
-
Chill Overnight: For the best flavor and texture, refrigerate the cheesecake overnight. This waiting time enhances the nutmeg and eggnog flavors, giving you a delightful holiday dessert.
Make Ahead Options
These Nutmeg Eggnog Cheesecakes are perfect for busy cooks looking to save time during the holiday season! You can prepare the crust and filling up to 24 hours in advance. Simply follow the crust and filling instructions and then assemble the cheesecake in the springform pan without baking. Wrap it tightly in plastic wrap and refrigerate until you’re ready to bake it. This way, the flavors will meld beautifully, making your Nutmeg Eggnog Cheesecake just as delicious as if made fresh the day of serving. After baking, cool the cheesecake as directed and refrigerate until set. For the whipped topping, prepare it no more than a few hours before serving to maintain its fluffy texture, ensuring that your dessert is ready to delight your guests with minimal last-minute fuss!
What to Serve with Nutmeg Eggnog Cheesecake
The perfect meal complements the warm, festive flavors of this luscious dessert, inviting friends and family to gather around the table.
-
Cranberry Orange Salad: A refreshing salad that balances the richness of the cheesecake with zesty citrus and tart cranberries.
-
Spiced Hot Apple Cider: This warm beverage, infused with cinnamon and cloves, enhances the cozy holiday spirit and pairs beautifully with every slice.
-
Gingerbread Cookies: The sweet and spicy notes of gingerbread cookies echo the flavors of the season, making for a charming dessert duo.
-
Roasted Brussels Sprouts: Their earthy, savory flavor adds a delightful contrast to the cheesecake’s sweetness, creating a well-rounded meal.
-
Pecan Pie: A classic holiday dessert, the nutty and caramelized flavors of pecan pie harmonize with the creamy richness of the cheesecake.
-
Pumpkin Soup: Start your meal with a warm and comforting pumpkin soup; its creaminess complements the cheesecake without overwhelming your taste buds.
-
Vanilla Bean Ice Cream: A scoop of creamy ice cream offers a delightful temperature contrast to the cheesecake, making for a decadent finish.
-
Chocolate Mint Thins: These light, refreshing mints are perfect to cleanse the palate between bites of rich cheesecake, adding a pop of freshness.
Nutmeg Eggnog Cheesecake Recipe FAQs
How do I select the best nutmeg for my cheesecake?
Absolutely! Freshly grated nutmeg provides the most vibrant flavor. Look for whole nutmeg in the spice aisle; it should feel heavy and have a hard, slightly shiny surface. When you grate it, the scent should be fragrant and warm. If you’re using pre-ground nutmeg, check the expiration date for freshness.
How should I store my Nutmeg Eggnog Cheesecake?
You can keep your Nutmeg Eggnog Cheesecake in an airtight container in the refrigerator for up to 5 days. Make sure it’s well-sealed to maintain its delicious creamy texture. If you have leftovers, this is the perfect way to enjoy a sweet treat while also keeping it safe from drying out!
Can I freeze the Nutmeg Eggnog Cheesecake?
Yes! To freeze the cheesecake, ensure it is fully chilled and set first. Remove any whipped cream topping, as it doesn’t freeze well. Wrap the cheesecake tightly in plastic wrap or aluminum foil and store it in an airtight container. It will keep for up to 3 months. When you’re ready to enjoy it, simply thaw it overnight in the refrigerator.
What can I do if my cheesecake cracks while baking?
Very! To minimize cracking, avoid overmixing the egg mixture, and always use a water bath. If cracks still occur, don’t worry! After cooling, you can cover them with the whipped cream topping, which adds both flavor and decorative appeal. If your cheesecake has a few surface cracks, it doesn’t affect the taste—just part of its charm!
Is there a pet-safe version of this cheesecake?
Not this one! Unfortunately, the ingredients in Nutmeg Eggnog Cheesecake, especially eggs and sugar, are not safe for pets. If you’re seeking a pet-friendly treat, consider creating a separate “dessert” for them using mashed pumpkin and peanut butter, ensuring it’s vet-approved. Always check with your veterinarian for safe options!
What kind of substitutions can I make for allergies?
Certainly! For a gluten-free version, you can use gluten-free graham cracker crumbs for the crust. If you have a dairy allergy, consider using dairy-free cream cheese and coconut yogurt as substitutes. Just be cautious with the flavors, as they will alter the taste slightly. Always read labels for potential allergens when trying these substitutions!
Nutmeg Eggnog Cheesecake: A Creamy Holiday Delight
Ingredients
Equipment
Method
- Preheat your oven to 325°F (163°C). Prepare a 9-inch springform pan by greasing it and lining the bottom with parchment paper. In a bowl, combine graham cracker crumbs, melted butter, sugar, and nutmeg until it resembles wet sand. Firmly press this mixture into the bottom of the pan, ensuring an even layer. Bake for 10 minutes until slightly golden, then remove from the oven and let cool.
- Lower the oven temperature to 300°F (148°C). In a large mixing bowl, beat the softened cream cheese, granulated sugar, and flour until smooth and creamy. Gradually add in the eggnog and ground nutmeg, mixing thoroughly. Incorporate the eggs one at a time, mixing gently after each addition.
- Carefully pour the cheesecake filling over the cooled crust in the springform pan. Use a spatula to smooth the top. Set the pan aside while preparing for the baking.
- To create a water bath, place the springform pan into a larger roasting pan and fill the outer pan with warm water until it reaches halfway up the sides of your cheesecake pan. Bake for 1 hour to 1 hour and 40 minutes, or until the center jiggles slightly yet appears set.
- When baking is complete, turn off the oven and let the cheesecake rest inside with the door closed for 30 minutes. Then crack the oven door open slightly and allow the cheesecake to cool for an additional 30 minutes. Move the cheesecake to the refrigerator and chill for 5 to 6 hours or overnight.
- In a mixing bowl, combine cold heavy cream, eggnog, and powdered sugar. Whip using an electric mixer on medium-high speed until stiff peaks form.
- Carefully remove the cheesecake from the springform pan and peel away the parchment paper. Top with the whipped cream and sprinkle extra nutmeg on top.
Leave a Reply