
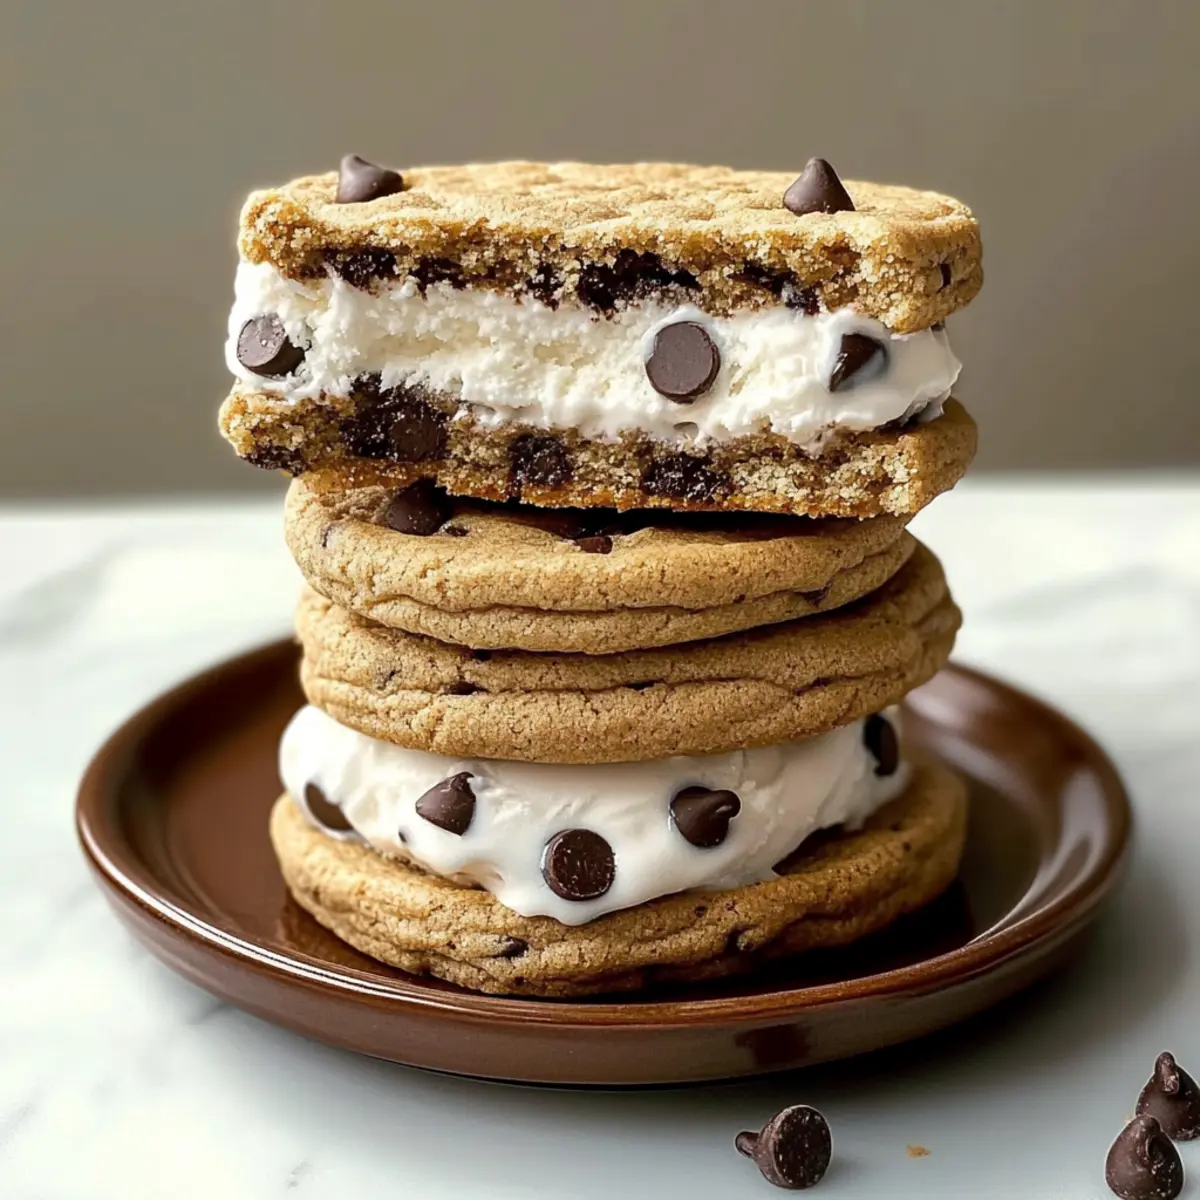
As I rummaged through my pantry, the enchanting aroma of freshly baked cookies wafted through the air, transporting me back to lazy summer afternoons spent crafting sweet treats. This inspired me to whip up some delightful Cookie Ice Cream Sandwiches, a perfect marriage of chewy chocolate chip cookies and creamy vanilla bean ice cream. Ideal for lazy weekends or celebrations alike, this recipe is not just a nostalgic nod to childhood favorites; it’s a gourmet upgrade that will impress your family and friends. Quick to prepare and utterly satisfying, these sandwiches offer a delightful contrast of warm and cold that is simply irresistible. Are you ready to dive into a delicious adventure? Let’s get baking!
Why Are Cookie Ice Cream Sandwiches Irresistible?
Nostalgic Delight: Each bite takes you back to carefree summer days, merging chewy cookies with rich ice cream for a treat that feels both familiar and indulgent.
Gourmet Upgrade: With high-quality ingredients like pure vanilla extract and dark chocolate chips, this recipe elevates a childhood favorite to new heights.
Quick and Easy: You’ll be amazed at how simple it is to create these delights; they’re perfect for any occasion, from casual family gatherings to festive birthday parties.
Customizable: Feel free to swap the classic vanilla bean ice cream for other flavors or add mix-ins like sprinkles or nuts for a personal touch.
Make-Ahead Magic: Keep assembled sandwiches ready in your freezer for spontaneous cravings or surprise guests. If you love easy treats, don’t miss out on these Healthy Christmas Cookies or Almond Flour Cookies.
Cookie Ice Cream Sandwich Ingredients
Unlock the secrets to creating mouthwatering Cookie Ice Cream Sandwiches with these premium ingredients!
For the Cookies
- Unsalted Butter – Provides richness and tender texture; opt for softened butter to ensure a perfect cream.
- Granulated Sugar – Contributes sweetness and helps achieve a crisp edge for the cookies.
- Light Brown Sugar – Adds moisture and a hint of caramel flavor, enhancing the overall richness of the cookies.
- Eggs – Acts as a binder, adding moisture; stick with large eggs for best results.
- Pure Vanilla Extract – Enhances flavor; always choose pure over imitation for a deeper taste.
- All-Purpose Flour – Gives structure and body to create the perfect cookie base.
- Baking Soda – A leavening agent that helps the cookies rise, making them light and chewy.
- Salt – Balances sweetness and enhances flavors, providing a well-rounded taste.
- Semi-Sweet & Dark Chocolate Chips/Chunks – Infuses a rich chocolate flavor; pick quality brands that you enjoy on their own.
For the Ice Cream Filling
- Vanilla Bean Ice Cream – The creamy texture complements the cookies beautifully; for the best results, select a high-fat content ice cream.
With these delicious ingredients, you’ll be on your way to creating unforgettable Cookie Ice Cream Sandwiches that your family will adore!
Step‑by‑Step Instructions for Cookie Ice Cream Sandwiches
Step 1: Prepare Baking Sheets
Begin by preheating your oven to 375°F (190°C), ensuring it’s hot enough for even baking. While waiting, line two baking sheets with parchment paper to prevent the cookies from sticking. This step is essential for achieving that perfect chewy cookie texture, setting the stage for your delightful Cookie Ice Cream Sandwiches.
Step 2: Mix Wet Ingredients
In a large mixing bowl, cream together 1 cup of softened unsalted butter with ¾ cup of granulated sugar and ¾ cup of light brown sugar until the mixture is light and fluffy, about 2-3 minutes. Gradually add in two large eggs, mixing well after each addition, and finish by blending in 2 teaspoons of pure vanilla extract. The result should be a smooth and creamy batter full of sweet promise.
Step 3: Combine Dry Ingredients
In a separate bowl, whisk together 2 ½ cups of all-purpose flour, 1 teaspoon of baking soda, and ½ teaspoon of salt. This step helps distribute the baking soda evenly, ensuring your cookies rise beautifully. Gradually incorporate this dry mixture into the wet ingredients, mixing until just combined. Avoid overmixing to keep your cookies tender.
Step 4: Add Chocolate
Gently fold in 1 cup of semi-sweet chocolate chips and ½ cup of dark chocolate chunks, ensuring an even distribution throughout the dough. The chocolate pieces will melt slightly while baking, creating pockets of gooeyness in your Cookie Ice Cream Sandwiches. The dough should be thick and chunky, ready for the next step.
Step 5: Form Cookies
Using a tablespoon or a cookie scoop, drop dough balls onto your prepared baking sheets, spacing them about 2 inches apart. This space allows the cookies to spread while baking, creating perfectly shaped rounds. You should aim for about 12 cookies per sheet, envisioning the scrumptious sandwiches they will become.
Step 6: Bake
Place the baking sheets in the preheated oven and bake for 9-11 minutes. Watch closely; you want the edges to be golden brown while the centers remain soft. This balance is crucial for creating that delightful contrast between the warm cookies and the cold ice cream in your sandwiches.
Step 7: Cool
Once baked, allow the cookies to cool on the baking sheets for about 5 minutes. This initial cooling helps the cookies set properly. Then, transfer them to a wire rack to cool completely. Ensure they are fully cooled before assembling the sandwiches to avoid melting the ice cream.
Step 8: Assemble Sandwiches
To assemble your Cookie Ice Cream Sandwiches, scoop a generous amount of creamy vanilla bean ice cream onto the flat side of one cookie. Top it with another cookie, pressing gently to secure the ice cream. For added fun, you can roll the edges in colorful sprinkles or drizzle with melted chocolate, doubling the treat’s joy.
Cookie Ice Cream Sandwiches: Customization Galore
Feel free to unleash your creativity with these delightful variations, adding personal touches that will make this classic treat even more special!
-
Flavor Swaps: Try using mint chocolate chip ice cream in place of vanilla bean for a fresh twist. The combination of mint and chocolate is always a crowd-pleaser.
-
Nutty Crunch: Incorporate chopped nuts into your cookie dough for added flavor and crunch. Pecans or walnuts perfectly complement the rich chocolate and creamy ice cream!
-
Gluten-Free: Substitute all-purpose flour with gluten-free flour blends to cater to gluten sensitivities without compromising flavor or texture. Your gluten-free friends will thank you!
-
Dairy-Free Option: Opt for dairy-free butter and ice cream to create a vegan cookie ice cream sandwich that everyone can enjoy, letting no one miss out on the fun.
-
Extra Chocolate: Drizzle melted chocolate over the top of each assembled sandwich for an indulgent finish. This will not only look stunning but add an extra layer of chocolatey goodness!
-
Bold Flavor Boost: Spice things up by adding 1 teaspoon of espresso powder to your cookie dough. It enhances the depth of chocolate and makes each bite simply irresistible.
-
Rainbow Sprinkles: After assembling your sandwiches, roll the edges in colorful sprinkles for a fun, festive touch that’s perfect for celebrations or just because!
-
Sundae Style: Transform your sandwiches into sundae-style treats by adding a scoop of whipped cream and a cherry on top. These will steal the show at any get-together!
In case you’re exploring other delicious sweets, don’t miss out on our creamy Jack Cheese Chicken or treat yourself to some indulgent Healthy Christmas Cookies that can balance out those cookie cravings!
Make Ahead Options
These Cookie Ice Cream Sandwiches are a fantastic option for meal prep, making your dessert game a breeze during busy times! You can prepare the chocolate chip cookies up to 3 days in advance by baking them and storing them in an airtight container at room temperature to maintain their chewy texture. Additionally, you can scoop the vanilla bean ice cream into flat discs and freeze them for up to 24 hours, making assembly quick and effortless. When you’re ready to serve, simply assemble the sandwiches by placing the ice cream between two cookies—this ensures you enjoy a fresh and delightful treat that tastes just as delicious as when first made. Don’t forget to keep the assembled sandwiches in the freezer if you have any leftovers!
Expert Tips for Cookie Ice Cream Sandwiches
Ingredient Quality: Use high-quality chocolate and butter to enhance the flavor of your cookie ice cream sandwiches. Fresh, premium ingredients make a noticeable difference!
Avoid Overmixing: Once you add the flour, mix just until combined. Overmixing can lead to tough cookies that won’t provide the delightful chewy texture you want.
Cool Completely: Allow cookies to cool fully before assembling the sandwiches. This prevents the ice cream from melting too quickly, creating a messy treat.
Experiment with Sizes: Feel free to adjust the size of your cookies. Larger cookies make for an extra indulgent sandwich, while smaller ones are perfect for a lighter treat.
Storage Tips: Wrap assembled sandwiches tightly in plastic wrap and store them in an airtight container in the freezer. They can last up to 2-3 weeks without losing flavor or texture.
Take it Slow: Resist the urge to sample too many cookies before assembling! Enjoying them fresh-Gourmet Cookie Ice Cream Sandwiches is a special occasion that’s worth the wait.
How to Store and Freeze Cookie Ice Cream Sandwiches
Freezer: Wrap assembled sandwiches tightly in plastic wrap and store in an airtight container in the freezer for up to 2-3 weeks. This helps maintain the perfect balance of textures.
Thawing: When ready to enjoy, let the sandwiches sit at room temperature for about 5-10 minutes to soften slightly before serving, ensuring a delightful experience with each bite.
Leftovers: If you have any leftover cookies that didn’t make it to the sandwich stage, store them in an airtight container in the fridge for up to 3 days to keep them fresh and chewy.
Reassembly: If your ice cream sandwiches have lost their shape, simply press them back together gently after thawing, restoring that perfect gooey, creamy goodness.
What to Serve with Gourmet Cookie Ice Cream Sandwiches
Indulge in the joy of creating a delicious meal that beautifully complements your delectable Cookie Ice Cream Sandwiches!
- Fresh Fruit Salad: A medley of colorful fruits adds a refreshing contrast, balancing the rich sweetness of the sandwiches.
- Chocolate Milkshake: The creamy indulgence of a chocolate milkshake pairs perfectly, creating a nostalgic diner-style experience.
- Homemade Whipped Cream: Light and airy, a dollop of freshly whipped cream on the side elevates the dessert to sheer bliss.
- Salted Caramel Sauce: Drizzling warm salted caramel over the ice cream sandwiches enhances flavors with an irresistible sweet-salty touch.
- Coffee or Espresso: A rich cup of coffee offers a delightful bitter counterpoint, enhancing the sweetness of the sandwiches.
- Vanilla Bean Pudding: Silky and smooth vanilla pudding echoes the ice cream flavor, making for a comforting yet sophisticated pairing.
- Sprinkles of Nuts: Chopped pecans or almonds add a lovely crunch, plus a nutty flavor that beautifully contrasts the cookies’ textures.
Cookie Ice Cream Sandwiches Recipe FAQs
How do I choose ripe ingredients for this recipe?
Absolutely! When selecting your ingredients, opt for unsalted butter that is soft but not melted, which will help in creating a creamy texture. For the best chocolate chips, look for brands with high cocoa content that you enjoy eating on their own. The eggs should be large and fresh, and while the flour does not need to be ripe, ensuring that it’s fresh will lead to a better cookie texture.
How should I store leftover Cookie Ice Cream Sandwiches?
Very! To keep your Cookie Ice Cream Sandwiches fresh, wrap each sandwich tightly in plastic wrap and place them in an airtight container. They will remain delicious in the freezer for up to 2-3 weeks. Just be sure to label the container with the date for easy reference!
Can I freeze Cookie Ice Cream Sandwiches?
Absolutely! To freeze them properly, follow these steps: After assembling your sandwiches, wrap each one individually in plastic wrap or foil. Place them in an airtight container or a freezer-safe ziplock bag to protect against freezer burn. They will stay fresh for up to 2-3 weeks. When you’re ready to enjoy, let them thaw at room temperature for about 5-10 minutes for a perfect texture!
What should I do if my cookies turn out too hard?
No worries! If your cookies end up too hard, it may be due to overmixing the dough or baking them for too long. If they bake too hard, consider reducing the baking time by a minute or two. Also, remember that cookies will continue to firm up as they cool, so taking them out of the oven when the edges are golden but the centers remain soft is key. Next time, try to mix just until combined after adding flour for a softer bite.
Are these Cookie Ice Cream Sandwiches pet-friendly?
Very! This recipe contains ingredients that aren’t safe for pets, such as chocolate and sugar. However, you can make a pet-friendly version by creating cookies using whole wheat flour and mashed banana, omitting any sweeteners. Just make sure to offer those to your pets in moderation as well!
Delicious Cookie Ice Cream Sandwiches for a Sweet Summer Treat
Ingredients
Equipment
Method
- Preheat your oven to 375°F (190°C) and line two baking sheets with parchment paper.
- Cream together 1 cup of softened unsalted butter with ¾ cup of granulated sugar and ¾ cup of light brown sugar until light and fluffy.
- Gradually add in two large eggs and 2 teaspoons of pure vanilla extract, mixing well to form a smooth batter.
- In a separate bowl, whisk together 2 ½ cups of all-purpose flour, 1 teaspoon of baking soda, and ½ teaspoon of salt; then mix into the wet ingredients.
- Gently fold in 1 cup semi-sweet chocolate chips and ½ cup dark chocolate chunks.
- Drop dough balls onto prepared baking sheets, spacing them about 2 inches apart.
- Bake for 9-11 minutes, until edges are golden brown and centers are soft.
- Cool cookies on baking sheets for 5 minutes, then transfer to a wire rack to cool completely.
- To assemble, scoop vanilla bean ice cream onto the flat side of one cookie and top with another, pressing gently.
Leave a Reply