
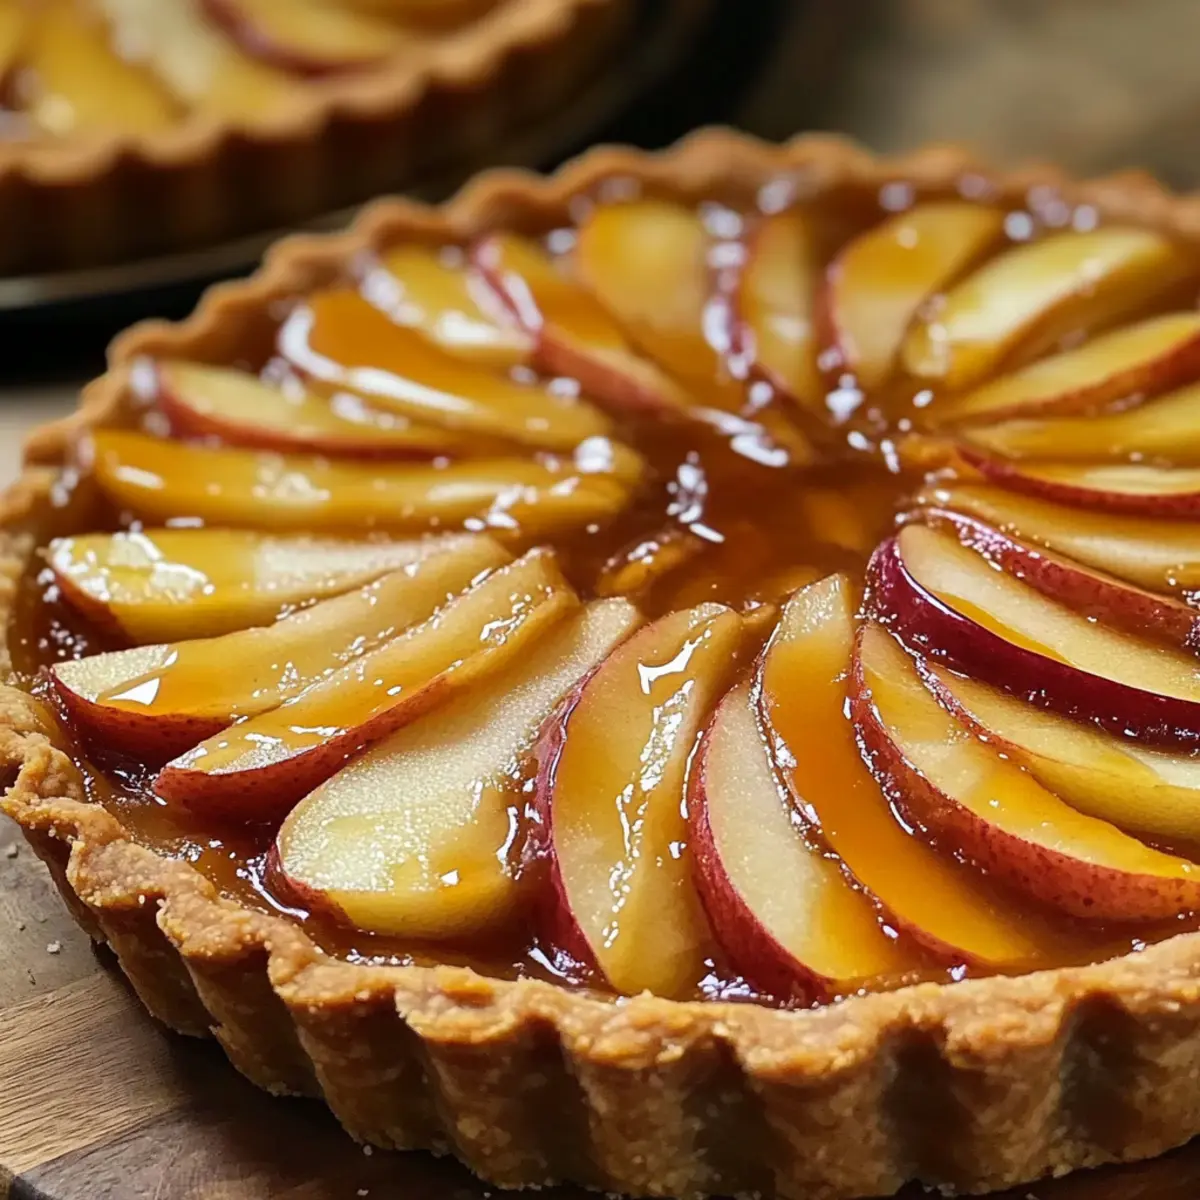
As the autumn leaves begin to fall and the air turns crisp, a delicious aroma wafts through my kitchen, filling it with warm memories of cozy gatherings and sweet indulgences. Today, I’m excited to share my take on Salted Caramel Apple Tarts—a delightful dessert that pairs tender, spiced apples with a rich, buttery crust and a luscious salted caramel drizzle. Not only are these tarts quick to whip up, but they’re also a surefire crowd-pleaser, perfect for both elegant dinner parties and casual family nights. Whether you’re yearning for a taste of nostalgia or simply looking to impress with minimal effort, these tarts are an ideal choice. Ready to transform your kitchen into a haven of deliciousness? Let’s dive into the recipe that will have everyone asking for seconds!
Why Are These Tarts Irresistible?
Indulgent Flavors: The combination of spiced apples and salted caramel creates an unforgettable taste experience that will delight any palate.
Quick and Easy: With just a handful of simple ingredients and minimal prep time, you’ll go from kitchen to table in no time.
Versatile Variations: Feel free to swap out apples for pears or experiment with different spices to personalize your tarts.
Crowd-Pleasing Appeal: Perfect for any occasion, these tarts are sure to impress guests or satisfy your family’s sweet tooth. For a delightful pairing, consider serving with a scoop of ice cream or check out my Caramel Apple Pie for more fall-inspired treats!
Stunning Presentation: With their golden-brown crust and glossy caramel drizzle, these tarts are as beautiful as they are delicious.
Salted Caramel Apple Tarts Ingredients
For the Tart Crust
• All-Purpose Flour – Provides structure for the tart crust; gluten-free flour works too!
• Unsalted Butter – Adds richness and flaky texture; margarine can substitute for a dairy-free option.
• Granulated Sugar – Sweetens the crust while offering a slight crunch; try coconut sugar for lower glycemic sweetness.
• Egg Yolk – Binds the dough and ensures tenderness; egg white can alter the texture slightly.
• Ice Water – Brings the dough together; cold milk can create a richer variation.
For the Apple Filling
• Apples (Granny Smith or Honeycrisp) – Provides a delightful tartness; any firm apple will work like Fuji or Braeburn.
• Brown Sugar – Sweetens the filling and adds depth; maple sugar offers a unique twist.
• Cinnamon – Enhances scents and flavors; nutmeg or allspice can be used for variations.
• Lemon Juice – Prevents browning of apples while brightening flavors; vinegar is an alternative.
For the Salted Caramel
• Granulated Sugar – The key ingredient for a successful caramel; essential for optimal flavor and texture.
• Unsalted Butter – Provides creaminess; using salted butter can elevate the flavor even more.
• Heavy Cream – Creates a smooth, luscious caramel; coconut cream can be a dairy-free substitute.
• Sea Salt – Enhances sweetness; omit if you prefer a sweeter taste for your salted caramel apple tarts.
Step‑by‑Step Instructions for Salted Caramel Apple Tarts
Step 1: Prepare the Tart Crust
In a large mixing bowl, combine all-purpose flour and granulated sugar, mixing well. Cut in the cold unsalted butter using a pastry cutter or your fingers until the mixture resembles coarse crumbs. Stir in the egg yolk and just enough ice water until the dough forms. Shape it into a disk, wrap in plastic, and refrigerate for 30 minutes to chill.
Step 2: Preheat Oven
While the tart dough chills, preheat your oven to 350°F (175°C). This ensures it’s hot enough for the perfect blind baking of the tart crust. Once preheated, you’ll have a lovely environment to create a flaky texture for your Salted Caramel Apple Tarts.
Step 3: Prepare Apples
Peel, core, and slice the apples into thin pieces. In a mixing bowl, toss them with brown sugar, cinnamon, and fresh lemon juice, ensuring that all slices are evenly coated. Set aside to allow the flavors to meld while the tart crust is baking.
Step 4: Roll Out Dough
On a lightly floured surface, roll out the chilled tart dough into a circle about 1/8 inch thick. Carefully transfer it into a 9-inch tart pan, pressing it gently into the corners. Trim any excess dough from the edges to create a neat finish, ready for blind baking.
Step 5: Blind Bake Crust
Line the tart crust with parchment paper and fill it with pie weights or dried beans to prevent bubbling. Bake in the preheated oven for about 15 minutes, then remove the weights and parchment, baking for an additional 10 minutes, or until the crust is golden brown and crisp.
Step 6: Make Salted Caramel
In a medium saucepan over medium heat, add granulated sugar. Stir constantly until it melts and turns a beautiful golden amber color. Once caramelized, remove from heat and carefully whisk in unsalted butter, followed by heavy cream until smooth. Sprinkle in sea salt and set aside to cool slightly.
Step 7: Assemble Tarts
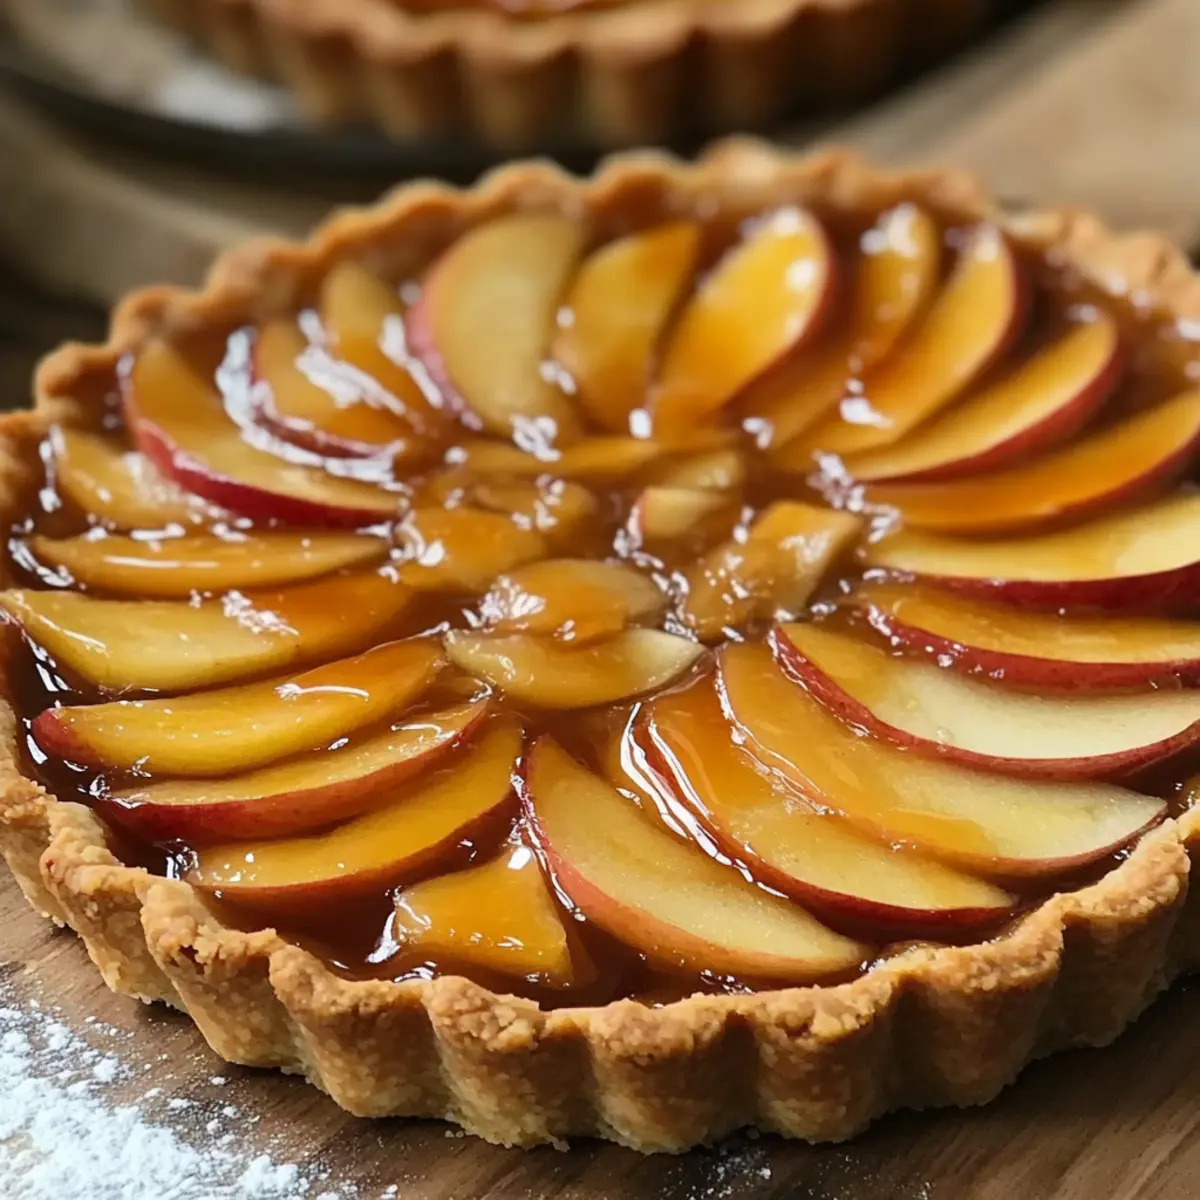
Remove the baked tart crust from the oven and let it cool slightly. Arrange the spiced apple slices in the crust, overlapping them beautifully for an appealing look. Drizzle generously with the warm salted caramel sauce, letting it seep into the apples.
Step 8: Bake Tarts
Place the assembled Salted Caramel Apple Tarts back into the oven and bake for 15 to 20 minutes. Look for the apples to be tender and the caramel to bubble slightly, indicating that your tarts are ready and will soon be a delight on your dining table.
Step 9: Cool Tarts
Once baked, remove the tarts from the oven and allow them to cool for 15 to 20 minutes. This cooling period will let the caramel set, ensuring that each slice holds together beautifully when served.
Step 10: Serve
Before serving, drizzle any remaining salted caramel sauce over the tarts for that extra indulgence. Pair with a scoop of vanilla ice cream or a dollop of whipped cream for an unforgettable dessert experience that’s all about the harmony of flavors in your Salted Caramel Apple Tarts.
Salted Caramel Apple Tarts Variations
Feel free to let your creativity shine as you customize these delightful tarts with these fun twists!
- Fruit Swap: Substitute apples with crisp pears for a unique twist that adds a fragrant, sweet note.
- Nutty Topping: Sprinkle chopped pecans or walnuts on top for an added crunch and delicious nutty flavor. The combination of sweet caramel and earthy nuts is simply divine!
- Dairy-Free Option: Use coconut cream instead of heavy cream to create a luscious, dairy-free salted caramel that everyone can enjoy.
- Flavor Boost: Mix in a pinch of ground ginger or cardamom to the apple filling for a warm, aromatic spice that pairs beautifully with the caramel.
- Gluten-Free Crust: Swap all-purpose flour with a gluten-free blend to cater to those avoiding gluten without sacrificing taste or texture.
- Spice Variation: Experiment by replacing cinnamon with nutmeg or allspice to give the filling an entirely new personality. Each spice brings a different warmth!
- Caramel Variation: Try making a chocolate caramel sauce by adding cocoa powder to the caramel mixture for a decadent double-treat.
- Swirled Layers: Layer the apples with caramel before baking, creating beautiful caramelized pockets in the filling that’ll have everyone coming back for more.
Once you’ve got your tarts baked and ready, why not pair them with a scoop of vanilla ice cream? Or, if you’re in the mood for something else, check out my recipes for Cranberry Apple Coleslaw or Caramelized Leek and Mushroom Gruyere Pasta to keep your fall flavor inspiration alive!
Make Ahead Options
These Salted Caramel Apple Tarts are ideal for meal prep, allowing you to savor homemade goodness with less stress! You can prepare the tart crust up to 24 hours in advance, wrapping it tightly in plastic and refrigerating to maintain its flaky texture. The apple filling can also be mixed ahead—just toss the sliced apples with lemon juice to prevent browning, and store in an airtight container for up to 3 days. When you’re ready to serve, simply roll out the crust, fill it with the prepared apples, and drizzle with salted caramel before baking. This way, you’ll have delicious tarts ready in no time, perfect for impressing your guests!
What to Serve with Salted Caramel Apple Tarts?
To create a complete dining experience, consider these delightful accompaniments that enhance the sweetness of the tarts.
- Vanilla Ice Cream: A scoop of creamy vanilla ice cream adds a perfect contrast to the warm tarts, melting deliciously with each bite.
- Whipped Cream: Light and airy, freshly whipped cream lends a touch of elegance and balances the rich caramel flavors beautifully.
A sprinkle of cinnamon on the whipped cream can add an extra layer of warmth and spice, echoing the flavors in your tarts.
- Coffee or Cappuccino: The rich, bold flavors of coffee are a classic match for sweet desserts, allowing the lovely salted caramel to shine even brighter.
- Fresh Fruit Salad: A refreshing blend of seasonal fruits provides a light contrast, cleansing the palate and adding a burst of freshness between bites of the tarts.
A mix of berries, citrus segments, and perhaps a touch of mint can invigorate your dessert course.
- Chocolate Drizzle: For chocolate lovers, a simple drizzle of melted chocolate can elevate the tarts into a truly extravagant treat.
- Cider or Spiced Tea: An inviting cup of spiced apple cider or warming spiced tea complements the fall flavors, enhancing the overall experience of your meal.
These pairings will not only enhance your Salted Caramel Apple Tarts but also turn your dessert into an unforgettable culinary moment.
Expert Tips for Salted Caramel Apple Tarts
- Proper Chilling: Always refrigerate your dough for at least 30 minutes. This prevents shrinkage and helps create a flaky texture in your Salted Caramel Apple Tarts.
- Even Apple Slices: Make sure to slice your apples evenly for uniform cooking. Thick slices may not become tender while baking and could lead to uneven texture.
- Watch the Caramel: Keep a close eye on the sugar as you caramelize it; it can go from perfect to burnt in a matter of seconds. Stir gently and consistently to avoid burning.
- Cooling Time: Allow your tarts to cool for at least 15-20 minutes before slicing. This helps the caramel set and keeps your tarts from becoming soggy.
- Experiment with Flavors: Don’t hesitate to try different spices or fruit variations. Swapping apples for pears or adding a touch of nutmeg can elevate your Salted Caramel Apple Tarts to a new level!
How to Store and Freeze Salted Caramel Apple Tarts
Fridge: Store your leftover Salted Caramel Apple Tarts in an airtight container for up to 2 days. This will maintain freshness and prevent sogginess.
Freezer: For long-term storage, freeze the tarts after cooling, wrapped tightly in plastic wrap and then aluminum foil for up to 3 months.
Reheating: To reheat, thaw overnight in the fridge then warm in a preheated oven at 350°F (175°C) for 10-15 minutes, to revive the crust’s flakiness.
Freshness Reminder: These tarts are best enjoyed fresh, so savor them while they’re at their most delicious!
Salted Caramel Apple Tarts Recipe FAQs
What kind of apples should I use for Salted Caramel Apple Tarts?
I highly recommend using firm apples like Granny Smith or Honeycrisp for that perfect tartness and texture. However, you can also swap them for Fuji or Braeburn apples. Just make sure to choose apples that hold their shape when baked!
How should I store leftover Salted Caramel Apple Tarts?
For the best flavor and texture, store your leftover tarts in an airtight container in the fridge for up to 2 days. Keeping them sealed will help maintain their crispiness and prevent them from becoming soggy.
Can I freeze Salted Caramel Apple Tarts? How?
Absolutely! To freeze your tarts, allow them to cool completely, then wrap each tart tightly in plastic wrap followed by aluminum foil. This way, they can be stored in the freezer for up to 3 months. When you’re ready to enjoy them, just thaw overnight in the fridge and reheat in a preheated oven at 350°F (175°C) for 10-15 minutes.
What should I do if my caramel crystallizes while making it?
No need to worry! If your caramel starts to crystallize, simply remove it from the heat and add a splash of water. Return it to low heat and stir gently until the sugar dissolves back into the mixture. Remember to keep an eye on your sugar as it caramelizes—patient stirring is essential to avoid burning!
Can I make these tarts ahead of time?
Yes, you can absolutely prep your Salted Caramel Apple Tarts in advance! You can prepare the crust and apple filling a day in advance. Just store the crust wrapped in the fridge and the apple filling in an airtight container. Then, when you’re ready, simply assemble, bake, and enjoy the delightful aroma filling your kitchen!
Are there any dietary considerations for Salted Caramel Apple Tarts?
Great question! While this recipe doesn’t have specific dietary restrictions, you can make some substitutions. For a gluten-free option, use gluten-free flour for the crust. You may replace unsalted butter with margarine for a dairy-free version. Always check for any potential allergies related to the ingredients used!
Salted Caramel Apple Tarts: Your New Favorite Fall Treat
Ingredients
Equipment
Method
- In a large mixing bowl, combine all-purpose flour and granulated sugar, mixing well. Cut in the cold unsalted butter until the mixture resembles coarse crumbs. Stir in the egg yolk and enough ice water until the dough forms. Shape into a disk, wrap in plastic, and refrigerate for 30 minutes.
- Preheat your oven to 350°F (175°C).
- Peel, core, and slice the apples into thin pieces. Toss with brown sugar, cinnamon, and lemon juice, ensuring even coating.
- Roll out the chilled tart dough into a circle about 1/8 inch thick. Transfer it into the tart pan and trim excess dough.
- Line the tart crust with parchment paper and fill with pie weights. Bake for 15 minutes, then remove weights and parchment, baking for another 10 minutes until golden brown.
- In a medium saucepan over medium heat, add granulated sugar. Stir constantly until melted and amber-colored. Whisk in unsalted butter and heavy cream until smooth. Stir in sea salt and cool slightly.
- Remove the baked crust, cool slightly, and arrange the apple slices. Drizzle with warm salted caramel sauce.
- Bake the assembled tarts for 15 to 20 minutes until apples are tender and caramel bubbles slightly.
- Let cool for 15 to 20 minutes before serving.
- Drizzle remaining salted caramel sauce before serving. Pair with vanilla ice cream or whipped cream.
Leave a Reply