
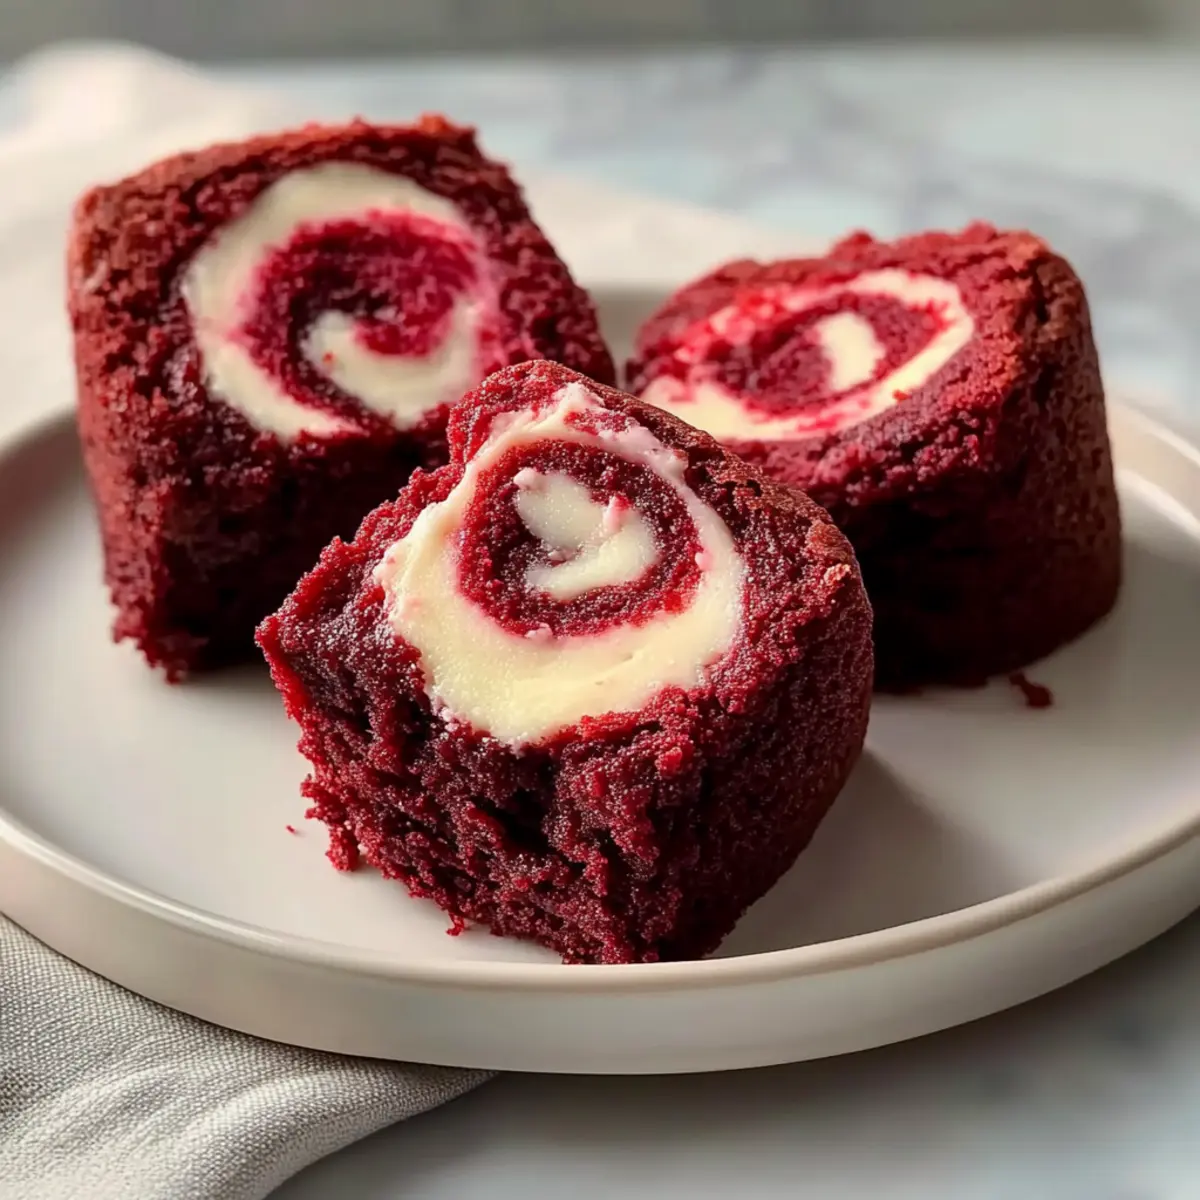
As I stood in the kitchen, the warm scent of cocoa enveloped me, instantly transporting me to cozy afternoons filled with sweet memories. Today, I’m sharing my go-to indulgence: Homemade Red Velvet Brownie Bites with Cream Cheese Swirl. These bite-sized delights are not only rich and fudgy but also require minimal effort—just 15 minutes of hands-on time before they head into the oven. With a perfect balance of chocolatey goodness and a creamy swirl that elevates them to pure heaven, they’re bound to win over family and friends alike. Plus, you won’t need any special equipment to whip up this delightful treat! What’s more tempting than treating yourself or surprising your guests with an easy yet impressive dessert? Let’s dive into the recipe that will make your taste buds dance!
Why Are These Brownie Bites Irresistible?
Decadent, each bite is packed with rich chocolate flavor that melts in your mouth. Easy to make, you only need common kitchen staples and about 15 minutes of prep time—no fancy gadgets here! Versatile, you can customize these bites with flavor variations like almond extract or even swap in gluten-free flour for dietary needs. Crowd-pleaser, they’re perfect for parties, movie nights, or simply treating yourself! Pair them with a hot cup of coffee or a glass of milk for a delightful experience. Want more sweet inspiration? Check out my Banana Bread Brownies or Peanut Butter Bites for delicious alternatives!
Homemade Red Velvet Brownie Bites Ingredients
For the Brownie Batter
• Butter – Adds richness and moisture; use unsalted butter for better control over salt content.
• Sugar – Sweetens the brownie mixture; can substitute with a sugar alternative if needed.
• Cocoa Powder – Provides chocolate flavor, the traditional choice for red velvet; natural cocoa enhances color and flavor.
• Vanilla Extract – Enhances overall flavor; use pure vanilla extract for better quality.
• Red Food Coloring – Creates the iconic red velvet appearance; gel food coloring is preferred for a brighter color.
• Salt – Enhances flavor; essential for balancing the sweetness.
• Espresso Powder – Deepens the chocolate flavor without imparting coffee taste; optional but recommended for a richer profile.
• Vinegar – Adds tang and interacts with cocoa for a deeper color: do not skip; it’s key to achieving the red velvet effect.
• Eggs – Bind ingredients and provide structure; ensure they are at room temperature for optimal mixing.
• Flour – Provides structure; all-purpose flour is recommended; overmixing will create tough brownies, so mix gently.
For the Cream Cheese Swirl
• Cream Cheese – Forms the creamy swirl; must be at room temperature for easy blending; can substitute with mascarpone or ricotta for different flavors.
• Egg Yolk – Adds richness to the cream cheese filling; ensure it is integrated smoothly without overmixing.
Step‑by‑Step Instructions for Homemade Red Velvet Brownie Bites
Step 1: Preheat the Oven
Begin by preheating your oven to 350°F (175°C). While the oven warms up, grease a mini muffin pan thoroughly to prevent the brownie bites from sticking. The ideal pan will hold 24 mini muffin cups. This step ensures that you’ll achieve perfectly shaped and easily removable homemade red velvet brownie bites.
Step 2: Sift Cocoa Powder
In a medium bowl, carefully sift the cocoa powder to eliminate any lumps. This simple but important step helps achieve a smooth brownie texture, so don’t skip it! Once sifted, set the cocoa aside. This will complement the richness of your batter as you combine it with other ingredients in upcoming steps.
Step 3: Mix the Brownie Batter
In a larger mixing bowl, melt the unsalted butter until fully liquid. Whisk in the sugar, sifted cocoa powder, vanilla extract, red food coloring, salt, espresso powder (if using), and vinegar until well combined. You’re aiming for a smooth and glossy mixture, which should take about 1–2 minutes of vigorous mixing to ensure it all blends beautifully.
Step 4: Incorporate the Eggs
Add in the eggs one at a time, whisking thoroughly after each addition. This will help to incorporate air into the batter, resulting in a lighter texture in your homemade red velvet brownie bites. Ensure each egg is fully combined before adding the next, which should take about 1 minute each.
Step 5: Add the Flour
Once your eggs are incorporated, gently fold in the all-purpose flour until just combined. Be careful not to overmix, as this could lead to tough brownies. Stop mixing when you no longer see flour streaks and the batter appears thick and luscious. This is the base for your fudgy brownie bites.
Step 6: Prepare the Cream Cheese Swirl
In another bowl, beat the softened cream cheese, sugar, and vanilla extract until smooth and creamy. Incorporate the egg yolk and blend carefully until the mixture is well combined. This will form a velvety cream cheese swirl that perfectly complements the richness of the brownie base.
Step 7: Assemble the Brownie Bites
Spoon the brownie batter into each muffin cup, filling them halfway full. Next, dollop about a teaspoon of the cream cheese mixture on top of the brownie batter in each cup. Carefully cover the cream cheese swirl with additional brownie batter, ensuring it’s evenly distributed for a delightful surprise in every bite.
Step 8: Create the Swirl
Using a toothpick or a skewer, gently swirl the brownie batter and cream cheese layer together. This motion should create a marbled effect without mixing the two completely. Aim for a graceful swirl that reveals the distinct layers, as this will enhance the visual appeal of your homemade red velvet brownie bites.
Step 9: Bake to Perfection
Place the muffin pan into the preheated oven and bake for about 12 minutes. Keep an eye on them; the tops should look set while the centers remain a bit soft. This balance is key to achieving that perfect fudgy texture, which is what makes these brownie bites so irresistible.
Step 10: Cool and Serve
Once baked, let the brownie bites cool in the pan for 5 minutes. This brief resting time will allow them to firm up slightly. After that, gently transfer the bites to a wire rack to cool completely. This step ensures they maintain their shape and don’t crumble when removed from the pan. Enjoy your delicious homemade red velvet brownie bites!
Homemade Red Velvet Brownie Bites Variations
Feel free to get creative and make these delightful morsels your own!
- Gluten-Free: Substitute half the flour with almond flour for a delightful gluten-free treat. The nutty flavor adds an extra layer of richness.
- Different Extracts: Swap vanilla extract for almond or coconut extract to add a unique twist. Each variation will inspire a different aroma and taste, making it fun!
- Chocolate Ganache Topping: Top cooled brownie bites with a luscious chocolate ganache for an even sweeter indulgence. Rich chocolate pairs beautifully with the tangy cream cheese swirls.
- Nutty Crunch: Incorporate chopped nuts, such as walnuts or pecans, into the brownie batter. The crunch complements the fudgy texture and adds versatility to each bite.
- Fruit Infusion: Add mini chocolate chips or swirl in some raspberry jam alongside the cream cheese for a fruity surprise. This twist creates a delightful burst of flavor.
- Cream Cheese Alternatives: Swap cream cheese for mascarpone or ricotta in the swirl for a different creamy experience. Each option offers a subtle flavor shift, keeping things interesting!
- Spiced Kick: Add a pinch of cinnamon or nutmeg to the brownie batter for a comforting spiced flavor profile. This simple touch can elevate these bites into the cozy dessert you crave!
- Fruity Frosting: Top your brownie bites with a light frosting made from whipped cream and powdered sugar mixed with fresh fruit puree. This adds a refreshing finish to each rich bite.
These variations will enliven your kitchen adventures, making your homemade red velvet brownie bites even more exciting! And while you’re at it, don’t miss out on my delicious Peanut Butter Bites and Sausage Egg Bites for more sweet and savory delights!
What to Serve with Indulgent Red Velvet Brownie Bites with Cream Cheese Swirl
Pairing your brownie bites with complementary flavors and textures makes for a memorable dessert experience.
-
Creamy Vanilla Ice Cream: The rich creaminess balances the tangy cream cheese swirl, adding a delightful temperature contrast. The cold ice cream melts into the warm brownies, creating a heavenly bite.
-
Fresh Raspberries: Their tartness cuts through the sweetness of the brownie bites, making for a refreshing palate cleanser. You could also serve them drizzled with raspberry sauce for extra flair.
-
Chocolate Ganache: Drizzling a warm chocolate ganache on top enhances the chocolatey goodness of the brownies and takes indulgence to another level. For chocolate lovers, this is a must!
-
Coffee: A hot cup of coffee brings out the rich flavors of cocoa and cream cheese, offering a cozy companion for your brownie bites. The warmth complements the fudgy texture beautifully.
-
Whipped Cream: Light and airy, whipped cream adds a lovely textural contrast while enhancing the overall sweetness. Consider topping each bite with a dollop for an elegant touch.
-
Milk: A classic pairing, a chilled glass of milk perfectly complements the fudgy richness of the brownie bites. The creamy texture of the milk rounds out the whole dessert experience.
-
Chocolate-Covered Strawberries: These offer a bite of freshness and chocolate that harmonizes well with the decadent brownie bites. They’re not only delicious but also visually stunning on any dessert table.
These pairing options elevate your dessert and create a feast for both the eyes and the taste buds. Enjoy your homemade red velvet brownie bites!
How to Store and Freeze Homemade Red Velvet Brownie Bites
Fridge: Keep your brownie bites stored in an airtight container for up to 5 days. This ensures they stay fresh and maintain that delectable fudgy texture.
Freezer: For longer storage, freeze the brownie bites in a single layer on a baking sheet before transferring to an airtight container or freezer bag. They can stay frozen for up to 3 months.
Thawing: When ready to enjoy, thaw your homemade red velvet brownie bites overnight in the fridge or at room temperature for about 1-2 hours for the best flavor and texture.
Reheating: If desired, rewarm the bites in the microwave for about 10-15 seconds for a melty, comforting treat!
Expert Tips for Homemade Red Velvet Brownie Bites
- Avoid Overbaking: Remove your brownie bites at 12 minutes, even if they seem slightly underdone; they’ll set as they cool to keep them moist.
- Grease Your Pan Well: Ensure you thoroughly grease the muffin pan to prevent the homemade red velvet brownie bites from sticking, making for easy removal.
- Gentle Mixing: When folding in the flour, avoid overmixing. This keeps your brownies tender, preventing them from becoming tough.
- Don’t Skimp on Waiting: Let the brownie bites cool for at least 5 minutes in the pan—it helps them firm up and makes transferring easier without crumbling.
- Swirling Technique: Use a gentle swirling motion with a toothpick or skewer for a beautiful marbled effect. Avoid vigorous mixing to maintain distinct layers.
Make Ahead Options
These Homemade Red Velvet Brownie Bites are perfect for meal prep enthusiasts! You can prepare the brownie batter up to 24 hours in advance by mixing it and storing it in an airtight container in the refrigerator. Additionally, you can make the cream cheese swirl ahead of time and refrigerate it for up to 3 days. When you’re ready to bake, simply ladle the chilled brownie batter into your muffin cups, add the cream cheese mixture, and swirl before baking as directed. This method ensures your brownie bites will be just as delicious and fresh, saving you significant time on busy weeknights while still delivering that rich, indulgent flavor that everyone loves!
Homemade Red Velvet Brownie Bites Recipe FAQs
How do I choose ripe ingredients for my brownie bites?
Absolutely! For your homemade red velvet brownie bites, it’s important to use fresh and high-quality ingredients. Choose eggs that are at room temperature for smoother mixing, and ensure your cream cheese is softened to blend easily. For the butter, unsalted is recommended to control the saltiness of the recipe, while the sugar should be granulated and fresh, free from clumps.
How should I store leftover brownie bites?
Very! Store your brownie bites in an airtight container in the fridge for up to 5 days. This will help retain their moist, fudgy texture. If you want to keep them longer, consider freezing. Wrap each brownie bite well in plastic wrap and place them in a freezer-safe bag or container; they will stay fresh for up to 3 months.
Can I freeze homemade red velvet brownie bites?
Absolutely! To freeze your brownie bites, first, let them cool completely. Arrange them in a single layer on a baking sheet and place the sheet in the freezer for about 1-2 hours until they’re solid. Once firm, transfer the brownie bites to an airtight container or heavy-duty freezer bag. Be sure to label the container with the date—enjoy them within 3 months for the best flavor!
What do I do if my brownie bites turn out too dry?
Don’t worry, this happens sometimes! Dry brownies often result from overbaking or using too much flour. To ensure your brownie bites are moist, remove them from the oven right at 12 minutes, even if they seem soft in the center. If they do come out dry, consider serving them with a scoop of ice cream or a drizzle of chocolate sauce for added moisture and flavor.
Can I make these brownie bites gluten-free?
Yes, indeed! For a gluten-free variation of your homemade red velvet brownie bites, simply substitute half of the all-purpose flour with almond flour or another gluten-free flour blend. Keep in mind that using a gluten-free flour mix might slightly alter the texture, but they will still be deliciously fudgy!
Are any of the ingredients unsafe for pets?
Very! Some ingredients like chocolate, cocoa powder, and sugar can be harmful to pets. If you’re sharing the treats, ensure they’re safely stored away from your furry friends. Always consult your vet if in doubt about specific ingredients and their safety for pets.

Decadent Homemade Red Velvet Brownie Bites You’ll Crave
Ingredients
Equipment
Method
- Preheat your oven to 350°F (175°C) and grease a mini muffin pan thoroughly.
- Sift cocoa powder to eliminate lumps.
- Melt unsalted butter in a bowl and whisk in sugar, sifted cocoa, vanilla extract, red food coloring, salt, espresso powder, and vinegar.
- Add eggs one at a time, whisking thoroughly after each addition.
- Gently fold in the flour until just combined.
- Beat cream cheese, sugar, and vanilla extract until smooth, then add egg yolk and blend until combined.
- Spoon brownie batter into muffin cups halfway, top with cream cheese mixture, and cover with more brownie batter.
- Gently swirl the batter and cream cheese mixture using a toothpick to create a marbled effect.
- Bake for about 12 minutes, until the tops look set.
- Cool in the pan for 5 minutes before transferring to a wire rack.
Leave a Reply