
“Crunch! That satisfying sound of a perfectly fried morsel gives me instant joy. Today, I’m excited to share my Thai Fried Chicken Sandwich Recipe, a delightful twist on a classic favorite that effortlessly balances spice and crunch. With each bite, you’ll savor the marinated chicken, kissed by coconut milk and an aromatic blend of spices, creating a flavor profile that’s as vibrant as it is comforting. This sandwich isn’t just delicious; it’s also customizable to fit any dietary needs—perfect for anyone transitioning from fast food to homemade goodness. Whether you’re a meat-lover or a vegetarian at heart, this recipe is simple, rewarding, and bound to impress your loved ones. Are you ready to bring a taste of Thailand into your kitchen?”
Why is This Sandwich a Game Changer?
Bursting with flavor, this Thai Fried Chicken Sandwich offers a unique blend of spices that will have your taste buds dancing. Customizable to fit any dietary preference, it’s as simple to create a tofu version as it is to stick with succulent chicken. Crowd-pleaser at gatherings, this sandwich guarantees compliments, whether served at a casual lunch or dinner. Quick to prepare, you can whip it up on a busy weeknight or impress guests with minimal effort. Lastly, perfectly crispy, the crunchy coating coupled with fresh toppings elevates your meal to gourmet status—who needs fast food with a dish like this?
Thai Fried Chicken Sandwich Ingredients
For the Marinade
- Coconut Milk – Provides moisture and richness to the marinade; Greek yogurt is a great substitute for added tang.
- Curry Powder – Adds aromatic depth; feel free to adjust the amount for milder preferences.
- Minced Garlic – Infuses the chicken with a savory kick; always opt for fresh garlic for the best flavor.
- Grated Ginger – Offers a zesty warmth that enhances the overall taste.
- Salt – Essential for seasoning; use kosher or sea salt for optimal results.
- Sugar – Balances the flavors in the marinade; brown sugar adds a deeper richness.
For the Chicken
- Chicken Thighs – Juicy and flavorful, perfect for frying; substitute with chicken breasts but monitor cooking time closely.
- Rice Flour or Cornstarch – Creates a light, crispy coating; use cornstarch for a gluten-free option.
For the Sauce
- Thai Chili Sauce – Adds heat combined with sweet-tanginess; substitute sriracha for a kick of extra heat.
- Plain Yogurt – Mixed with Thai chili sauce for a creamy spread; mayonnaise can be used instead for an egg-free option.
For the Sandwich Assembly
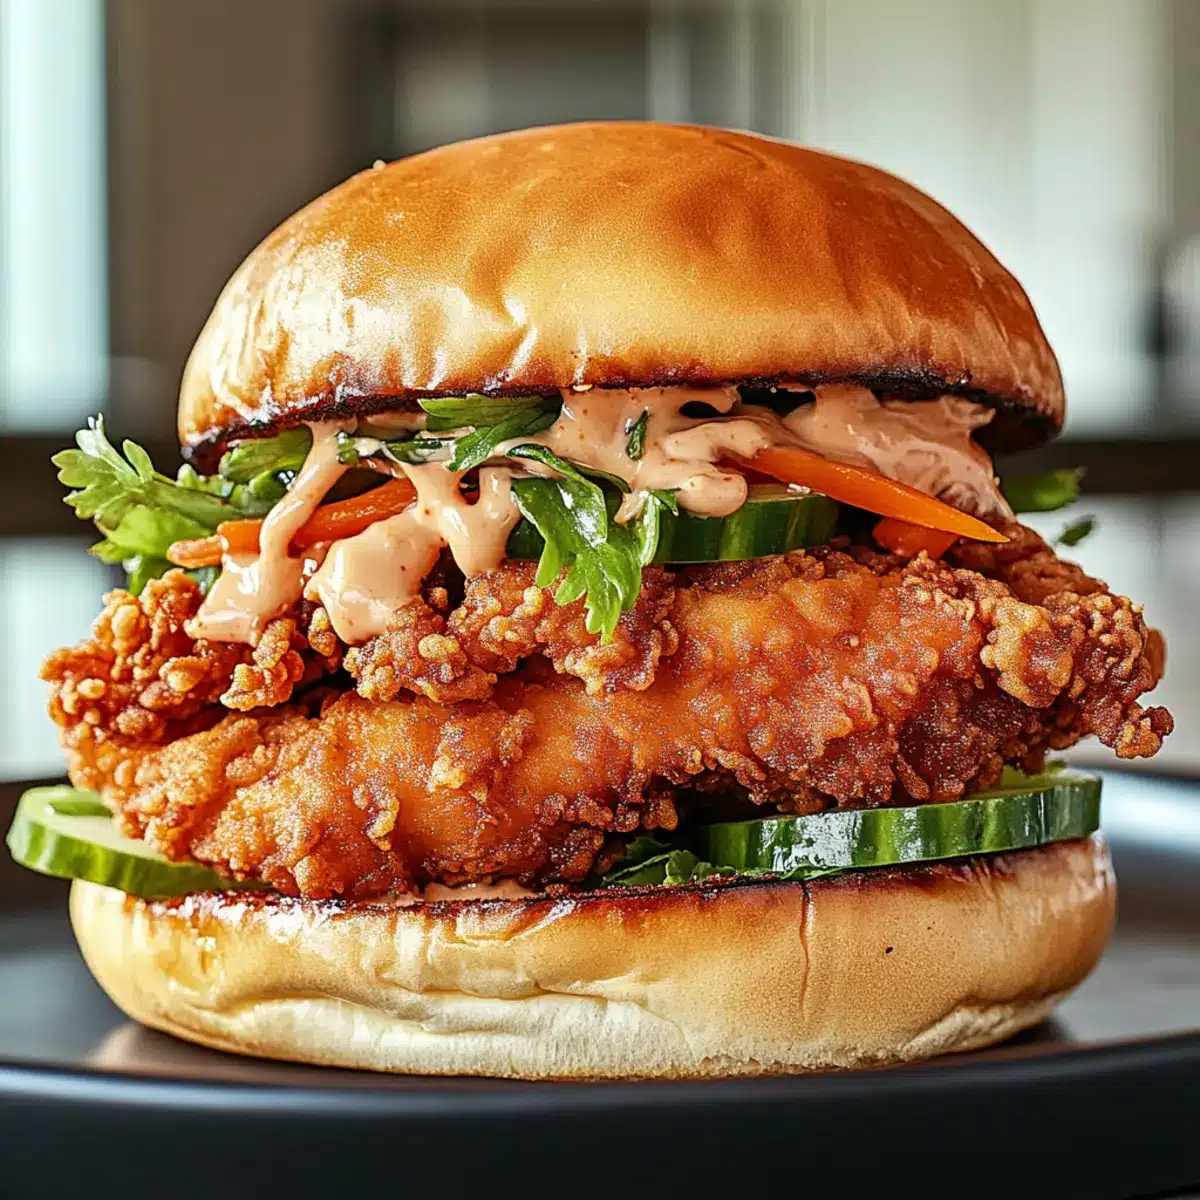
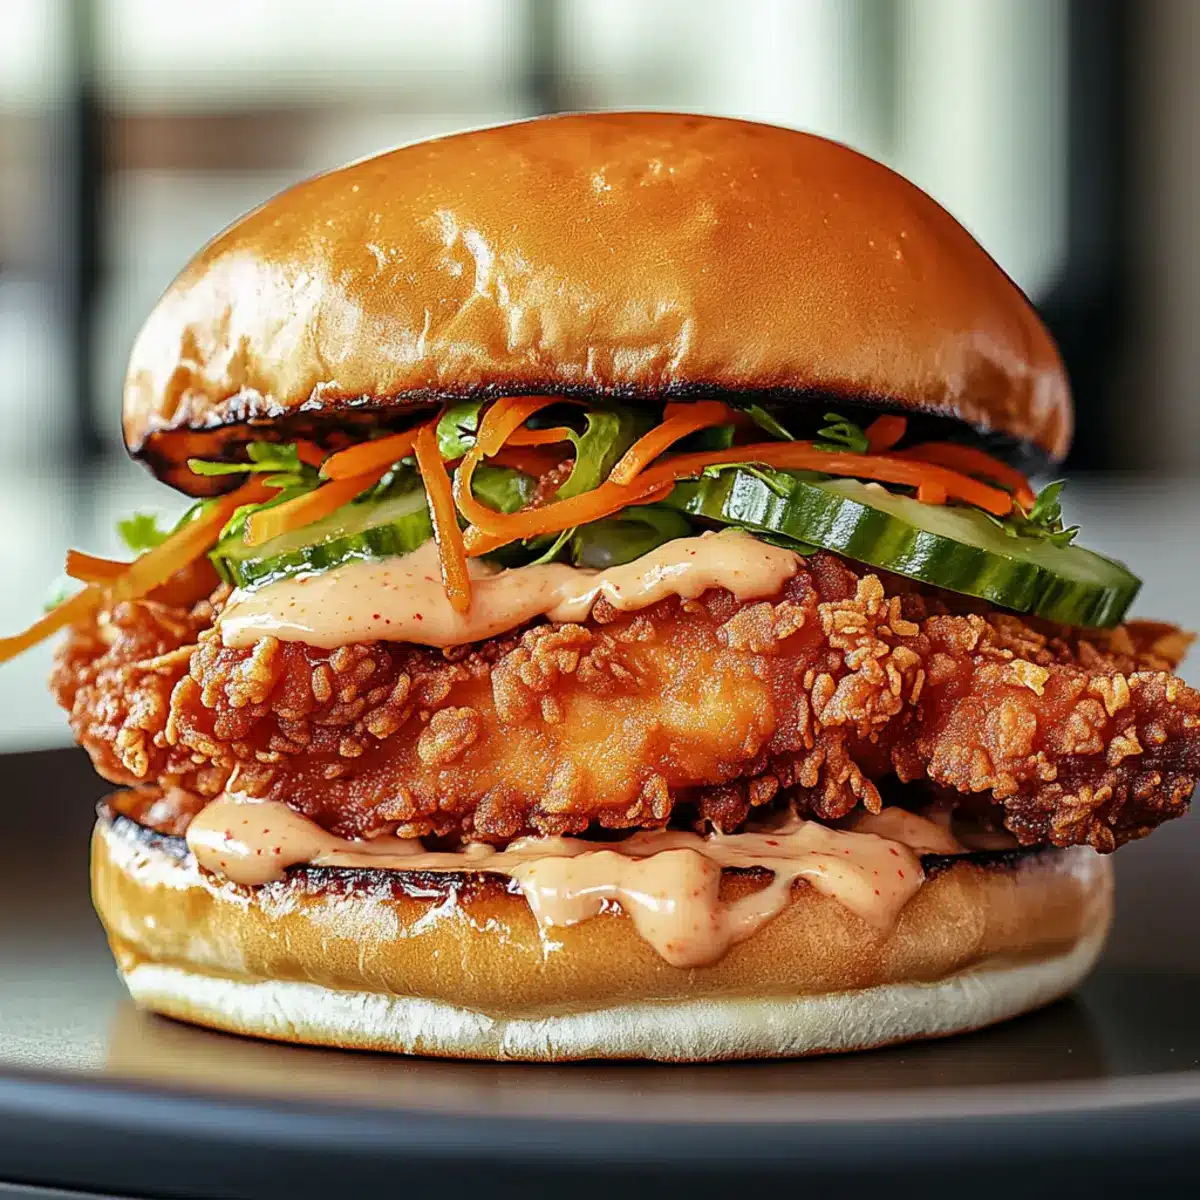
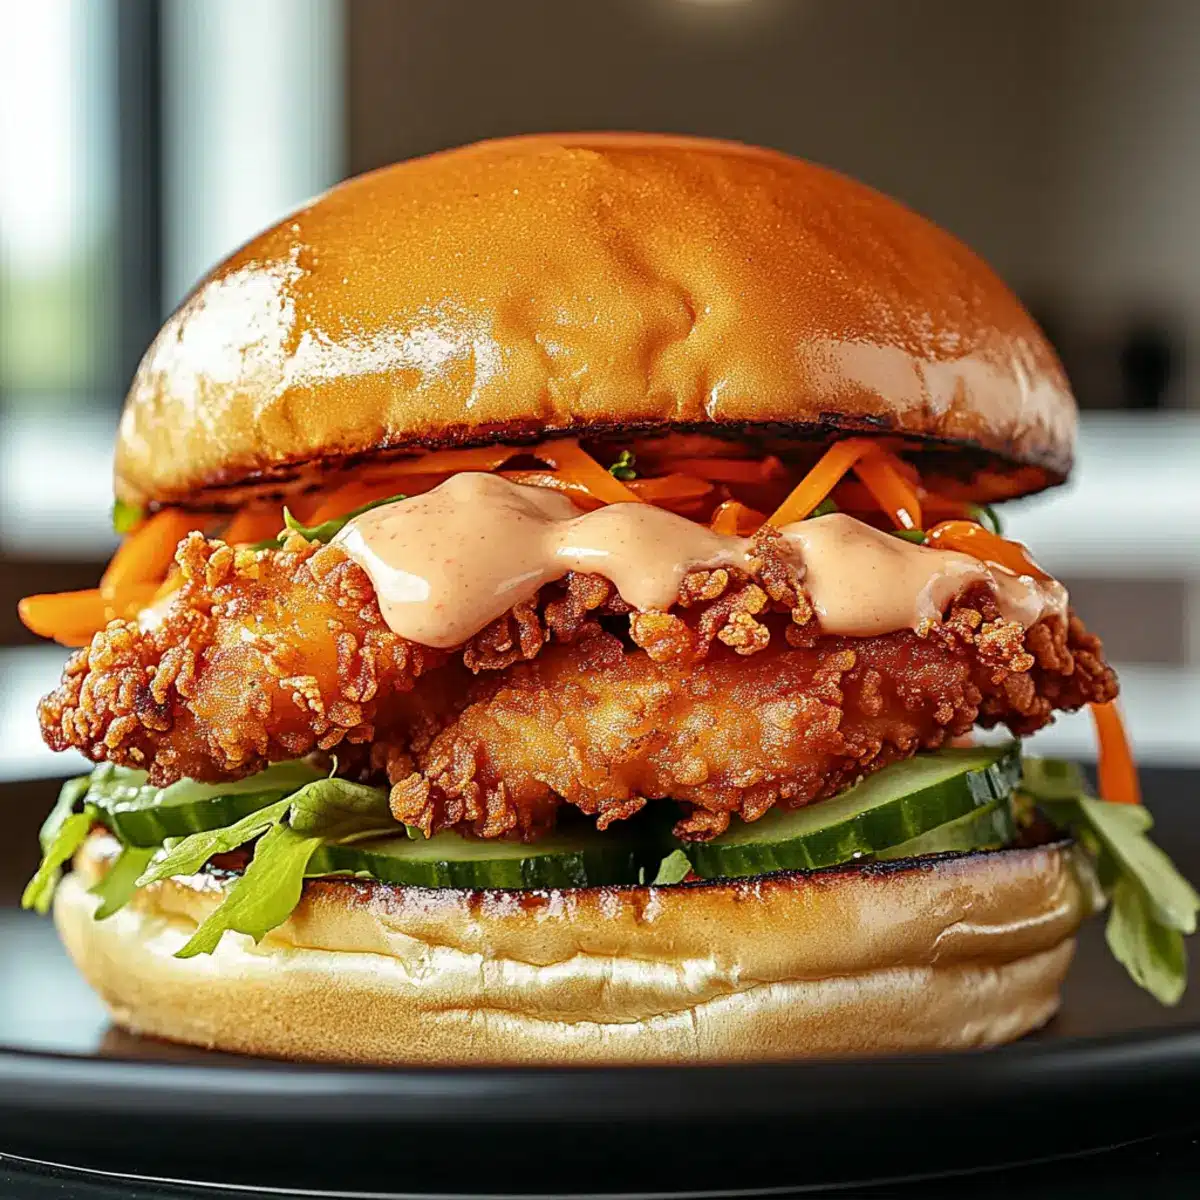
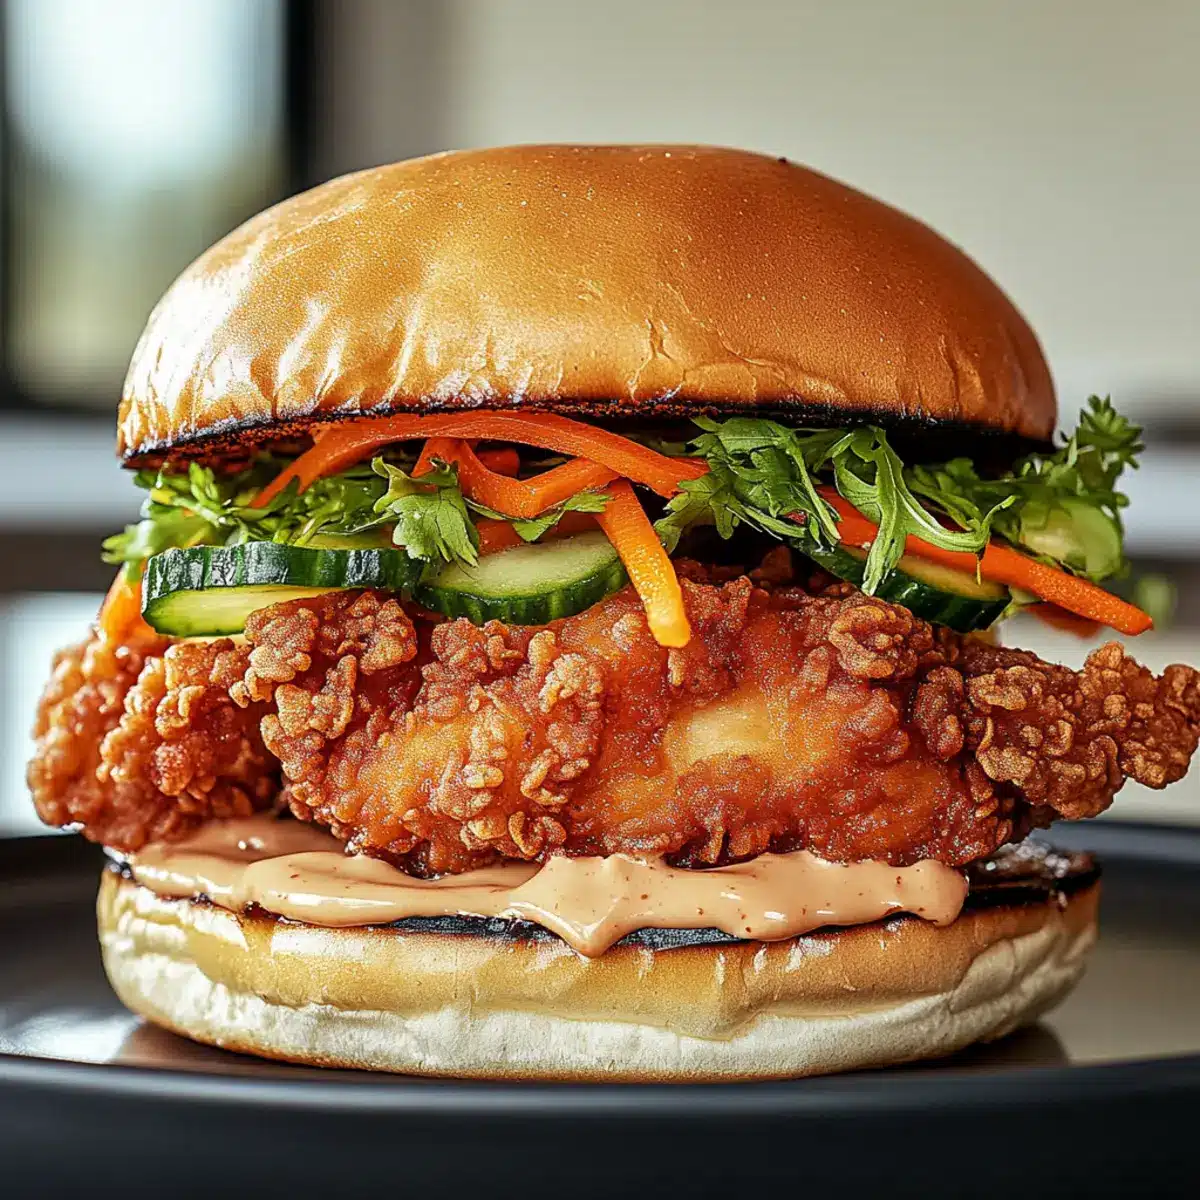
- Cucumbers – Provide a refreshing crunch; try pickled cucumbers for an extra zing.
- Pickled Carrots – Introduces a tangy sweetness; a slaw mix can also add texture.
- Buns – Soft brioche or sandwich buns are fantastic for soaking up the sauce; use crusty bread for a heartier bite.
With these ingredients on hand, you’re well on your way to crafting a memorable Thai Fried Chicken Sandwich Recipe that’s tailored just for you!
Step‑by‑Step Instructions for Thai Fried Chicken Sandwich Recipe
Step 1: Marinate the Chicken
In a large mixing bowl, combine coconut milk, curry powder, minced garlic, grated ginger, salt, and sugar to create a flavorful marinade. Add the chicken thighs, ensuring they are fully coated. Cover the bowl with plastic wrap and refrigerate for at least 1 hour, allowing the chicken to soak up the delicious flavors. For an even richer taste, marinate overnight.
Step 2: Prepare the Coating
While the chicken marinates, in a shallow dish, mix rice flour or cornstarch with a pinch of salt and pepper. This will create a light and crispy coating for your chicken. Once the marinating time is complete, take the chicken out of the fridge and dredge each piece in the dry mixture, ensuring they are evenly coated for that perfect crunch.
Step 3: Fry the Chicken
In a large, heavy-bottomed skillet or deep fryer, heat oil to 350°F (175°C). Carefully add the coated chicken thighs to the hot oil, ensuring not to overcrowd the pan. Fry for about 5-7 minutes on each side, or until they are golden brown and reach an internal temperature of 165°F (74°C). Use tongs to transfer the chicken to a paper towel-lined plate to drain excess oil.
Step 4: Make the Sauce
In a small bowl, mix together Thai chili sauce and plain yogurt or mayonnaise. This creamy sauce will enhance the spicy flavors of your Thai Fried Chicken Sandwich. Adjust the ratio based on your preferred level of heat and creaminess, blending until smooth and ready to spread on your sandwich.
Step 5: Assemble the Sandwich
Toast your choice of buns until golden brown. Spread a generous layer of the prepared sauce on the bottom half of each bun. Add a crispy fried chicken thigh on top, followed by crunchy cucumber slices and tangy pickled carrots. Top with fresh herbs, then place the other half of the bun on top to complete your delicious Thai Fried Chicken Sandwich.
Step 6: Garnish and Serve
For a burst of flavor, garnish your assembled sandwich with fresh cilantro and a sprinkle of lime juice just before serving. This adds a zesty brightness that complements the richness of the chicken and sauce. Serve immediately, and enjoy the satisfying crunch and vibrant flavors of your homemade Thai Fried Chicken Sandwich!
What to Serve with Thai Fried Chicken Sandwich
Enhance your meal experience with delicious sides and drinks that complement the tantalizing flavors of this sandwich.
-
Sweet Potato Fries: The natural sweetness and crunch of crispy fries pair perfectly with the spicy notes of the chicken, creating a delightful contrast.
-
Asian Slaw: A vibrant mix of cabbage, carrots, and dressing adds crunch and freshness, balancing the sandwich’s richness while introducing a zesty flavor that brightens every bite.
-
Cucumber Salad: Refreshing and crisp, a cucumber salad with a light vinaigrette offers a cool counterpoint, cleansing the palate between bites of the spicy, fried chicken.
-
Mango Sticky Rice: This classic Thai dessert provides a sweet finish, with its creamy coconut rice and ripe mango harmonizing beautifully with the sandwich’s bold flavors.
-
Thai Iced Tea: A blend of black tea, milk, and sugar, this drink’s smooth and creamy texture complements the sandwich’s crunch and spiciness, refreshing your taste buds.
-
Pickled Vegetables: A side of tangy pickled vegetables adds a punch of acidity, enhancing the flavors of the sandwich while providing a crunchy texture to enjoy.
-
Fresh Herbs: Consider a small side of fresh herbs like cilantro or mint to sprinkle on your sandwich or enjoy on the side; their bright notes will elevate each bite.
-
Chili Garlic Sauce: For those who crave an extra kick, offering this alongside adds bold flavor that can be drizzled or dipped, enhancing the sandwich experience.
Make Ahead Options
These Thai Fried Chicken Sandwiches are perfect for busy home cooks looking to streamline meal prep! You can marinate the chicken thighs in the coconut milk mixture up to 24 hours in advance, ensuring maximum flavor infusion. Additionally, you can prepare the sauce and store it in the refrigerator for about 3 days without sacrificing quality. Just keep the fried chicken in an airtight container at room temperature for up to 2 hours after frying to maintain its crispiness, and then refrigerate if not consuming right away. When you’re ready to serve, simply reheat the chicken in an oven (to retain its crunch) and assemble your delicious Thai Fried Chicken Sandwich with fresh toppings. This way, you’ll enjoy restaurant-quality results with minimal effort, even on the busiest weeknights!
Thai Fried Chicken Sandwich Variations
Explore exciting twists and swaps for the ultimate Thai Fried Chicken Sandwich! Each variation will spark your creativity and delight your taste buds.
-
Vegetarian Delight: Substitute crispy tofu or cauliflower for chicken, ensuring a satisfying crunch without sacrificing flavor. Tofu, marinated and fried, absorbs the rich marinade beautifully.
-
Gluten-Free Option: Use cornstarch instead of rice flour for the coating, ensuring your sandwich remains light and crispy. Pair with gluten-free buns for a complete meal.
-
Spicy Kick: Increase the amount of Thai chili sauce for a bolder flavor that packs an extra punch. Alternatively, drizzle some sriracha over the assembled sandwich for an added heat.
-
Creamy Swap: Replace plain yogurt with plant-based yogurt for a dairy-free sauce while maintaining creaminess. This keeps your sandwich both flavorful and accessible for vegans!
-
Crunchy Slaw: Swap out pickled carrots for a crunchy slaw mix to add texture and freshness with an extra layer of flavor. The added crunch will enhance each bite beautifully.
-
Fresh Herbs: Experiment with different herbs like mint or basil instead of cilantro for a unique scent and flavor. Mixing herbs can bring new life to your sandwich!
-
Zesty Toppings: Try adding sliced radishes or fresh arugula for a peppery bite. These light, crisp toppings will elevate the sandwich experience even further.
-
Tropical Twist: Add a slice of grilled pineapple for a sweet, tangy flavor that pairs wonderfully with the spice of the chicken. Who says sandwiches can’t be tropical?
For even more culinary inspiration, check out my delicious Chicken Avocado Melt or indulge in the comforting flavors of Cowboy Butter Chicken. You’re just a few ingredients away from transforming your meals into something extraordinary!
Expert Tips for Thai Fried Chicken Sandwich
-
Marinade Time Matters: Allowing your chicken to marinate for at least 1 hour, preferably overnight, ensures maximum flavor infusion for the Thai Fried Chicken Sandwich.
-
Oil Temperature Check: Ensure your oil is at 350°F (175°C) before frying. Oil that’s not hot enough can lead to greasy chicken, ruining that crispy coating.
-
Avoid Overcrowding: Frying too many pieces at once will drop the oil temperature, leading to uneven cooking. Fry in batches if necessary for that perfect crunch.
-
Safe Cooking Temperature: Use a meat thermometer to guarantee your chicken reaches an internal temperature of 165°F (74°C) for safe eating without overcooking it.
-
Storage Smartly: Store leftover components separately, keeping the fried chicken crispy for up to 3 days. This way, you can enjoy a fresh sandwich later!
-
Get Creative: Feel free to experiment with toppings! Radishes or fresh herbs can add unique flavors, allowing you to customize your Thai Fried Chicken Sandwich recipe to your taste.
How to Store and Freeze Thai Fried Chicken Sandwich
Fridge: Store leftover fried chicken in the refrigerator for up to 3 days. Keep the components—chicken, sauce, and toppings—separate to maintain freshness and texture.
Freezer: The cooked chicken can be frozen for up to 2 months. For best results, let it cool completely, then wrap it tightly in foil or plastic wrap before freezing.
Reheating: Thaw frozen chicken in the fridge overnight. To maintain its crispiness, reheat it in an oven preheated to 350°F (175°C) for about 10-15 minutes.
Assembling Later: If you plan to eat the sandwich later, store the buns separately and assemble just before serving to ensure that your Thai Fried Chicken Sandwich remains fresh and delicious.
Thai Fried Chicken Sandwich Recipe FAQs
What type of chicken is best for this recipe?
I recommend using chicken thighs for the best flavor and juiciness. They’re ideal for frying, but if you prefer, you can use chicken breasts as a substitute. Just be cautious with the cooking time, as breasts can dry out more quickly.
How do I store leftover Thai Fried Chicken?
Absolutely! Store any leftover fried chicken in the refrigerator for up to 3 days. To keep everything fresh and crispy, store the components separately: chicken, sauce, and toppings like cucumbers and pickled carrots.
Can I freeze the fried chicken? If so, how?
Yes, you can freeze the cooked chicken for up to 2 months without losing too much quality. Allow it to cool completely, then wrap it tightly in foil or plastic wrap. When ready to enjoy, thaw it in the fridge overnight, and reheat in an oven preheated to 350°F (175°C) for about 10-15 minutes to regain that delicious crisp.
What substitutions can I make for dietary restrictions?
This Thai Fried Chicken Sandwich recipe is incredibly flexible! You can replace chicken with crispy tofu or cauliflower for a plant-based alternative. If you’re avoiding gluten, use cornstarch instead of rice flour for the coating. Additionally, if you have egg allergies, substitute the yogurt with mayonnaise to create the creamy sauce.
How can I tell if my oil is hot enough for frying?
A simple method is to use a thermometer to check for 350°F (175°C) or drop a small piece of batter into the oil. If it bubbles and rises to the surface immediately, your oil is ready for frying. This is crucial, as properly heated oil ensures a crispy, golden chicken rather than greasy or undercooked meat.
What are some creative topping ideas for my sandwich?
The more the merrier! You can get creative with toppings like sliced radishes for a peppery crunch, fresh arugula for a zesty bite, or even sliced jalapeños if you like it extra spicy. Experimenting with different toppings can elevate your Thai Fried Chicken Sandwich to new flavor heights!
Thai Fried Chicken Sandwich Recipe That's Crispy and Customizable
Ingredients
Equipment
Method
- In a large mixing bowl, combine coconut milk, curry powder, minced garlic, grated ginger, salt, and sugar to create a flavorful marinade. Add the chicken thighs, ensuring they are fully coated. Cover the bowl with plastic wrap and refrigerate for at least 1 hour.
- In a shallow dish, mix rice flour or cornstarch with a pinch of salt and pepper. Dredge each piece of chicken in the mixture once marinating is complete, ensuring they are evenly coated.
- Heat oil in a skillet to 350°F (175°C). Fry the coated chicken thighs for about 5-7 minutes on each side until golden brown and internal temperature reaches 165°F (74°C).
- Mix together Thai chili sauce and plain yogurt or mayonnaise in a small bowl. Adjust ratio for heat and creaminess, blending until smooth.
- Toast buns until golden brown, spread sauce on bottom half, add fried chicken, cucumber, and pickled carrots. Top with fresh herbs and finish with the other half of the bun.
- Garnish with fresh cilantro and a sprinkle of lime juice immediately before serving.
Leave a Reply