
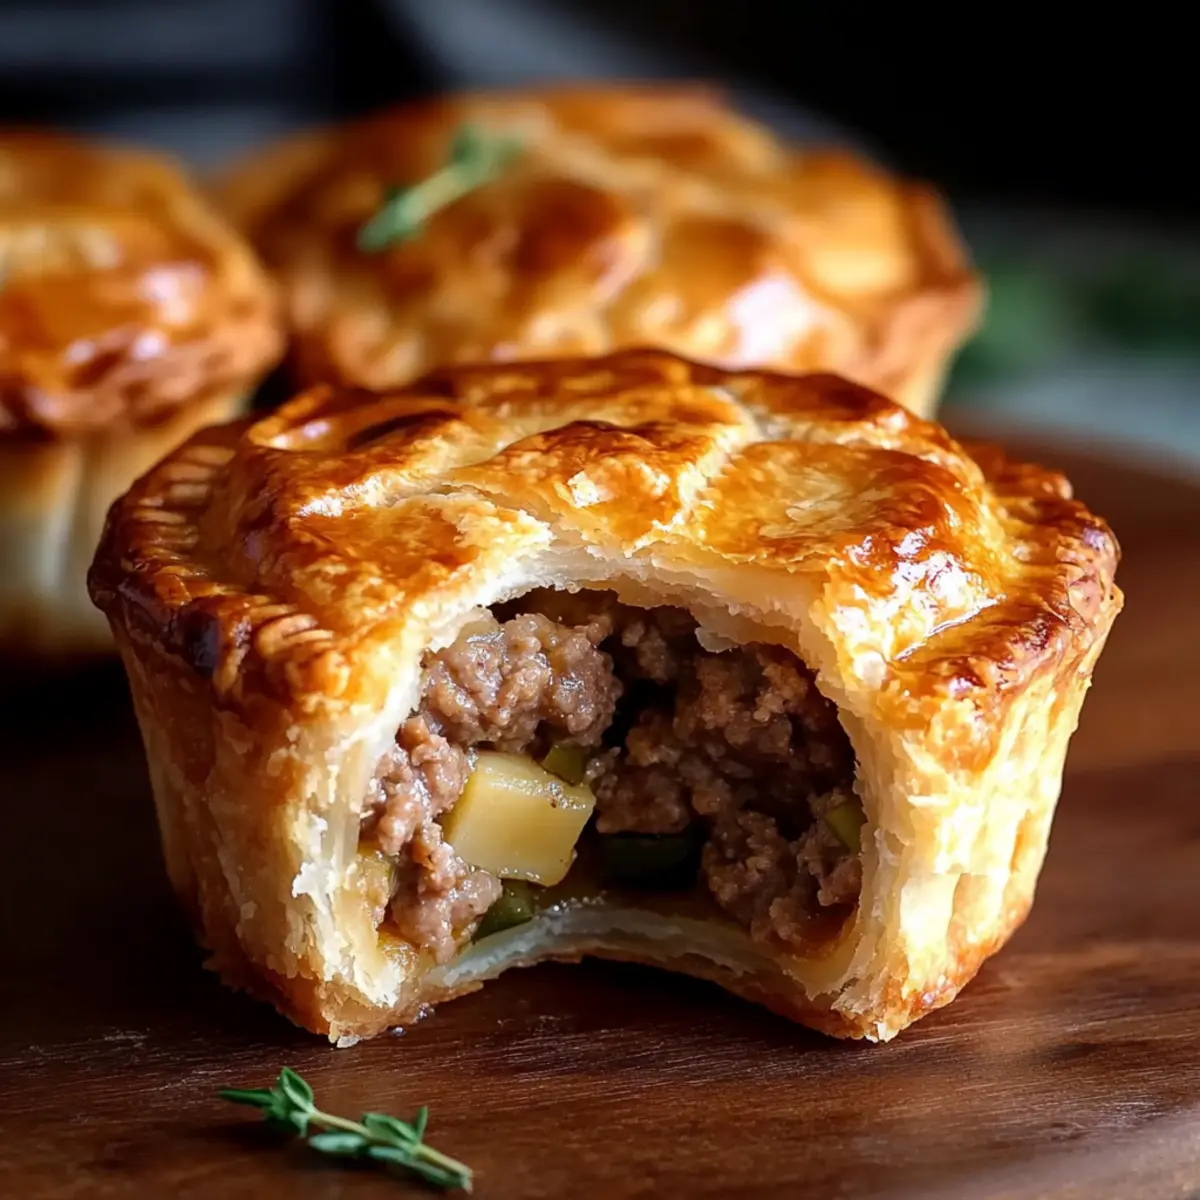
At a bustling potluck, I overheard someone exclaiming how these delightful muffin tin meat pies were the hit of the evening! With their golden, flaky crusts and savory fillings, it’s no wonder they quickly became the star of the show. My easy Muffin Tin Meat Pies bring a cozy twist to comfort food, combining rich flavors and convenience so you can whip them up on the busiest of weeknights. These tasty morsels aren’t just easy to make; they’re also freezer-friendly and versatile, allowing you to explore fun variations like Cheesy BBQ or Spicy Taco. Whether you’re hosting a gathering or need a quick meal for the week, these pies have you covered. Ready to delight your family with a flavorful surprise? Let’s dive into this scrumptious recipe!
Why are Muffin Tin Meat Pies a must-try?
Convenient and Easy: These Muffin Tin Meat Pies are perfect for busy weeknights, allowing you to enjoy a homemade meal in no time.
Versatile Flavor Options: Explore a variety of flavor combinations like Cheesy BBQ or Italian, making it easy to please everyone at the table.
Freezer-Friendly: Batch-cook these pies and pop them in the freezer for quick meals whenever you need them.
Crowd-Pleasing Appeal: Whether it’s a potluck or family dinner, these little treats steal the show and receive rave reviews every time!
Perfect for Leftovers: Use whatever proteins and veggies you have on hand, making this recipe a fantastic way to reduce food waste.
Ready to get cooking? Don’t forget to check out these delicious Pancake Muffins Bites and Chicken Noodle Soup for more easy, comforting recipes!
Muffin Tin Meat Pie Ingredients
For the Filling
• Ground Beef – The main protein source; lean ground beef keeps it rich without excess grease.
• Onion – Finely diced for sweetness; yellow or white onions add depth of flavor.
• Garlic – Fresh minced garlic brings comforting aroma; garlic powder works as an alternative.
• Worcestershire Sauce – Deepens the umami flavor, enhancing the savory filling.
• Tomato Paste – Thickens the filling and provides a rich base for your muffin tin meat pies.
• Frozen Mixed Vegetables – Adds color, nutrition, and texture; fresh diced veggies can be used as a substitute.
• Shredded Cheddar Cheese – Creates a melty, cheesy filling loved by all; sharp cheddar will give the most flavor.
• Salt and Pepper – Essential for balancing and enhancing flavors.
• Paprika – Adds a hint of smoky warmth, lifting the overall taste.
For the Crust
• Refrigerated Pie Crusts – Store-bought for convenience; feel free to use homemade versions for a personal touch.
• Egg (for brushing) – Gives a beautiful golden finish to the crust when baked.
Get ready to savor the warm, delectable experience of Muffin Tin Meat Pies! Perfect for gatherings or a cozy dinner at home, these savory bites won’t disappoint.
Step‑by‑Step Instructions for Muffin Tin Meat Pies
Step 1: Preheat and Prepare
Begin by preheating your oven to 375°F (190°C). While the oven warms up, take a moment to grease a 12-cup muffin tin generously with cooking spray or butter, ensuring each cup is well-coated to prevent sticking. This key step sets the stage for your delicious Muffin Tin Meat Pies to bake to perfection.
Step 2: Prepare the Crust
Roll out the refrigerated pie crusts on a lightly floured surface. Using a round cutter or a glass, cut out circles that are about 4 inches in diameter. Carefully press these rounds into the greased muffin tin, shaping them to fit snugly in each cup. The crust should slightly rise above the edges of the tin, ready to hold in the mouthwatering filling.
Step 3: Sauté the Aromatics
In a large skillet, heat a tablespoon of olive oil over medium heat. Add the finely diced onion and sauté for 2–3 minutes until it becomes translucent and fragrant. Then, stir in the minced garlic, cooking for an additional minute until it softens and releases its comforting aroma. This aromatic base will enhance the flavors of your Muffin Tin Meat Pies.
Step 4: Brown the Meat
Add the ground beef to the skillet, breaking it apart with a spatula. Cook for about 5–7 minutes until browned and no longer pink. Once cooked, drain any excess grease from the skillet to keep your filling rich but not greasy. This step helps ensure that your savory muffins are both delicious and not overly oily.
Step 5: Combine Filling Ingredients
Stir in the tomato paste, Worcestershire sauce, and season generously with salt, pepper, and paprika. Continue to cook for 2–3 minutes, allowing the flavors to meld together beautifully. The filling should begin to thicken slightly, creating a rich, savory base for your Muffin Tin Meat Pies.
Step 6: Thicken and Add Vegetables
In a small bowl, mix cornstarch with a bit of water to form a slurry. Stir this mixture into the beef mixture, cooking for an additional minute until the filling thickens. Next, fold in the frozen mixed vegetables, cooking briefly until they’re heated through. This colorful addition not only enhances nutrition but also makes your pies visually appealing.
Step 7: Fill the Pie Shells
Using a spoon, generously fill each pie shell with the beef and vegetable mixture. Be careful not to overfill, as this can cause spilling during baking! Top each filling with a sprinkle of shredded cheddar cheese, allowing it to melt beautifully as the pies bake, creating a delicious cheesy layer.
Step 8: Seal the Pies
With the leftover dough, use a smaller cutter to cut out rounds or create strips to top each filled pie. Gently place these over the cheese and use your fingers to pinch or fork the edges closed, creating a sealed crust. Cut a small slit in the top of each pie to allow steam to escape, ensuring a perfect bake.
Step 9: Bake to Golden Perfection
Brush the tops of the muffin tin meat pies with a beaten egg, giving them a beautiful golden hue while they bake. Place the muffin tin in the preheated oven and bake for 22–25 minutes, or until the crusts are golden brown and flaky. The enticing aroma will fill your kitchen, signaling that your delightful pies are nearly ready!
Step 10: Cool and Serve
Once baked, remove the muffin tin from the oven and let the pies cool for about 5 minutes. This cooling period allows the filling to set slightly, making them easier to remove. Carefully lift each Muffin Tin Meat Pie from its cup and serve them warm, allowing everyone to enjoy these comforting bites of flavor!
What to Serve with Muffin Tin Meat Pies
Pairing delicious sides with your savory meat pies elevates the entire meal experience, creating a comforting feast that warms the heart.
-
Creamy Mashed Potatoes: The buttery richness of mashed potatoes perfectly complements the savory filling, making every bite feel indulgent.
-
Crisp Garden Salad: A light and fresh salad packed with greens and crunchy veggies cleanses the palate and adds a refreshing contrast to the hearty pies.
-
Roasted Vegetables: Seasoned and caramelized, their natural sweetness and smoky flavors enhance the savory notes of the meat pies, bringing warmth to your plate.
-
Garlic Breadsticks: The buttery, garlicky flavors of breadsticks make for a delightful addition, perfect for savoring each last bite of filling.
-
Coleslaw: A tangy, crunchy slaw brightens up the meal. Its acidity balances the richness of the pies while adding a delightful crunch!
-
Herbed Quinoa: Nutty and fluffy quinoa, seasoned with fresh herbs, adds a wholesome touch, bringing additional texture and nutrients alongside your Muffin Tin Meat Pies.
-
Apple Crisp: For dessert, a warm apple crisp with a scoop of vanilla ice cream provides a perfect sweet ending, balancing out the savory flavors of your meal.
Storage Tips for Muffin Tin Meat Pies
Fridge: Store baked Muffin Tin Meat Pies in an airtight container for up to 4 days. This keeps them fresh and ready for quick reheating!
Freezer: Freeze individual pies in freezer-safe bags or containers for up to 3 months. Label them with the date for your convenience.
Reheating: For the best taste and texture, reheat the frozen pies in a 350°F (175°C) oven for about 15–20 minutes. This restores their crispy crust and warm filling.
Prepare Ahead: You can make the meat filling in advance and assemble the pies when ready to bake. This saves time and makes dinner planning a breeze!
Expert Tips for Muffin Tin Meat Pies
-
Chop the Onion Finely: This enhances sweetness and avoids large chunks, ensuring a smooth filling for your Muffin Tin Meat Pies.
-
Don’t Overfill: Be cautious with the filling to prevent spills during baking. An ideal filling will stay neatly within the crust.
-
Experiment with Herbs: Boost flavor by adding fresh herbs like thyme or rosemary, or a dash of hot sauce for a kick!
-
Consider Crust Alternatives: For a healthier option, try zucchini strips instead of crust. This creates a low-carb version of Muffin Tin Meat Pies without sacrificing taste.
-
Cool Before Serving: Let the pies cool for 5 minutes after baking. This helps the filling set for easier removal from the muffin tin.
Make Ahead Options
These Muffin Tin Meat Pies are perfect for meal prep enthusiasts! You can prepare the filling up to 3 days in advance, making your busy weeknights a breeze. Simply cook your beef and vegetable mixture, allow it to cool, and store it in an airtight container in the refrigerator. You can also cut your pie crusts and place them in the muffin tin ahead of time, covering with plastic wrap to maintain freshness. When you’re ready to serve, simply fill the crusts with the prepared filling, top with cheese, and bake as instructed. This way, you’ll have delicious, homemade Muffin Tin Meat Pies with minimal effort, just as tasty as if made fresh that day!
Muffin Tin Meat Pies Variations & Substitutions
Get ready to personalize your muffin tin meat pies with these delightful twists that will ignite your taste buds!
-
Cheesy BBQ: Swap in your favorite barbecue sauce along with smoked cheddar for a tangy, smoky flavor.
-
Chicken Pot Pie Style: Use shredded chicken paired with cream of chicken soup for a cozy, comforting twist that warms the soul.
-
Low Carb: Replace the pie crust with thinly sliced zucchini for a light and healthy alternative without sacrificing flavor.
-
Spicy Taco: Add taco seasoning and pepper jack cheese for a zesty kick that transforms your pies into a fiesta of flavor!
-
Italian Meat Pies: Stir in marinara sauce and mozzarella cheese to elevate your pies with Italian flair that everyone will love.
-
Breakfast Style: Fill with crumbled sausage, scrambled eggs, and cheddar for a hearty breakfast treat that’s perfect any time of day.
Feel free to play with the filling combinations! I’ve found that a touch of fresh herbs like thyme or basil can take them to the next level. And if you’re looking for more easy comfort recipes, don’t miss out on these delicious Roll Protein Muffins or a warm bowl of Chicken Noodle Soup—perfect add-ons to your cooking repertoire!

Muffin Tin Meat Pies Recipe FAQs
How do I choose ripe ingredients for my muffin tin meat pies?
Absolutely! When selecting your ingredients, opt for fresh, firm vegetables without any dark spots or bruises. For the ground beef, choose lean cuts to keep the filling rich yet not greasy. If you decide to use fresh vegetables instead of frozen, look for vibrant colors; for instance, bright peas and crisp carrots ensure quality flavor and nutrition.
What is the best way to store leftover muffin tin meat pies?
Very! Store any baked muffin tin meat pies in an airtight container in the refrigerator for up to 4 days. This helps maintain their freshness. You can also freeze individual pies wrapped in plastic wrap and placed in freezer-safe bags or containers for up to 3 months. Don’t forget to label them with the date for easy access!
Can I freeze muffin tin meat pies? If so, how?
Of course! To freeze, first let your baked muffin tin meat pies cool completely. Then, wrap each pie individually in plastic wrap and place them in a freezer-safe bag. They can be stored in the freezer for up to 3 months. When you’re ready to enjoy, simply reheat them in a 350°F (175°C) oven for about 15–20 minutes to restore that delectable texture!
What if my muffin tin meat pie filling is too runny?
Don’t worry! If your filling turns out runny, you can adjust it easily. Mix 1 tablespoon of cornstarch with 2 tablespoons of water to create a slurry. Add this to your filling mixture and cook it for an additional minute or two over medium heat until it thickens up. Another option is to let it simmer longer to reduce excess liquid.
Are muffin tin meat pies suitable for special diets?
Absolutely! Muffin tin meat pies can be made suitable for various dietary needs. For a gluten-free option, use gluten-free pie crusts or even zucchini slices as a crust alternative. If allergies are a concern, always check labels on prepared ingredients like Worcestershire sauce for potential allergens. You can modify the filling to cater to picky eaters, ensuring everyone can enjoy these delightful pies.
Muffin Tin Meat Pies That Will Transform Your Weeknight Dinners
Ingredients
Equipment
Method
- Preheat your oven to 375°F (190°C) and grease a 12-cup muffin tin.
- Roll out the refrigerated pie crusts and cut out circles about 4 inches in diameter, pressing them into the greased muffin tin.
- In a large skillet, heat olive oil over medium heat, sauté diced onion for 2-3 minutes, then add minced garlic and cook for another minute.
- Add ground beef, cook for 5-7 minutes until browned, then drain excess grease.
- Stir in tomato paste, Worcestershire sauce, and season with salt, pepper, and paprika, cooking for 2-3 minutes.
- Mix cornstarch with water to form a slurry, stir into the beef mixture to thicken, then fold in frozen mixed vegetables.
- Fill each pie shell with the beef and vegetable mixture, sprinkle cheese on top.
- Use leftover dough to cut rounds or strips, seal the pies, and cut a small slit on top for steam to escape.
- Brush tops with beaten egg and bake for 22-25 minutes until golden brown.
- Let pies cool for 5 minutes before removing from the tin to serve warm.
Leave a Reply