
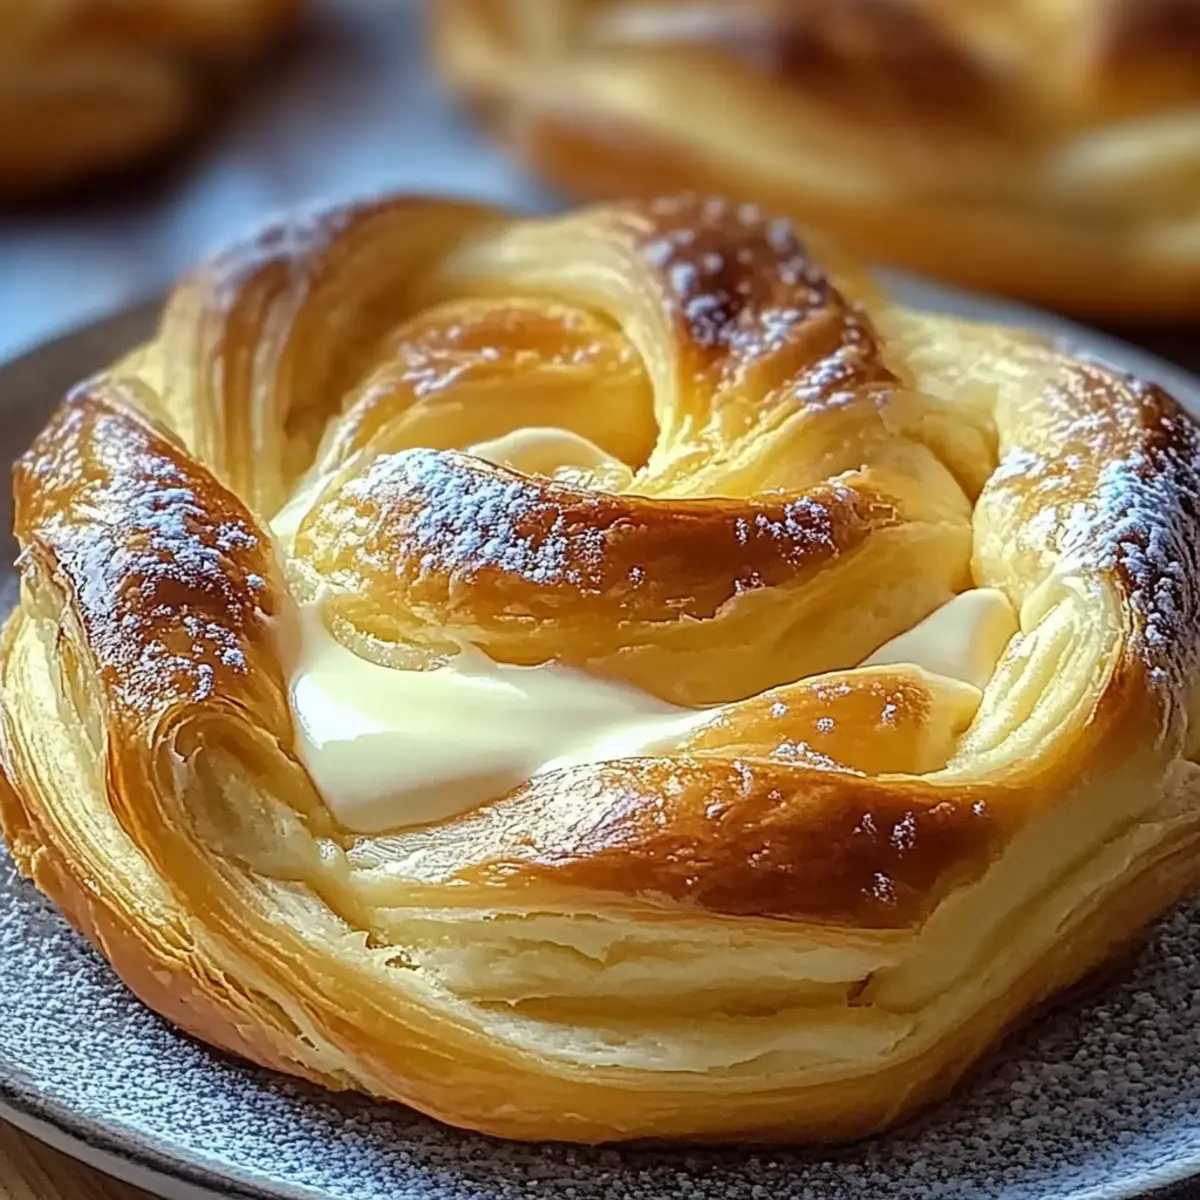
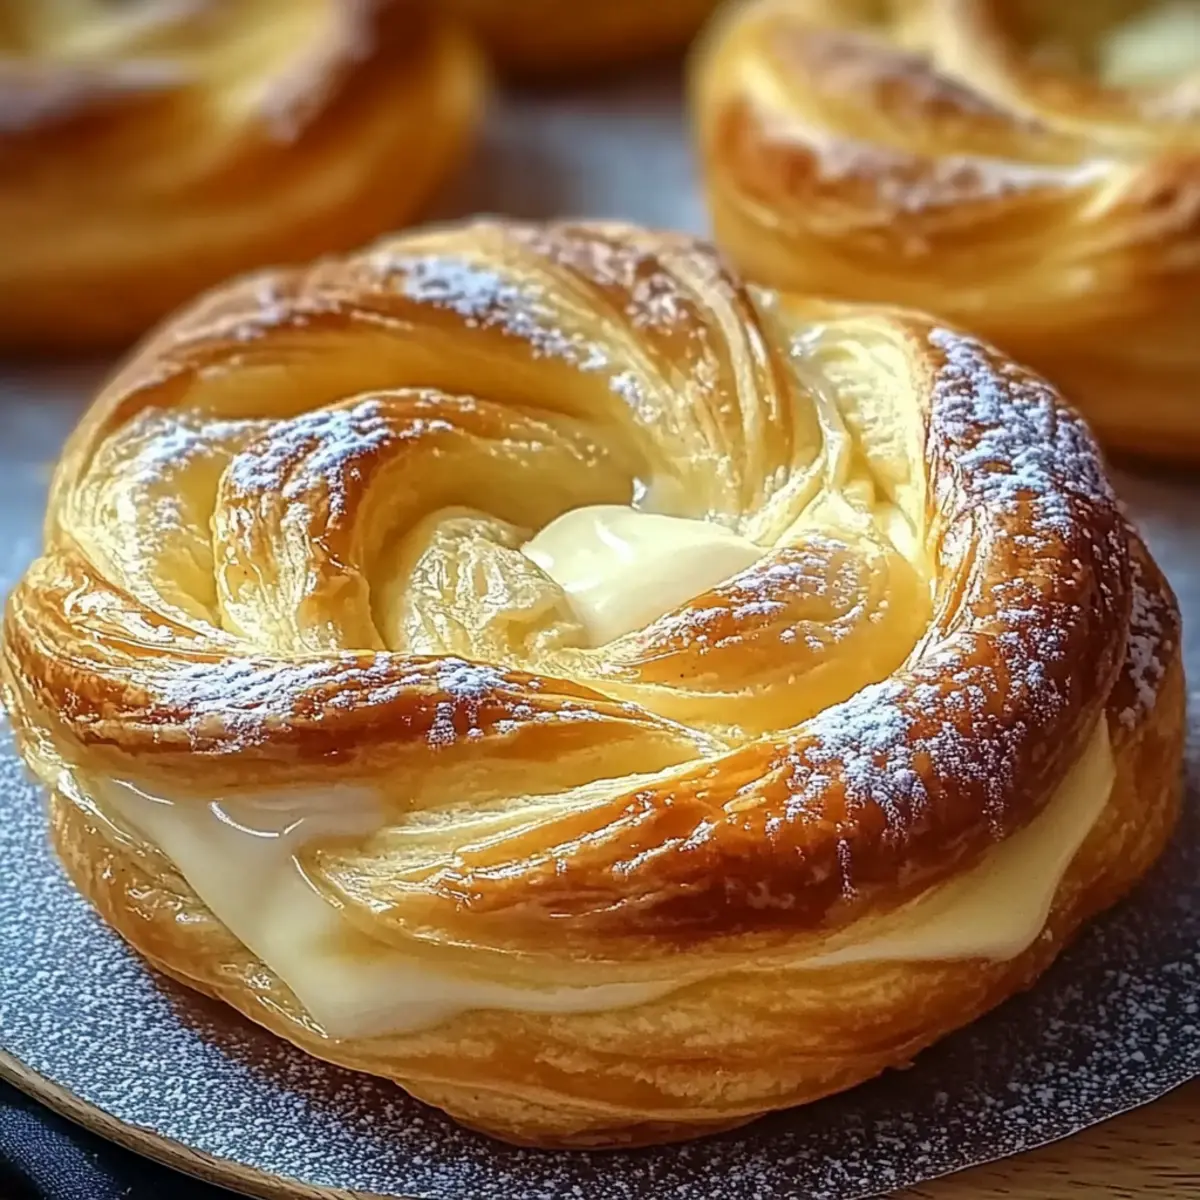
The sweet scent of freshly baked pastries wafting through the kitchen always takes me back to my childhood. This Heavenly Cheese Danish brings those cherished memories to life with its warm, buttery layers and a creamy filling that’s utterly irresistible. While many may shy away from baking, let me assure you, this recipe is not only approachable but also a guaranteed crowd-pleaser for brunch or cozy gatherings. The delightful twist of cinnamon and hint of maple syrup elevate this classic pastry to extraordinary heights. Imagine the joy of sharing these delicate danishes with loved ones, turning any ordinary day into a special occasion. Are you ready to create a little magic in your kitchen? Let’s dive into this wonderful recipe!
Why is this Cheese Danish a Must-Try?
Irresistible Aroma: The moment you take these Heavenly Cheese Danish out of the oven, your kitchen will be filled with an enchanting scent that beckons everyone to the table.
Homemade Wonder: Revel in the satisfaction of crafting these flaky pastries from scratch, bringing joy and warmth to your family.
Flavor Explosion: With a creamy, sweet filling perfectly balanced by hints of cinnamon and maple syrup, every bite is a delightful surprise.
Easily Customizable: Want a twist? Add your favorite fruit preserves or experiment with spices to create your own signature version, similar to my lovely Apple Grilled Cheese!
Crowd-Pleasing Delight: Perfect for brunch or cozy gatherings, these danishes are guaranteed to charm both family and friends alike!
Time-Friendly: This recipe is designed to fit into your busy schedule, making it easy to chill the dough and bake when you’re ready to showcase your baking skills!
Heavenly Cheese Danish Ingredients
For the Dough
• Active Dry Yeast – Essential for leavening, ensure it’s freshly activated (foamy in warm water).
• Warm Water – Activates the yeast; remember to heat it to 110° to 115°F.
• All-Purpose Flour – The backbone of your pastry, providing structure.
• Granulated Sugar – Sweetens the dough to balance the flavors.
• Salt – Enhances the overall taste and balances sweetness.
• Cold Butter – Vital for flakiness; cut into flour until it resembles coarse crumbs.
• 2% Milk – Hydrates the dough and helps in yeast activation.
• Egg Yolks – Adds richness to the pastry, making it delightful.
For the Filling
• Ground Cinnamon – Infuses warm, aromatic notes into the pastry.
• Cream Cheese – The star filling that brings creamy texture and flavor; try substituting with vegan options if desired.
• Additional Sugar – Sweetens the cream cheese filling, enhancing the dish’s decadence.
For Assembly and Glaze
• Large Egg (Separated) – Used both in the filling and as an egg wash for that beautiful golden finish.
• Water – Thins the egg white for brushing and glazing.
• Maple Syrup – Brush on after baking for a sweet, glossy finish, truly making this a Heavenly Cheese Danish!
Step‑by‑Step Instructions for Heavenly Cheese Danish
Step 1: Activate Yeast
In a small bowl, combine active dry yeast with warm water heated to 110° to 115°F. Allow the mixture to sit for about 5 minutes until it becomes foamy, indicating that the yeast is active. This step is crucial for ensuring your Heavenly Cheese Danish rises beautifully and achieves that desirable flaky texture.
Step 2: Mix Dry Ingredients
In a large mixing bowl, whisk together all-purpose flour, granulated sugar, and salt until well combined. Next, cut in cold butter with a pastry cutter or your fingers until the mixture resembles coarse crumbs. This process helps to create the flakiness in the dough, which is essential for your Heavenly Cheese Danish.
Step 3: Form Dough
Stir in the milk, egg yolks, and the activated yeast mixture to the dry ingredients. Mix until just combined to form a soft, sticky dough. Be careful not to overmix, as this can lead to denser pastries. Cover the bowl with plastic wrap, and get ready to show off your skills with this Heavenly Cheese Danish!
Step 4: Chill
Refrigerate the covered dough for a minimum of 8 hours or up to 24 hours. Chilling the dough enhances the flavor and texture, allowing the buttery goodness to develop fully. When ready, the dough should be firm yet pliable, ready for shaping into delightful pastries.
Step 5: Portion Dough
Once chilled, punch down the dough gently to release any air bubbles. Divide it into four equal pieces on a lightly floured surface. Each portion will be rolled out separately to create your Heavenly Cheese Danish, making it easier to handle and shape into an elegant pastry.
Step 6: Shape Dough
Roll out each piece of dough into a rectangle approximately 9×4 inches in size. As you roll, sprinkle a bit of ground cinnamon over the surface to infuse each pastry with that warm, inviting aroma. Your Heavenly Cheese Danish will soon take shape, enticing all who come near!
Step 7: Cut Strips
With a sharp knife or pizza cutter, slice each rectangle into four strips, each measuring about 9×1 inch. These strips will be twisted into beautiful shapes later, transforming your dough into elegant coils that will cradle the creamy filling.
Step 8: Twist Dough
Take each strip and twist it gently, creating a spiral effect. Then, coil each twisted strip loosely, tucking the ends beneath to create a secure seal. This twisting motion not only adds flair but also invites air to lift your Heavenly Cheese Danish as it bakes.
Step 9: Prepare Filling
In a separate bowl, beat together cream cheese, additional sugar, and the separated egg yolk until smooth and creamy. This filling will bring a rich, luscious center to your Heavenly Cheese Danish, balancing the pastry’s flakiness with its delightful sweetness.
Step 10: Fill Pastries
Once your coils are shaped, create a small indent in the center of each pastry and spoon in the cream cheese filling, avoiding overflow. This will ensure that each bite is filled with the heavenly creamy goodness it deserves, making your Heavenly Cheese Danish unforgettable.
Step 11: Rise
Cover the filled pastries loosely with a clean kitchen towel and allow them to rise until doubled in size, approximately 45 minutes. This rising time is essential to achieve that airy, flaky texture, so be patient as your Heavenly Cheese Danish develops its shape.
Step 12: Preheat Oven
While the pastries are rising, preheat your oven to 350°F. This temperature is perfect for creating golden-brown, flaky layers in your Heavenly Cheese Danish. Make sure your oven is fully preheated before baking for the best results!
Step 13: Egg Wash
In a small bowl, beat the egg white with a splash of water to create a simple egg wash. Gently brush this mixture over the risen pastries, ensuring they are evenly coated for that appealing golden finish that will make your Heavenly Cheese Danish shine.
Step 14: Bake
Place the pastries in the preheated oven and bake for 15-20 minutes, or until they are golden brown and your kitchen fills with wonderful aromas. The heavenly transformation of dough to pastry is truly something magical, so watch them closely towards the end of baking.
Step 15: Glaze
As soon as the Heavenly Cheese Danish are out of the oven, brush them with warm maple syrup for a glossy finish. This sweet glaze not only adds flavor but also enhances the visual appeal of your pastries. Indulge in the delightful experience of enjoying your freshly baked treats!

Heavenly Cheese Danish Variations
Embrace your culinary creativity with these delicious twists on the classic Heavenly Cheese Danish, making each batch uniquely yours.
-
Dairy-Free: Swap cream cheese for vegan cream cheese or ricotta for a lighter filling. This change allows for the same creamy satisfaction with a completely different texture.
-
Fruit-Filled Bliss: Add a dollop of fruit preserves or fresh fruit, such as blueberries or cherries, to the cream cheese filling for vibrant flavor bursts. The sweet acidity from the fruit perfectly complements the rich filling.
-
More Spice: Experiment with spices like nutmeg or cardamom in the dough or filling to add an exotic twist. Each spice brings a different warmth, taking your danish to another level of flavor sophistication.
-
Chocolate Lovers: Incorporate mini chocolate chips into the cream cheese filling for a decadent double delight. Imagine the rich flavor of melted chocolate mingling with the tangy cream cheese—a match made in dessert heaven!
-
Maple-Apple Infusion: Mix in finely chopped apples and a splash of maple syrup into the filling for a sweet, comforting flavor reminiscent of apple pie. This variation creates a warm, cozy essence that’s perfect for fall gatherings.
-
Nutty Crunch: Add chopped nuts, like pecans or almonds, to the filling for a delightful texture twist. The crunch adds an unexpected element that elevates every bite of this flaky pastry.
-
Zesty Lemon: Introduce fresh lemon zest to the cream cheese filling for a refreshing bright note. The citrusy zing will dance on your palate, making the danish feel even more indulgent.
-
Savory Option: For a savory take, try incorporating herbs like dill or chives with the cream cheese to create an elegant appetizer. Pair with a crisp salad for a wonderful brunch-friendly dish.
With these variations, you can savor the warm, inviting flavors of your homemade danishes time and time again. For more delightful recipes, you might enjoy my Cottage Cheese Chocolate or a comforting bowl of Cream Cheese Chicken!
Expert Tips for Heavenly Cheese Danish
-
Yeast Check: Ensure your yeast is fresh and activate it properly to create a light, airy texture in your Heavenly Cheese Danish. Look for foam after mixing it with warm water.
-
Chill Time Matters: Refrigerate the dough for at least 8 hours. Chilling enhances the flavor and flakiness, making your danishes even more delectable.
-
Proper Rising: Allow the filled pastries to rise until doubled in size. Rushing this step can lead to denser pastries; be patient for that perfect fluffiness.
-
Egg Wash Importance: Always use an egg white wash for a beautiful, golden finish. This not only enhances appearance but also adds a slight shine to your Heavenly Cheese Danish.
-
Flavor Variations: Don’t hesitate to customize your filling! Adding vanilla extract or lemon zest can elevate the creamy goodness and create a unique flavor profile that everyone will love.
How to Store and Freeze Heavenly Cheese Danish
Fridge: Store your Heavenly Cheese Danish in an airtight container in the refrigerator for up to 5 days. Reheat in the microwave or oven to maintain their delightful texture.
Freezer: For longer storage, freeze the danishes individually wrapped in plastic wrap or aluminum foil for up to 3 months. Label with the date for easy tracking!
Reheating: To enjoy them warm, simply place the frozen danishes in the oven at 350°F for about 15-20 minutes. This will restore that freshly baked goodness!
Room Temperature: If you plan to eat them within a day, they can be kept at room temperature, but always cover them to prevent drying out.
Make Ahead Options
These Heavenly Cheese Danish are perfect for busy home cooks looking to save time without sacrificing flavor! You can prepare the dough up to 24 hours in advance; simply follow the initial steps of activating the yeast, mixing the dry ingredients, and forming the dough before letting it chill in the refrigerator. To keep them fresh, cover the dough tightly with plastic wrap. You can also prepare the cream cheese filling and store it in the fridge for up to 3 days. When you’re ready to serve your delightful pastries, simply shape, fill, let them rise for 45 minutes, and bake. Enjoy the ease of homemade bliss with minimal effort on the day of serving!
What to Serve with Heavenly Cheese Danish
Delight your family and friends by creating a memorable meal that pairs beautifully with these indulgent pastries.
-
Fresh Fruit Platter: A colorful assortment of seasonal fruits like berries and citrus brightens the table and complements the creamy filling perfectly. The natural sweetness of the fruit adds a refreshing contrast.
-
Fluffy Scrambled Eggs: The creamy richness of scrambled eggs balances the pastry’s sweet filling, creating a satisfying brunch experience. Serve with a sprinkle of herbs for extra flavor.
-
Hot Coffee or Tea: Pair your Heavenly Cheese Danish with a steaming cup of coffee or herbal tea. The warmth of the beverage highlights the comforting flavors of the pastry and enhances the overall enjoyment.
-
Greek Yogurt with Honey: A dollop of creamy yogurt drizzled with honey offers a tangy and sweet contrast to the danish, balancing indulgence with lightness. This combination makes for a delightful breakfast.
-
Maple Bacon: Add a savory touch with crispy, sweet maple bacon. The salty crunch of bacon makes for a delectable pairing, bringing out the maple syrup glaze on the danish.
-
Smoothies: Blend your favorite fruits and yogurt to create a refreshing smoothie that pairs well with the danish, adding a fruity, healthful element to the meal.
-
Spiced Chai Latte: For a cozy twist, serve a warm spiced chai latte. The aromatic spices will harmonize beautifully with the cinnamon in the Heavenly Cheese Danish, making for a delightful experience.
-
Vanilla Ice Cream: Surprise your guests by offering a scoop of vanilla ice cream alongside warm danishes. The melting ice cream creates a heavenly combination of textures and flavors that’s simply irresistible.

Heavenly Cheese Danish Recipe FAQs
How do I select the best cream cheese for my Heavenly Cheese Danish?
Absolutely! Choose a full-fat cream cheese for the filling as it provides the best texture and flavor. Make sure it’s softened to room temperature before mixing, ensuring a smooth and creamy filling that spreads easily.
What’s the best way to store my Heavenly Cheese Danish?
You can store your danishes in an airtight container in the refrigerator for up to 5 days. It’s important to reheat them in the oven or microwave before enjoying to regain that fresh, flaky texture.
Can I freeze Heavenly Cheese Danish?
Very! To freeze, individually wrap each danish tightly in plastic wrap or aluminum foil and place them in a freezer-safe bag. They can be stored for up to 3 months. When you’re ready to enjoy one, simply bake them from frozen at 350°F for about 15-20 minutes.
What should I do if my cheese filling is too runny?
If you find your cream cheese filling is too runny, you can add a tablespoon of cornstarch to thicken it. Mix well and allow it to chill in the refrigerator for about 30 minutes to firm it up before filling the danishes.
Can my pets have any of the Heavenly Cheese Danish?
I recommend keeping these danishes away from pets due to the sugar and butter content, which may upset their stomachs. Instead, consider making a pet-friendly treat just for them!
Is there a dairy-free option for my Heavenly Cheese Danish?
Yes! You can substitute cream cheese with a non-dairy alternative such as vegan cream cheese or homemade ricotta made from nuts. This will create a delicious, creamy filling that everyone can enjoy, regardless of dietary preferences.
Heavenly Cheese Danish: Flaky Pastry with Sweet Creamy Bliss
Ingredients
Equipment
Method
- In a small bowl, combine active dry yeast with warm water heated to 110° to 115°F. Allow to sit for about 5 minutes until foamy.
- In a large bowl, whisk together flour, sugar, and salt. Cut in cold butter until it resembles coarse crumbs.
- Stir in milk, egg yolks, and the yeast mixture to form a soft, sticky dough. Cover with plastic wrap.
- Refrigerate the dough for 8 to 24 hours to enhance flavor and texture.
- Punch down the dough and divide into four equal pieces on a floured surface.
- Roll each piece into a rectangle approximately 9×4 inches, sprinkling cinnamon over the surface.
- Cut each rectangle into four strips measuring about 9×1 inch.
- Twist each strip gently and coil them loosely, tucking the ends beneath.
- In a bowl, beat together cream cheese, additional sugar, and separated egg yolk until smooth.
- Create a small indent in each pastry and spoon in the cream cheese filling.
- Cover pastries with a kitchen towel and let rise until doubled in size, about 45 minutes.
- Preheat the oven to 350°F while the pastries are rising.
- Beat the egg white with water to create an egg wash and brush over pastries.
- Bake for 15-20 minutes until golden brown and fragrant.
- Brush warm pastries with maple syrup for a glossy finish.
Leave a Reply