
There’s something magical about Tex-Mex cuisine that always sparks joy, particularly when I whip up a batch of Easy Baked Chicken Chimichangas. With just 40 minutes from prep to plate, this recipe not only saves time on busy weeknights but also fills the kitchen with an irresistible aroma that beckons everyone to the table. Each golden, crispy chimichanga cradles a savory filling that you can customize with your choice of ingredients—perfect for accommodating meat lovers and vegetarians alike. Plus, they’re a delightful way to transform leftovers into a dish that feels like a warm hug! As I dive into these comforting bites, I can’t help but wonder: what’s your favorite way to make a Tex-Mex classic your own?
Why Make Baked Chicken Chimichangas?
Delicious Customization: You can easily swap ingredients like shredded chicken for ground beef or even add sautéed veggies, making it truly your own.
Quick Prep Time: With just 40 minutes from start to finish, these chimichangas fit perfectly into busy weeknights, getting everyone fed and happy.
Irresistible Aroma: As they bake, your kitchen will fill with mouthwatering Tex-Mex scents, drawing everyone in for a warm meal.
Crispy Perfection: Baking instead of frying gives you a guilt-free crispy texture without sacrificing flavor, offering a healthier choice you won’t feel bad about.
Versatile Leftovers: Got some leftovers? Transform them into a delicious chimichanga filling! Check out tips on how to use leftovers creatively in other meals.
Get ready to bring a Tex-Mex fiesta to your table with these easy, crowd-pleasing bites!
Baked Chicken Chimichangas Ingredients
For the Filling
• Cooked Shredded Chicken – The heart of the filling; swap for ground beef or shredded pork for a different twist.
• Refried Beans – These lend creaminess and stability; any brand or homemade will work beautifully.
• Salsa – Infuses zest into the filling; choose your favorite variety for a personal flair.
• Coriander – An optional spice that enhances flavor; substitute with cumin for a slightly different taste.
• Chili Powder – Adds depth and a classic Tex-Mex flavor; taco seasoning can work too!
• Shredded Cheese – Melts to a gooey perfection; a Mexican blend or Pepper Jack is highly recommended.
• Green Onions – Offers a mild onion flavor and fresh crunch; yellow onion can be used for more bite.
• Jalapeños – Adds a dash of heat; remember to remove seeds for a milder flavor.
For Assembly
• Flour Tortillas – Essential for holding the filling; choose large taco-sized for best results.
• Butter – Elevates flavor and ensures crispy perfection; you can use olive or avocado oil if preferred.
Prepare these simple ingredients to create your Baked Chicken Chimichangas, and enjoy the deliciousness that brings everyone to the table!
Step‑by‑Step Instructions for Baked Chicken Chimichangas
Step 1: Preheat the Oven
Start by preheating your oven to 400°F (200°C). This ensures that when you’re ready to bake your Baked Chicken Chimichangas, they’ll reach that perfect golden crispiness. Use an oven thermometer for accuracy, as a properly heated oven is crucial for achieving that delightful crunch.
Step 2: Prepare the Filling
In a large mixing bowl, combine the cooked shredded chicken, refried beans, salsa, coriander, chili powder, shredded cheese, green onions, and jalapeños. Mix everything together until well blended—this savory filling will be the heart of your chimichangas. You can customize the mixture with your favorite added spices if desired, enhancing the flavors even further.
Step 3: Assemble the Chimichangas
Lay your flour tortillas flat on a clean surface. Spoon a generous amount of the filling mixture into the center of each tortilla. Carefully fold the sides over the filling and then roll them up tightly from the bottom, ensuring the filling is secure inside. This careful assembly is key to making perfect Baked Chicken Chimichangas.
Step 4: Prepare for Baking
Place the assembled chimichangas seam-side down on a baking sheet lined with parchment paper for easy cleanup. This positioning helps them stay rolled as they bake. Brush the tops lightly with melted butter to enhance the flavor and achieve a beautiful golden brown color during baking.
Step 5: Bake Until Crispy
Slide the baking sheet into the preheated oven and bake the chimichangas for 15 minutes. After this initial time, flip each chimichanga over for even cooking, and continue baking for another 10 minutes. They’re ready when they appear crispy and golden brown, inviting you for a delicious meal.
Step 6: Cool and Serve
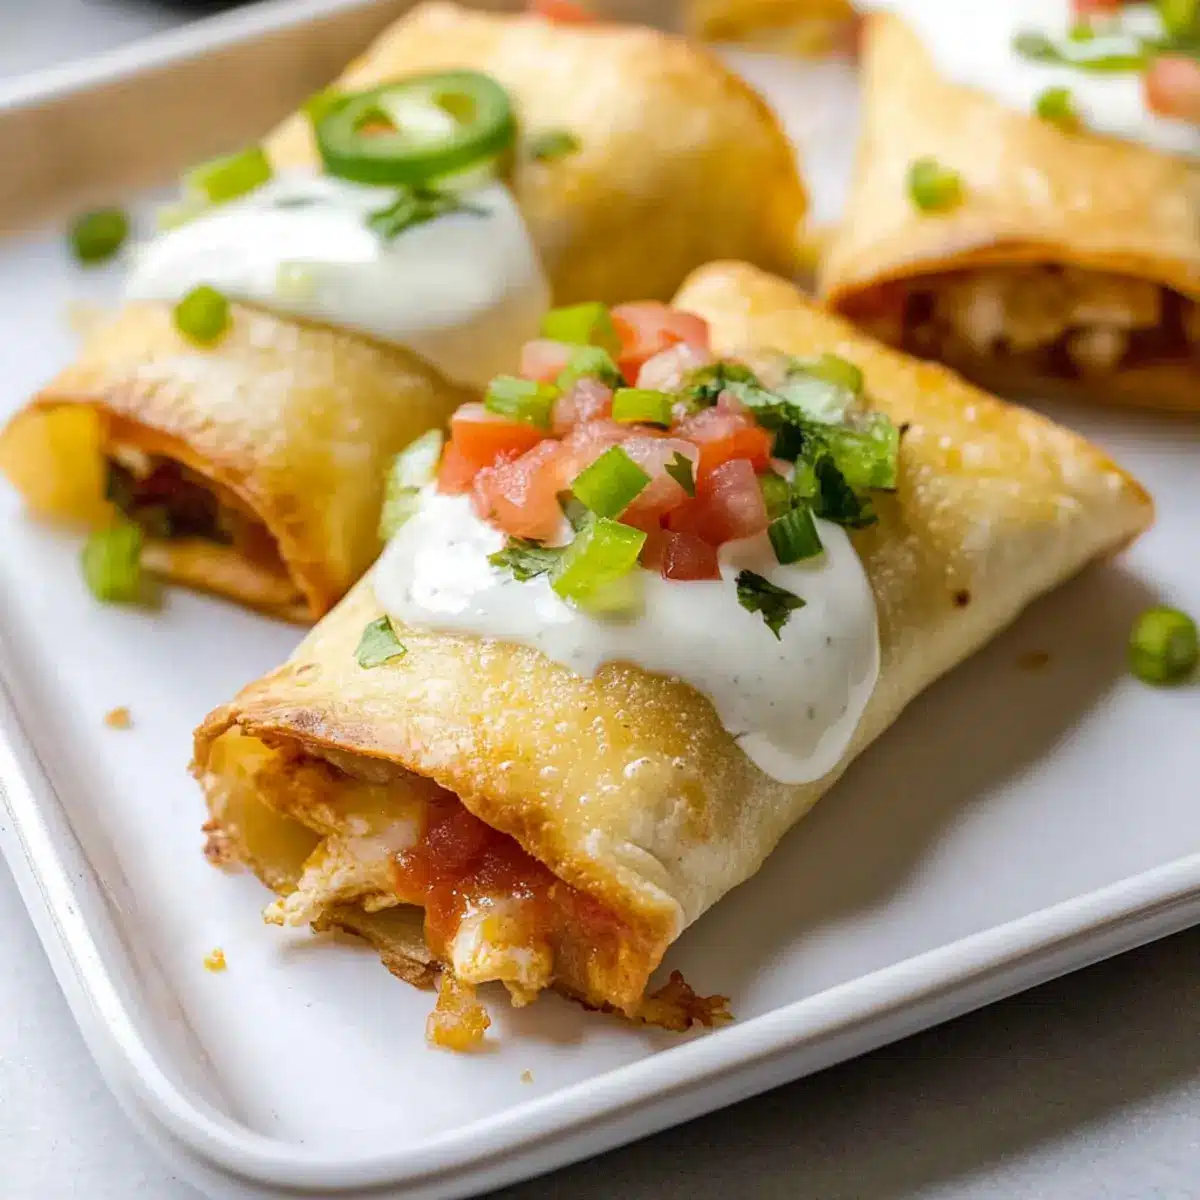
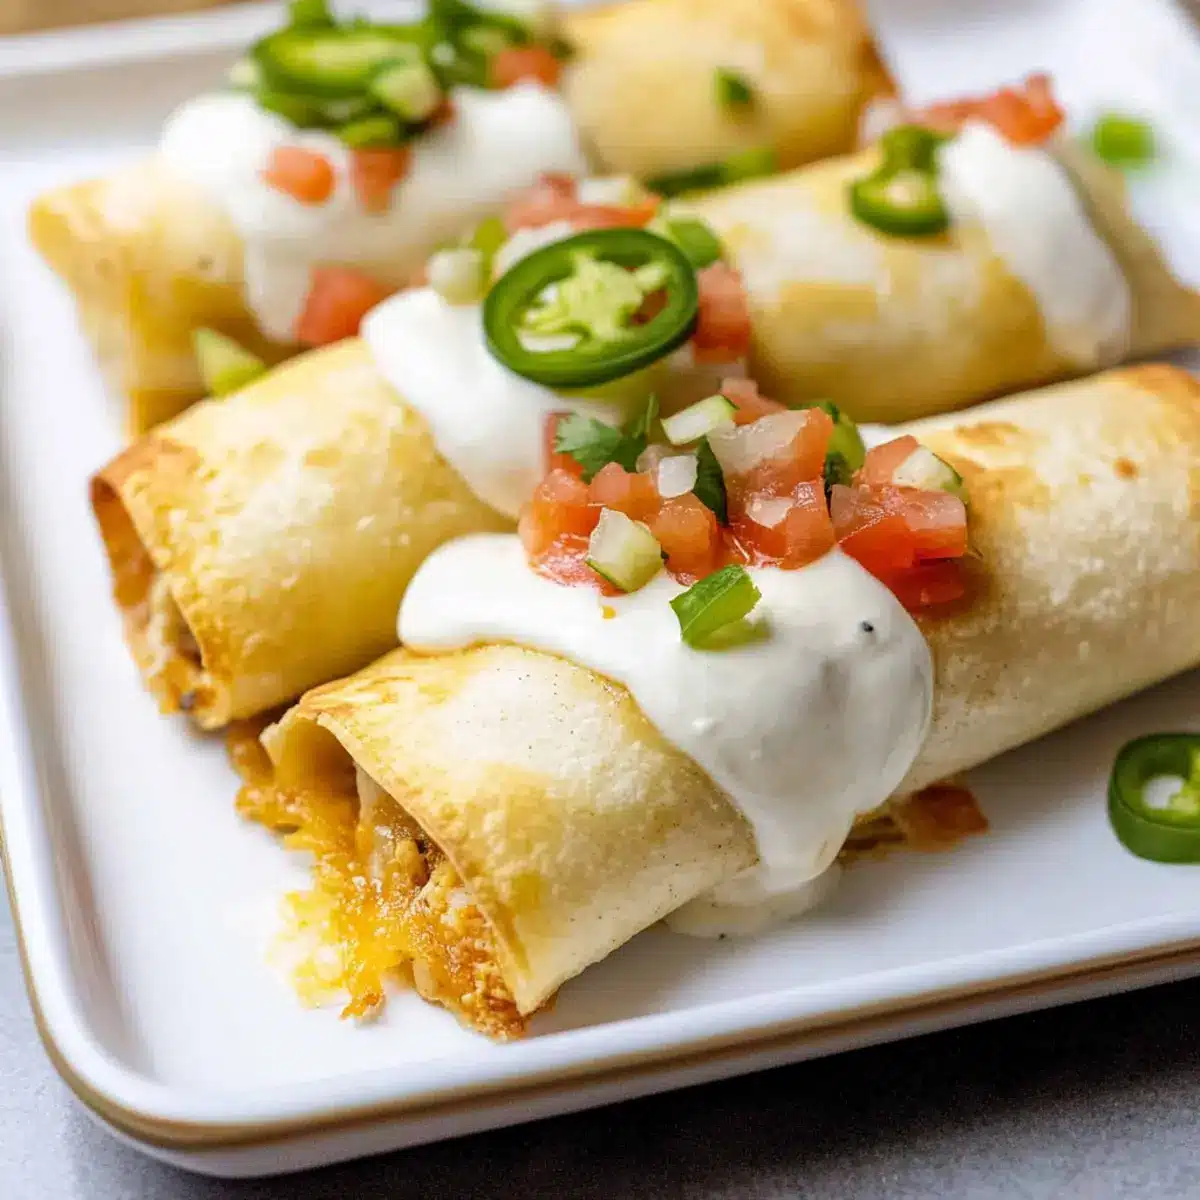
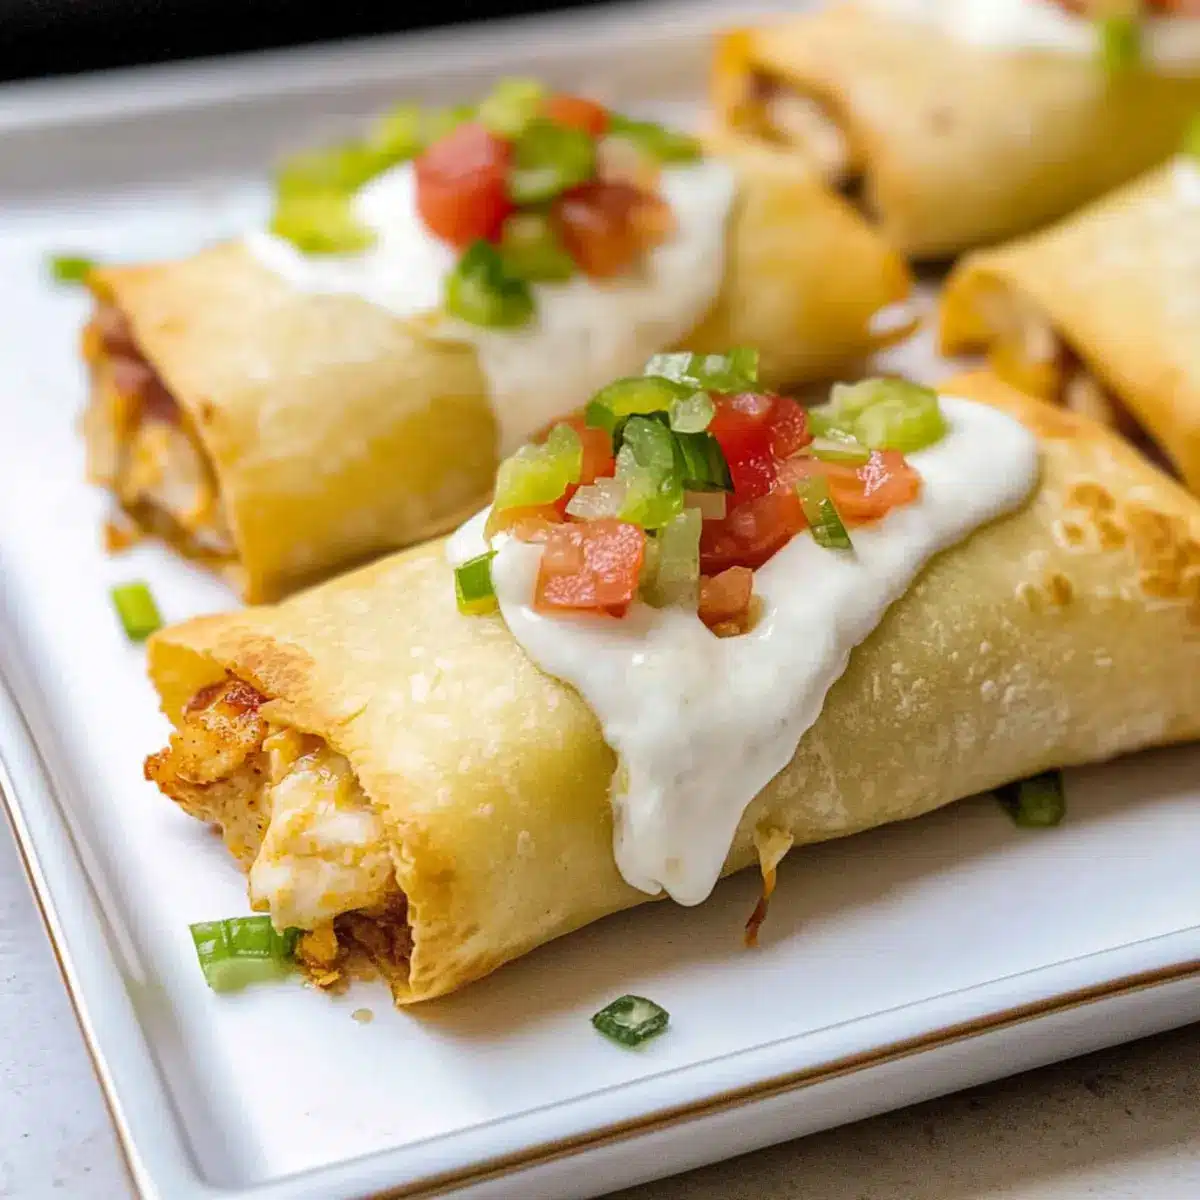
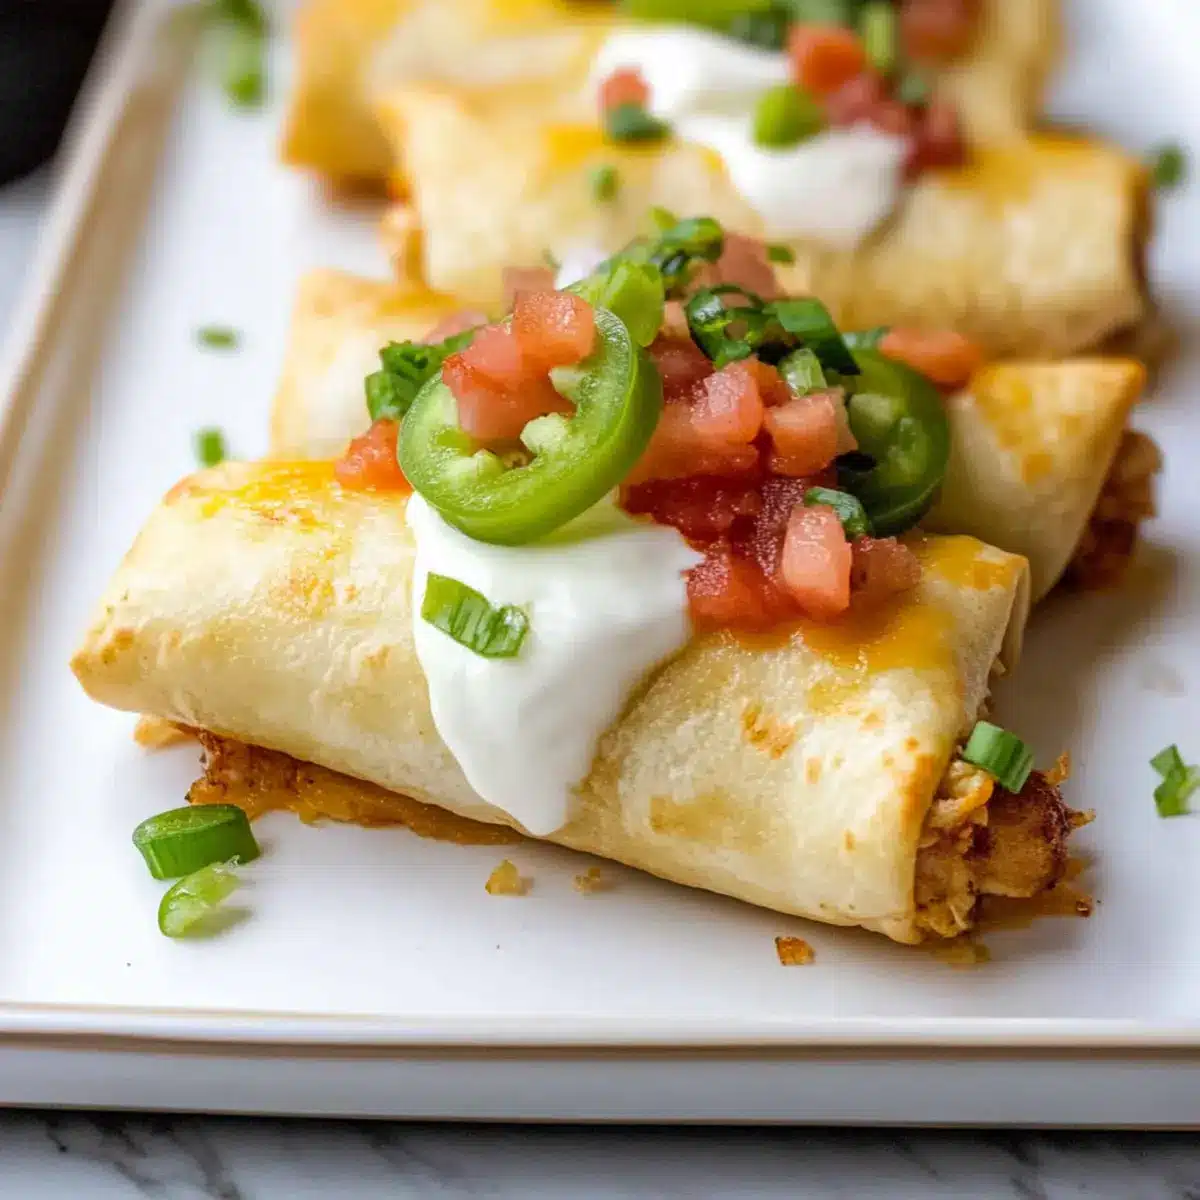
Once baked, remove the chimichangas from the oven and let them cool for 5-10 minutes on a wire rack. This resting time helps them set and prevents steam from making them soggy. Serve these Baked Chicken Chimichangas with your favorite toppings such as sour cream, guacamole, or pico de gallo for an irresistible Tex-Mex feast!
Expert Tips for Baked Chicken Chimichangas
-
Roll Tightly: Ensure your chimichangas are rolled tightly to prevent any filling from leaking during baking. This keeps your Baked Chicken Chimichangas beautifully intact!
-
Even Cooking: Flip the chimichangas halfway through baking for an even crispiness on both sides. This simple step makes a big difference in texture!
-
Prep Ahead: Assemble chimichangas a day in advance and refrigerate until ready to bake. This saves time on busy nights while still providing a fresh meal.
-
Choose the Right Tortillas: Use large flour tortillas for the best results. Corn tortillas can crack under pressure and won’t hold the filling well.
-
Crispy Finish: Brush with melted butter just before baking for that golden, crispy finish that makes these chimichangas irresistible.
-
Customize with Care: Feel free to substitute proteins or add veggies, but avoid overfilling to ensure they seal properly. This ensures your Baked Chicken Chimichangas are a delicious success!
What to Serve with Easy Baked Chicken Chimichangas
As you gather around the table, let the flavors of Tex-Mex delight lift your spirits and invite warm conversations.
- Creamy Guacamole: A smooth and avocado-rich dip that balances the crispy chimichangas with its creamy texture, enhancing every bite.
- Zesty Salsa Verde: The refreshing tang of this salsa adds brightness and a burst of flavor that complements the savory filling perfectly.
- Spanish Rice: Fluffy and seasoned rice adds substance to your meal, soaking up all the delicious drippings and making every forkful a party.
- Crisp Salad: A salad with fresh greens, tomatoes, and a zesty lime dressing brings a refreshing crunch and balances the heartiness of the chimichangas.
- Fragrant Cilantro-Lime Rice: This aromatic side features zesty flavors that harmonize beautifully with the chimichangas and round out a Tex-Mex feast.
- Chilled Mexican Beer: A crisp, cold beer serves as the perfect pairing, refreshing your palate while complementing the rich flavors of the meal.
- Classic Margarita: The tangy-sweet profile of this cocktail creates a delightful contrast to the chimichangas, adding a festive touch to your meal.
- Sweet Cinnamon Churros: For dessert, these sugary delights provide a warm and sweet ending to a savory meal, leaving a joyful sigh after each bite.
Every pairing here creates a delightful experience that highlights the scrumptiousness of baked chicken chimichangas while inviting everyone to linger just a little longer at the table.
Storage Tips for Baked Chicken Chimichangas
Fridge: Store leftover chimichangas in an airtight container in the refrigerator for up to 3 days to maintain their crispiness and flavor.
Freezer: For longer storage, freeze assembled but unbaked chimichangas, wrapping them individually in plastic wrap and then aluminum foil; they’ll be good for up to 3 months.
Reheating: When ready to enjoy, bake frozen chimichangas directly from the freezer at 400°F for about 20-25 minutes until heated through and crispy again, or air fry at 350°F for 10-12 minutes.
Keep Them Crispy: To retain that delightful crunch, recommend brushing with a little butter or oil before reheating; it enhances the flavor of your Baked Chicken Chimichangas and gives that crispy finish!
Baked Chicken Chimichangas Variations & Substitutions
Feel free to make these baked chicken chimichangas your own with a few simple swaps and tweaks!
-
Meat Swap: Replace shredded chicken with ground beef, shredded pork, or sautéed fajita veggies for a deliciously different flavor profile. Each choice brings a unique twist to the filling that can ignite curiosity and excitement at the dinner table.
-
Vegetarian Delight: For a vegetarian option, use black beans or an assortment of colorful sautéed vegetables. This way, everyone can savor the satisfying flavors that make Tex-Mex cuisine so beloved.
-
Cheese Fun: Experiment with different types of cheese, like Cotija or queso fresco, to give your chimichangas an unexpected creaminess and tang. The melting factor enhances the texture and makes each bite even more heavenly.
-
Spice Level: Dial up the heat by adding diced serrano peppers or an extra kick of chili powder. On the contrary, tone it down with sweet bell peppers for a mild version that’s family-friendly.
-
Crunchy Alternatives: Swap flour tortillas for whole wheat or spinach tortillas for a healthier twist. However, be cautious with corn tortillas as they tend to be more fragile—perfect for those looking for unique presentations!
-
Butter Alternatives: Use olive or avocado oil instead of butter for brushing if you’re looking for a dairy-free option. This minor adjustment will still achieve that golden, crispy finish everyone loves.
-
Flavor Enhancements: Add fresh herbs like cilantro or parsley into your filling for an extra burst of flavor that will bring balance and freshness to your chimichangas. Fresh herbs can elevate even the simplest dishes!
-
Saucy Options: Top your finished chimichangas with a drizzle of homemade queso or a dollop of sour cream mixed with lime juice for that extra zing. It’s a beautiful finishing touch that makes every bite a bit more indulgent.
These variations allow you to personalize each chimichanga to fit your family’s preferences, making dinner a joyful occasion. And if you’re looking to navigate through more delicious cooking ideas, be sure to discover helpful tips on using leftovers creatively!
Make Ahead Options
These Easy Baked Chicken Chimichangas are a fantastic meal prep option for busy cooks! You can prepare the filling (chicken, beans, salsa, and spices) up to 3 days in advance; simply mix and store it in an airtight container in the refrigerator to maintain its freshness. Additionally, you can assemble the chimichangas a day ahead, placing them seam-side down on a baking sheet and covering them with plastic wrap to keep them moist. When you’re ready to bake, remove the wrap, brush with butter, and bake at 400°F for 25 minutes, flipping halfway through. This allows you to enjoy deliciously crispy chimichangas with minimal effort, making your weeknight dinners seamlessly delicious!
Baked Chicken Chimichangas Recipe FAQs
How do I select the best chicken for Baked Chicken Chimichangas?
Absolutely! For the best flavor, use cooked shredded chicken from a rotisserie chicken or homemade. Look for chicken that is moist and tender without dark spots or an off smell. If using raw chicken, it’s essential to fully cook it before shredding. Ground beef or shredded pork can also be excellent substitutes with similar cooking methods.
How should I store leftover chimichangas?
Very! Store leftover Baked Chicken Chimichangas in an airtight container in the refrigerator for up to 3 days. If you want to keep them longer, consider freezing them. They are best frozen before baking. Just wrap each chimichanga individually in plastic wrap and then in aluminum foil to prevent freezer burn. They will last up to 3 months!
Can I freeze assembled chimichangas for meal prep?
Absolutely! To freeze unbaked Baked Chicken Chimichangas, follow these steps: After assembling them, wrap each chimichanga tightly in plastic wrap to prevent air exposure. Place wrapped chimichangas into a freezer-safe bag or container. When ready to bake, you can cook them directly from frozen—just add 5-10 extra minutes to the baking time, and for ultimate crispiness, brush the tops with some melted butter!
What should I do if my chimichangas are soggy?
The more the merrier! To avoid soggy chimichangas, ensure you’re not overfilling them and keep the seam side down when placing them on the baking sheet. If you encounter sogginess after baking, simply put them back in the oven for a few more minutes until they crisp up. For reheating leftovers, consider using an air fryer or an oven instead of a microwave to maintain the wonderful crunch.
Are Baked Chicken Chimichangas suitable for those with dietary restrictions?
Very! This recipe can easily accommodate dietary needs. For gluten-free options, use gluten-free tortillas. Vegetarians can substitute the chicken with black beans or a mix of sautéed peppers, zucchini, and corn. Always ensure to check your salsa, beans, and cheese for any allergens or additives that you might want to avoid.
How long does it take to cook Baked Chicken Chimichangas from frozen?
Of course! When cooking from frozen, preheat your oven to 400°F (200°C) and bake for 20-25 minutes. It’s essential to check if they are heated through and golden brown. A quick tip: brushing a bit of melted butter on top before baking can help achieve that deliciously crispy finish. Enjoy this handy process for your next busy weeknight meal!
Baked Chicken Chimichangas for Crispy Tex-Mex Cravings
Ingredients
Equipment
Method
- Preheat your oven to 400°F (200°C).
- In a mixing bowl, combine the cooked shredded chicken, refried beans, salsa, coriander, chili powder, shredded cheese, green onions, and jalapeños.
- Lay flour tortillas flat, spoon filling into the center, fold sides, and roll tightly.
- Place chimichangas seam-side down on a baking sheet lined with parchment paper.
- Brush tops lightly with melted butter.
- Bake for 15 minutes, flip, and continue baking for another 10 minutes until crispy.
- Let cool for 5-10 minutes before serving.
Leave a Reply