
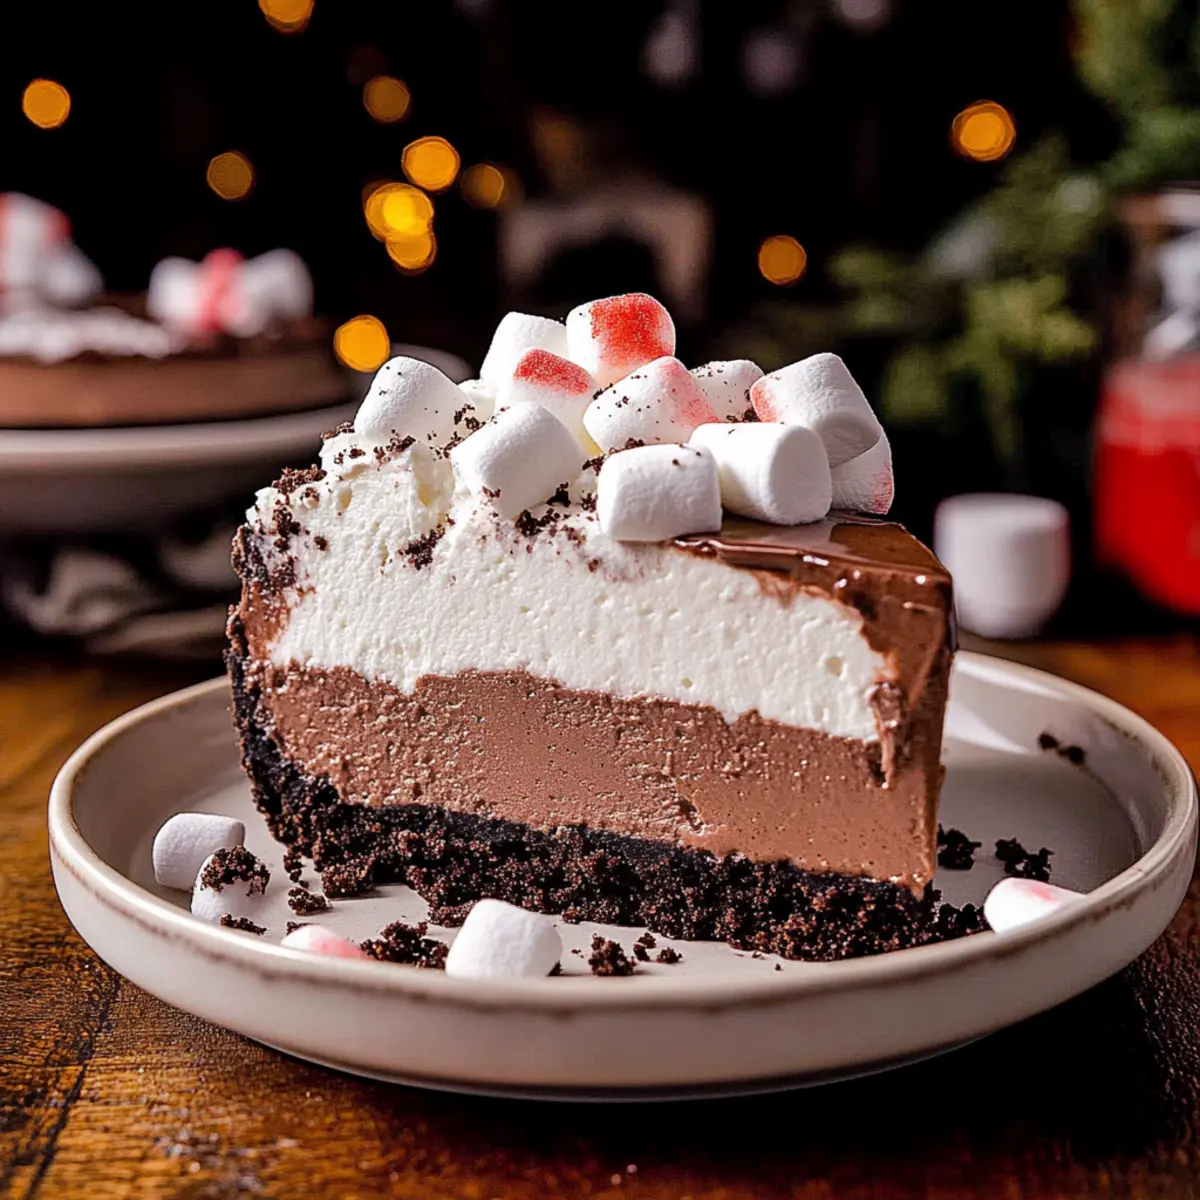
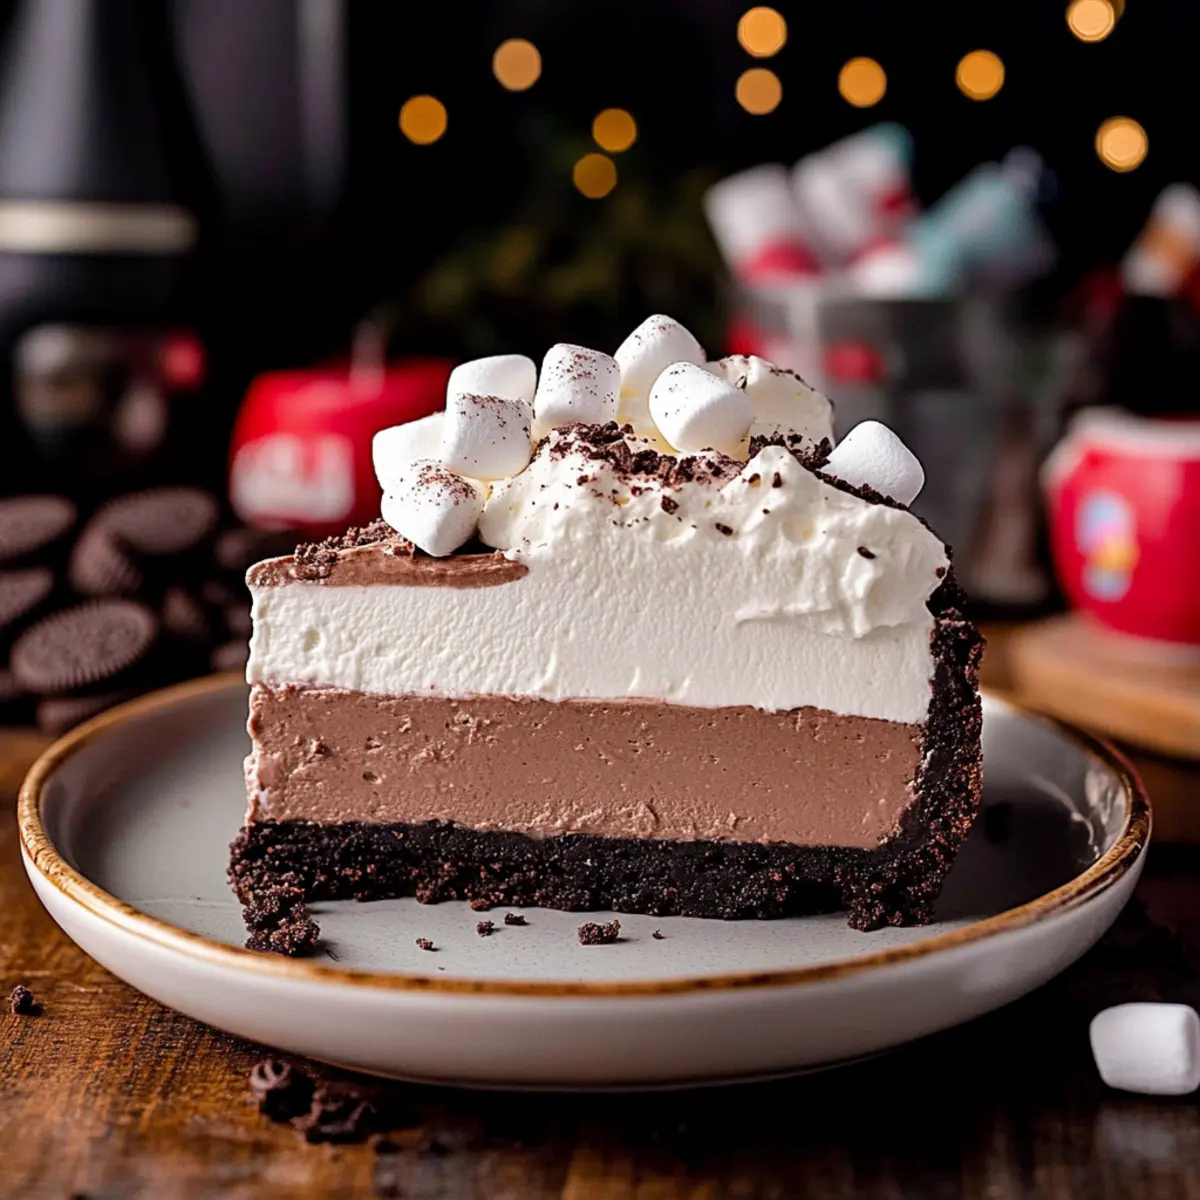
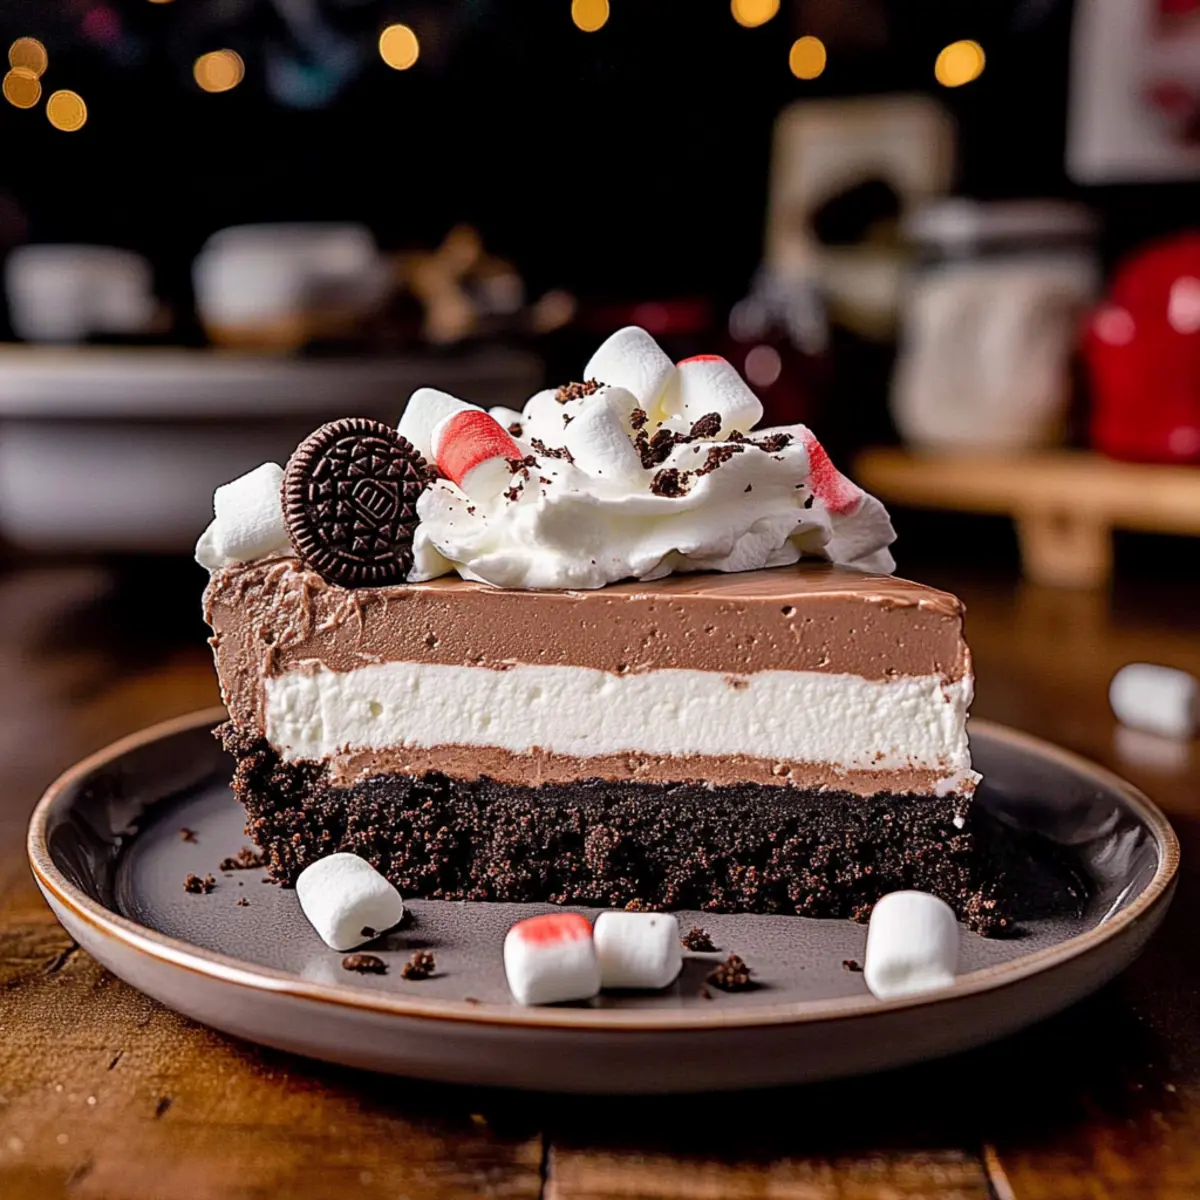
The aroma of rich chocolate wafting through the air can transform any room into a cozy haven, and there’s no better way to achieve that than with my Decadent Hot Chocolate Cheesecake. This delightful holiday dessert combines the indulgence of a creamy cheesecake with the familiar comforts of hot cocoa, all cradled in a crunchy Oreo crust. Not only does this treat please the eye with its velvety layers and fluffy whipped cream topping, but it also delights the palate with its unique and rich flavors, making it a perfect addition to your festive gatherings. Plus, it’s versatile enough to be adapted into mini cheesecakes or cheesecake bars for some fun and easy servings. Are you ready to whip up a slice of winter wonderland?
Why is Hot Chocolate Cheesecake a Must-Try?
Indulgent Flavor: Each slice boasts a rich, creamy filling that perfectly captures the essence of hot chocolate, evoking nostalgia for warm winter evenings.
Easy to Make: With straightforward steps and just a few key ingredients, even novice bakers can create this show-stopper.
Versatile Options: Whether you’re making a full cheesecake, mini versions, or even cheesecake bars, this recipe adapts easily to fit any occasion—try it as a delightful addition to your dessert table alongside Chocolate Chip Banana or Butter Bites Chocolate.
Crowd-Pleaser: Guaranteed to impress holiday guests, the combination of creamy layers and crunchy Oreo crust makes it a standout treat everyone will love.
Memorable Presentation: Topped with fluffy whipped cream and optional fun garnishes, it looks as good as it tastes, adding a festive touch to your gatherings.
Hot Chocolate Cheesecake Ingredients
For the Oreo Crust
- Crushed Oreos – Essential for a sweet and chocolatey base; substitute with chocolate wafer cookies if desired.
- Unsalted Butter – Binds the Oreo crumbs together, adding moisture; make sure it’s melted for the best consistency.
For the Cheesecake Filling
- Cream Cheese – Provides structure and creaminess; ensure it’s at room temperature for smooth mixing.
- Granulated Sugar – Sweetens the cheesecake; feel free to use coconut sugar for a healthier alternative.
- Hot Cocoa Mix – Infuses the cheesecake with a distinctive hot chocolate flavor; consider homemade cocoa mix for a unique twist.
- Unsweetened Cocoa Powder – Enhances the chocolate taste; Dutch-processed cocoa can offer a different flavor profile.
- Sour Cream – Adds tanginess and creaminess; Greek yogurt serves as a great substitute if needed.
- Heavy Cream – Contributes richness; half-and-half can be used in a pinch.
- Vanilla Extract – Elevates the overall flavor; opt for pure vanilla for the best results.
- Eggs – Provide structure and stability; make sure they’re at room temperature for a smooth batter.
For the Topping
- Whipped Cream – Lightens up the rich cheesecake; swap in coconut whipped cream for a non-dairy option.
- Powdered Sugar – Sweetens the whipped cream topping; you can use sugar substitutes for a healthier choice.
Unleash the comforting flavors of Hot Chocolate Cheesecake this holiday season, perfect for cozy gatherings or as an irresistible treat to share with friends and family!
Step‑by‑Step Instructions for Hot Chocolate Cheesecake
Step 1: Prepare the Crust
Preheat your oven to 325°F (163°C). In a mixing bowl, combine crushed Oreos with melted unsalted butter until the mixture resembles wet sand. Firmly press this mixture into the bottom of a 9-inch springform pan to form an even layer. Bake the crust in the preheated oven for 11 minutes, then remove and let it cool while you prepare the filling.
Step 2: Make the Filling
In a large mixing bowl, beat together room-temperature cream cheese and granulated sugar until the mixture is smooth and creamy, about 2-3 minutes. Gradually add in the hot cocoa mix, unsweetened cocoa powder, sour cream, heavy cream, and pure vanilla extract. Mix until well combined and creamy, ensuring there are no lumps for your hot chocolate cheesecake.
Step 3: Incorporate the Eggs
With the mixer on low speed, add the eggs one at a time to the cream cheese mixture, mixing just until incorporated after each addition. This gentle mixing helps maintain the cheesecake’s structure. After all the eggs are fully combined, scrape down the sides of the bowl to ensure everything is mixed evenly and smooth.
Step 4: Bake with Water Bath
Pour the creamy filling over the cooled Oreo crust, spreading it evenly. To prevent cracks, place the springform pan in a larger roasting pan and fill the outer pan with hot water halfway up the sides of the springform. Bake in the oven for 75-85 minutes, until the edges are set but the center still has a slight jiggle.
Step 5: Cooling Stage
When the cooking time is up, turn off the oven and crack the oven door ajar. Let the cheesecake cool in the oven for about 30 minutes, which helps prevent it from cracking due to sudden temperature changes. After cooling, transfer it to a wire rack to cool completely before refrigerating for at least 6 hours or, ideally, overnight.
Step 6: Whip Cream
Once your hot chocolate cheesecake is completely chilled, make the whipped cream topping. In a bowl, beat heavy cream, powdered sugar, and a splash of vanilla extract until medium peaks form. This should take about 3-5 minutes. Spread the fluffy whipped cream evenly over the chilled cheesecake, creating a lovely layer that complements the dessert perfectly.
Step 7: Garnish
To elevate your Hot Chocolate Cheesecake, decorate it with mini marshmallows, chocolate chips, or crushed candy canes for a festive touch. These garnishes not only add flavor but also make for a beautiful presentation, ensuring your dessert is the star of any holiday gathering!

Make Ahead Options
This creamy Hot Chocolate Cheesecake is ideal for meal prep and can save you valuable time during the busy holiday season! You can prepare the Oreo crust up to 3 days in advance; simply bake and cool it, then wrap it tightly in plastic wrap and store it in the fridge. The filling can also be made a day ahead; just keep it in an airtight container until you’re ready to bake. When you’re ready to enjoy, pour the filling over the crust and follow the baking instructions. Allow the cheesecake to chill for at least 6 hours or overnight to enhance its flavor and texture. With these make-ahead steps, you’ll have a show-stopping dessert that tastes just as delicious with minimal effort!
What to Serve with Decadent Hot Chocolate Cheesecake
The joy of indulging in a rich dessert is best enhanced when paired with delightful accompaniments that elevate the experience.
-
Rich Coffee: A cup of freshly brewed coffee brings out the chocolate notes, creating a comforting harmony that warms the soul on cold evenings.
-
Vanilla Ice Cream: The creamy sweetness of vanilla ice cream melts beautifully alongside the cheesecake, providing a delightful contrast to the rich, velvety texture.
-
Fresh Berries: Juicy raspberries or strawberries add a bright, tart flavor that cuts through the richness of the cheesecake, balancing each indulgent bite.
-
Nutty Biscotti: The crunchy texture of almond or hazelnut biscotti makes for a perfect companion; dip it into coffee for a delightful experience that enhances the dessert’s decadence.
-
Hot Cocoa: Embrace the hot chocolate theme by serving a cup of rich, homemade hot cocoa, garnished with marshmallows for a cozy, nostalgic feel.
-
Minty Mojito: For a refreshing twist, a mint mojito provides a cooling effect against the warm flavors of the dessert, ensuring a light finish to your meal.
-
Chocolate Drizzle: Drizzle extra melted chocolate over each slice for a luxurious touch. A simple addition that heightens the overall experience with luscious chocolate goodness!
-
Cheesecake Bars: Serve mini cheesecake bars alongside for guests who may want just a taste. These delightful bites keep the chocolate theme alive while offering a fun, shareable option.
Expert Tips for Hot Chocolate Cheesecake
-
Water Bath Magic: Use a water bath to bake your cheesecake. This essential step keeps it moist and prevents cracks, ensuring your hot chocolate cheesecake looks as good as it tastes.
-
Room Temperature Ingredients: Let all dairy ingredients reach room temperature before mixing. This creates a smoother batter and ensures even baking—no lumps allowed!
-
Chill for Perfection: Allow the cheesecake to cool thoroughly in the refrigerator for at least 6 hours, preferably overnight. This resting period enhances the flavor and texture, making slicing easier.
-
Neat Slices: Clean your knife between cuts to keep each slice tidy and beautiful. This small detail makes a world of difference when presenting your decadent dish.
-
Garnish with Joy: Get creative with your garnishes! Mini marshmallows, chocolate chips, or crushed candy canes add a festive flair that elevates your hot chocolate cheesecake to new heights.
Hot Chocolate Cheesecake Variations
Ready to make this heavenly dessert even more unique? Let your creativity soar with these delightful variations.
-
Mini Cheesecakes: Bake the batter in muffin tins for individual treats that are perfect for parties and portion control. They’re adorable and so much fun to serve!
-
Cheesecake Bars: Halve the recipe and pour it into an 8×8 pan for easy-to-slice dessert bars. These are great for potlucks or family gatherings and can be packed for on-the-go enjoyment.
-
Dairy-Free Option: Swap out cream cheese and whipped cream for vegan alternatives to create a dairy-free version without sacrificing creaminess. Coconut cream works wonders!
-
Flavored Twist: Add a splash of peppermint extract for a festive minty flavor, transforming your cheesecake into a holiday delight. Perfect for those cozy Christmas nights!
-
Nutty Addition: Stir in some crushed hazelnuts or walnuts into the filling for added texture and a nutty flavor that complements the chocolate beautifully. A little crunch takes it to another level!
-
Spiced Version: Enhance the warm flavors by adding cinnamon or a pinch of cayenne pepper to the filling. This unexpected twist will warm you from the inside out, making every bite exciting.
-
Chocolate Drizzle: Drizzle melted chocolate over your whipped cream topping for an extra decadent layer of chocolatey goodness. Who can ever resist more chocolate?
-
Garnish Variety: Experiment with different toppings like crumbled graham crackers or chocolate shavings for aesthetic appeal. Consider pairing it with warm drinks like Cottage Cheese Chocolate for a cozy combo.
Feel free to mix and match these ideas as you embark on your cheesecake-making adventure! Each twist brings new joy to this classic dessert, making it all the more memorable.
How to Store and Freeze Hot Chocolate Cheesecake
Fridge: Store leftovers in an airtight container in the refrigerator for up to 5 days. This helps maintain the cheesecake’s creamy texture while keeping it fresh.
Freezer: For longer storage, individual slices can be frozen for up to 30 days. Wrap each slice tightly in plastic wrap, then place in a freezer-safe bag to prevent freezer burn.
Thawing: To enjoy your frozen hot chocolate cheesecake, thaw in the refrigerator overnight before serving. This preserves its rich flavor and velvety texture.
Reheating: If you prefer it slightly warm, you can microwave a slice for about 10-15 seconds on low power, just to take the chill off without cooking it further.
Hot Chocolate Cheesecake Recipe FAQs
How do I select the best ingredients for my Hot Chocolate Cheesecake?
Absolutely! For the freshest cheesecake, look for room-temperature cream cheese—this ensures it’s smooth when mixed. Choose Oreos without any dark spots or damage for the crust; they’re key to a delicious, crunchy base. When picking cocoa products, opt for unsweetened cocoa powder that is fresh and rich, enhancing the chocolate flavor significantly.
What’s the best method for storing leftovers of my Hot Chocolate Cheesecake?
Very easy! After serving, store any leftover cheesecake in an airtight container in the refrigerator for up to 5 days. To maintain its creamy texture and delightful flavor, it’s important to cover it well. If you’re looking to keep it longer, wrap individual slices tightly in plastic wrap and place them in a freezer-safe bag before freezing. They can stay fresh for up to 30 days.
Can I freeze my Hot Chocolate Cheesecake, and if so, how?
Yes, you can! Freezing is simple. First, cool the cheesecake completely after baking. Once cooled, slice it into portions and wrap each piece tightly in plastic wrap. For added protection, place the wrapped slices in a freezer bag or container. This method prevents freezer burn and keeps your cheesecake safe for up to 30 days. When you’re ready to enjoy, thaw it overnight in the refrigerator or microwave a slice for 10-15 seconds on low heat to enjoy it slightly warm!
What should I do if my cheesecake cracks while baking?
Oh no, don’t worry! Cracks can happen, but by using a water bath during baking, you can minimize this risk significantly. Make sure your springform pan is well-sealed to prevent any water from leaking in. If a crack does appear, you can always cover it creatively with whipped cream or garnish—it’ll still taste amazing!
Are there any dietary considerations I should keep in mind while making Hot Chocolate Cheesecake?
Absolutely! If you’re baking for someone with dairy allergies, there are great substitutes available. You can use dairy-free cream cheese and coconut whipped cream instead of regular products. For those looking for reduced sugar options, coconut sugar can replace granulated sugar, and you can choose sugar substitutes for the whipped topping. This way, everyone can enjoy this delicious treat!
Can I adapt this recipe for mini cheesecakes or cheesecake bars?
Definitely! This recipe is wonderfully versatile. For mini cheesecakes, simply divide the batter into muffin tins and bake for about 18-20 minutes. If you’re craving cheesecake bars, halve the recipe and pour it into an 8×8 pan instead; it will bake up perfectly for easier portability and serving. Enjoy the fun of sharing these delightful treats!
Irresistible Hot Chocolate Cheesecake for Cozy Winter Nights
Ingredients
Equipment
Method
- Preheat your oven to 325°F (163°C). In a mixing bowl, combine crushed Oreos with melted unsalted butter until the mixture resembles wet sand. Firmly press this mixture into the bottom of a 9-inch springform pan to form an even layer. Bake the crust in the preheated oven for 11 minutes, then remove and let it cool while you prepare the filling.
- In a large mixing bowl, beat together room-temperature cream cheese and granulated sugar until the mixture is smooth and creamy, about 2-3 minutes. Gradually add in the hot cocoa mix, unsweetened cocoa powder, sour cream, heavy cream, and pure vanilla extract. Mix until well combined and creamy, ensuring there are no lumps for your hot chocolate cheesecake.
- With the mixer on low speed, add the eggs one at a time to the cream cheese mixture, mixing just until incorporated after each addition. This gentle mixing helps maintain the cheesecake's structure. After all the eggs are fully combined, scrape down the sides of the bowl to ensure everything is mixed evenly and smooth.
- Pour the creamy filling over the cooled Oreo crust, spreading it evenly. To prevent cracks, place the springform pan in a larger roasting pan and fill the outer pan with hot water halfway up the sides of the springform. Bake in the oven for 75-85 minutes, until the edges are set but the center still has a slight jiggle.
- When the cooking time is up, turn off the oven and crack the oven door ajar. Let the cheesecake cool in the oven for about 30 minutes, which helps prevent it from cracking due to sudden temperature changes. After cooling, transfer it to a wire rack to cool completely before refrigerating for at least 6 hours or, ideally, overnight.
- Once your hot chocolate cheesecake is completely chilled, make the whipped cream topping. In a bowl, beat heavy cream, powdered sugar, and a splash of vanilla extract until medium peaks form, about 3-5 minutes. Spread the fluffy whipped cream evenly over the chilled cheesecake.
- To elevate your Hot Chocolate Cheesecake, decorate it with mini marshmallows, chocolate chips, or crushed candy canes for a festive touch.
Leave a Reply