
As I bit into the crispy, golden exterior of a homemade Indian onion bhaji, I could almost hear the bustling street vendors calling out their delicious wares. This delightful snack is not only an indulgence for your taste buds but also a guilt-free choice, coming in at just one tablespoon of oil for four fritters. My take on the classic Indian Onion Bhaji elevates this popular street food by keeping it vegan, gluten-free, and truly healthy. It combines the robust flavor of spiced chickpea flour with tender, caramelized onions, resulting in a crunchy treat that’s perfect for sharing with chutney or as a side to your favorite curry. Best of all, you can whip up this delicious dish in under 30 minutes! Ready to dive into the world of homemade bhajis? Let’s get started!
Why are Indian Onion Bhajis a Must-Try?
Crispy Texture: These bhajis have an irresistible crunch that will make your taste buds dance with joy.
Healthy Indulgence: With just one tablespoon of oil, you can enjoy a snack that’s both delicious and guilt-free!
Vegan & Gluten-Free: Perfect for a wide range of dietary needs, these fritters are ideal for everyone to enjoy.
Quick Preparation: Ready in under 30 minutes, they’re perfect for last-minute snacks or appetizers.
Versatile Pairing: Serve them with tangy chutneys or alongside your favorite curries for a meal that truly satisfies.
Try them out and enjoy the delightful flavors of Indian street food right in your own home!
Indian Onion Bhaji Ingredients
For the Batter
• Chickpea Flour – Essential for a nutty flavor and structure; substitute with gluten-free flour if needed.
• Ground Cumin – Adds warmth and depth, crucial for authentic taste.
• Ground Turmeric – Provides lovely color and health benefits, making these bhajis even more appealing.
• Salt – Enhances the overall flavor; adjust to your personal preference.
• Nutritional Yeast (Optional) – Adds a cheesy flavor without dairy for an extra layer of delight.
• Water – Adjust as necessary to achieve the desired batter consistency.
For the Onions
• Onions – The star of the dish; medium-sized, thinly sliced for the best texture.
• Green Hot Chili Pepper – For a spicy kick; adjust according to your heat preference.
• Parsley (or Cilantro) – For garnish and freshness; feel free to substitute based on your taste.
For Frying
• Coconut Oil – Recommended for frying; delivers a subtle flavor that complements the bhajis perfectly.
Enjoy making these crispy Indian onion bhajis that are not only delectable but also healthy!
Step‑by‑Step Instructions for Indian Onion Bhaji
Step 1: Prep Onions
Begin by peeling the medium onions and slicing them into thin strips, aiming for uniformity to ensure even cooking. Set these onion slices aside in a bowl as you prepare to create the batter for your Indian onion bhaji, which will beautifully blend flavors with the remnants of moisture from the onions.
Step 2: Create Batter
In a mixing bowl, combine the chickpea flour, ground cumin, salt, ground turmeric, and optional nutritional yeast for added flavor. Gradually add water while whisking until you achieve a medium-thick batter consistency that easily coats the back of a spoon. This mixture will form the perfect base for your crispy Indian onion bhaji.
Step 3: Combine Onions
Carefully fold the sliced onions into the prepared batter, ensuring each piece is evenly coated. This step is crucial as it allows the flavors to meld. The batter should cling to the onions, making the bhajis crispy and delicious once fried. Set this mixture aside for a few minutes while you heat the oil.
Step 4: Heat Oil
Heat 1-2 tablespoons of coconut oil in a skillet over medium heat. The oil should shimmer slightly when it’s hot enough for frying, which will ensure your Indian onion bhaji gets that desired golden brown color. Avoid overcrowding the pan as this could lower the oil temperature.
Step 5: Fry Bhaji
Drop spoonfuls of the batter-coated onion mixture into the hot oil, making sure not to overcrowd the skillet—about four fritters at a time is ideal. Fry for approximately 2-4 minutes per side or until they turn a deep golden brown and are crispy. Use a slotted spoon to gently flip them halfway through for even cooking.
Step 6: Serve
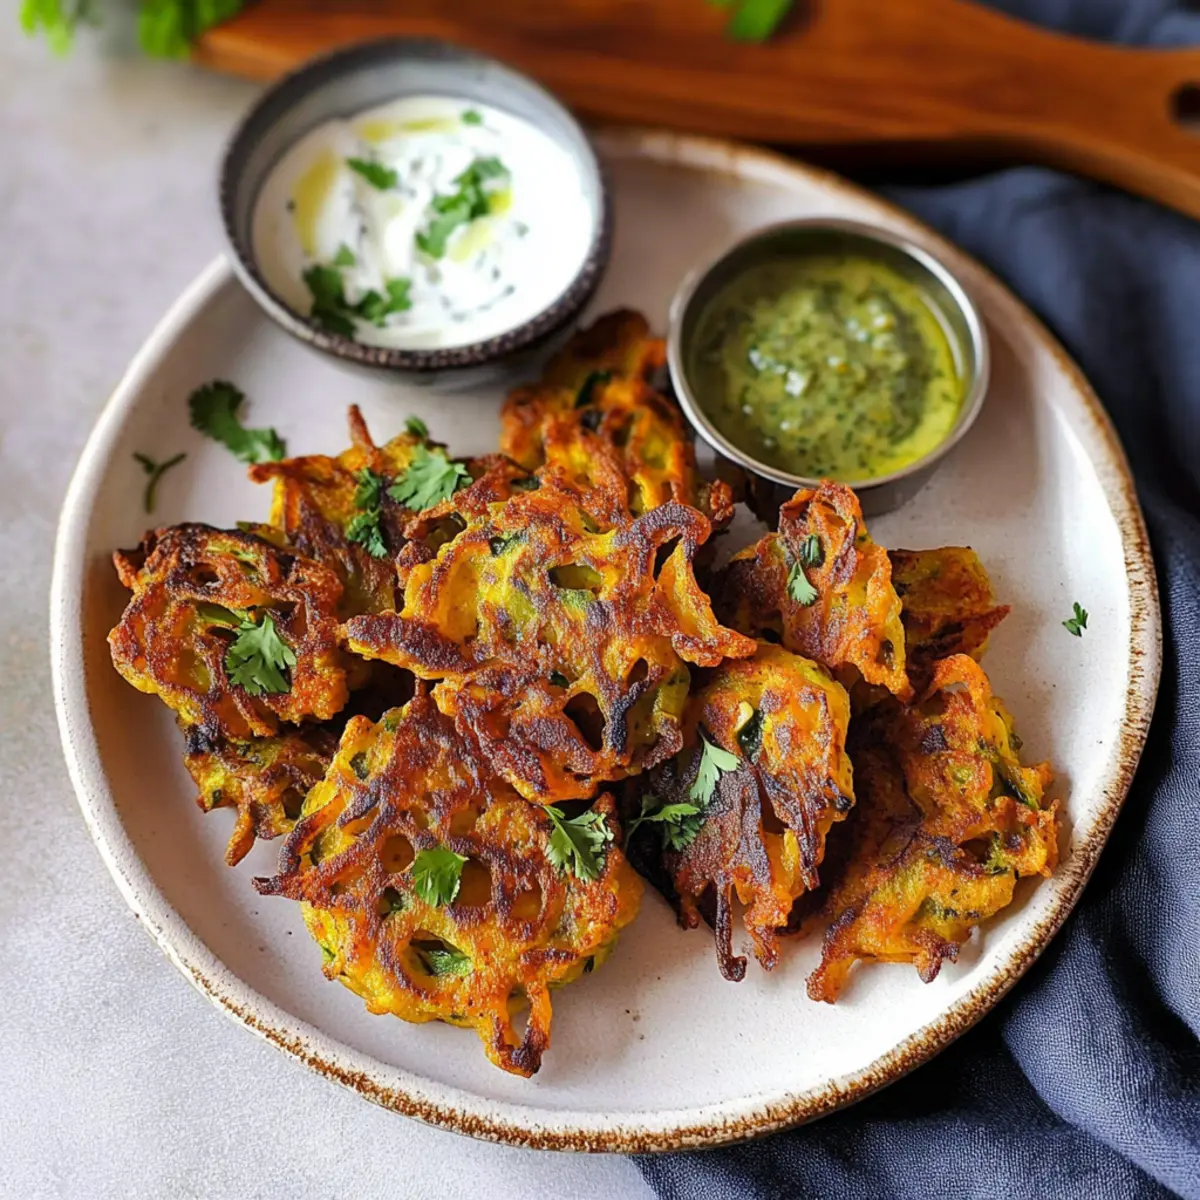
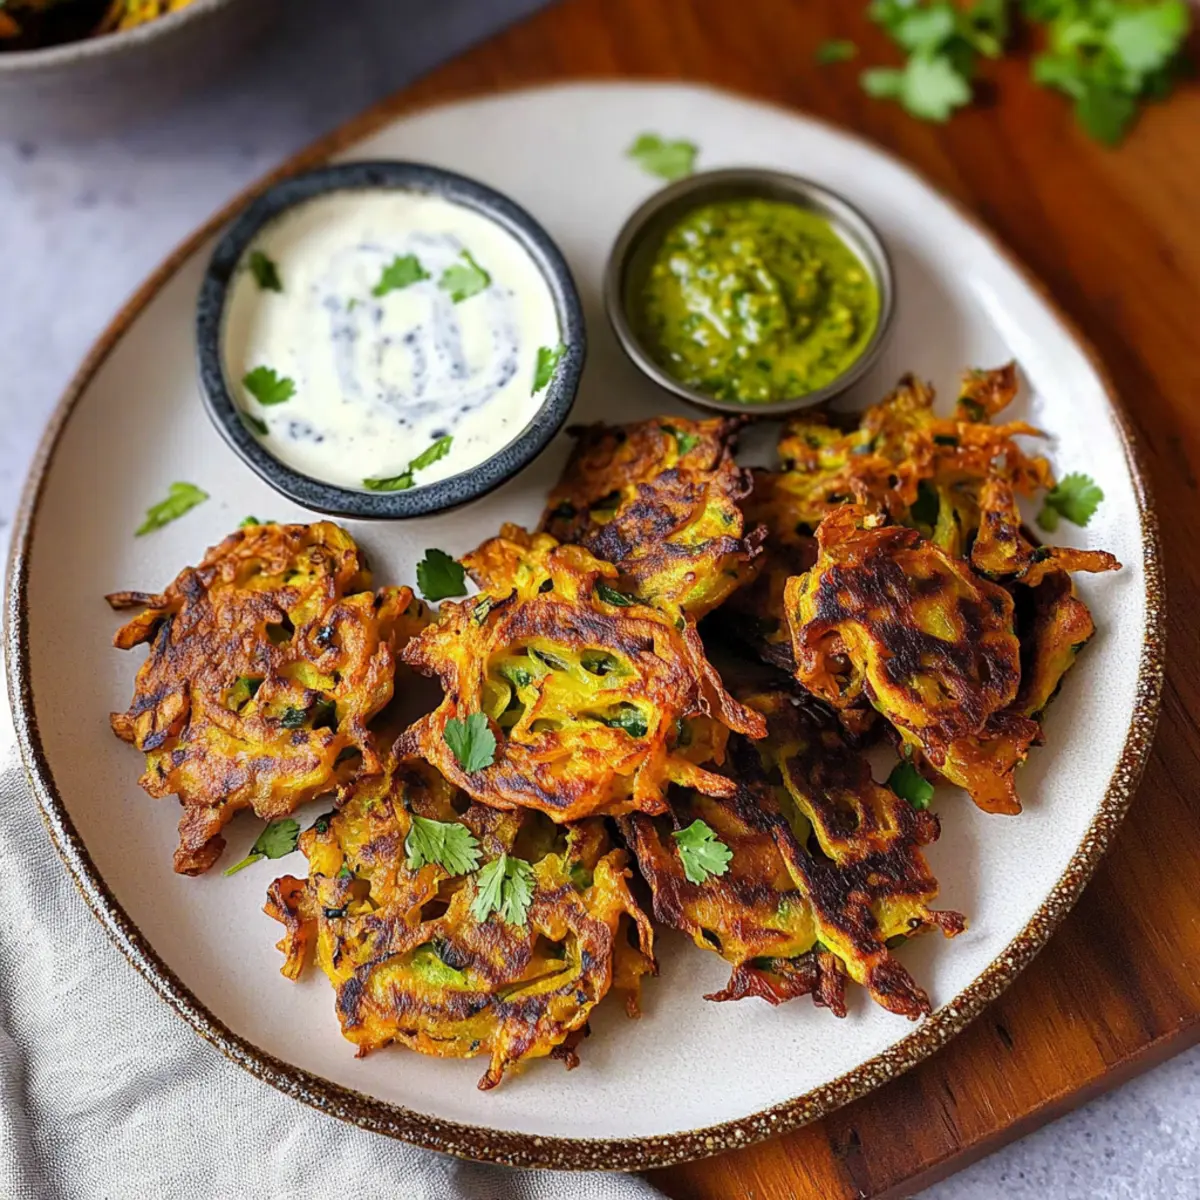
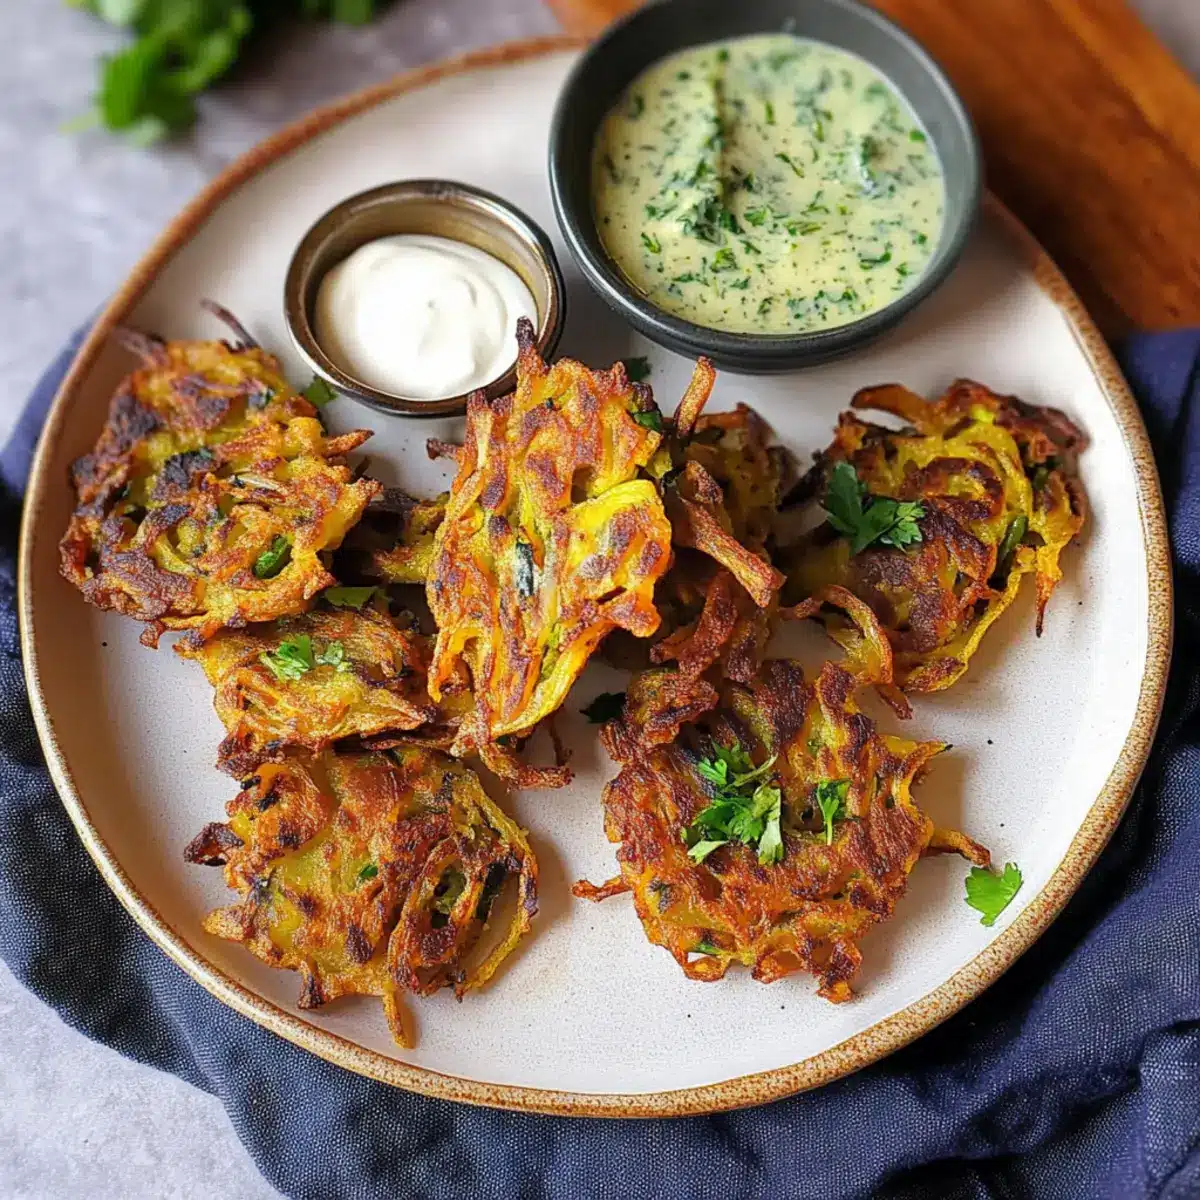
Once cooked, remove the bhajis from the skillet and let them drain on paper towels for a moment to remove excess oil. Serve your hot, crispy Indian onion bhajis immediately, accompanied by your favorite chutney or raita for a delightful snack or appetizer that captures the essence of traditional Indian street food.
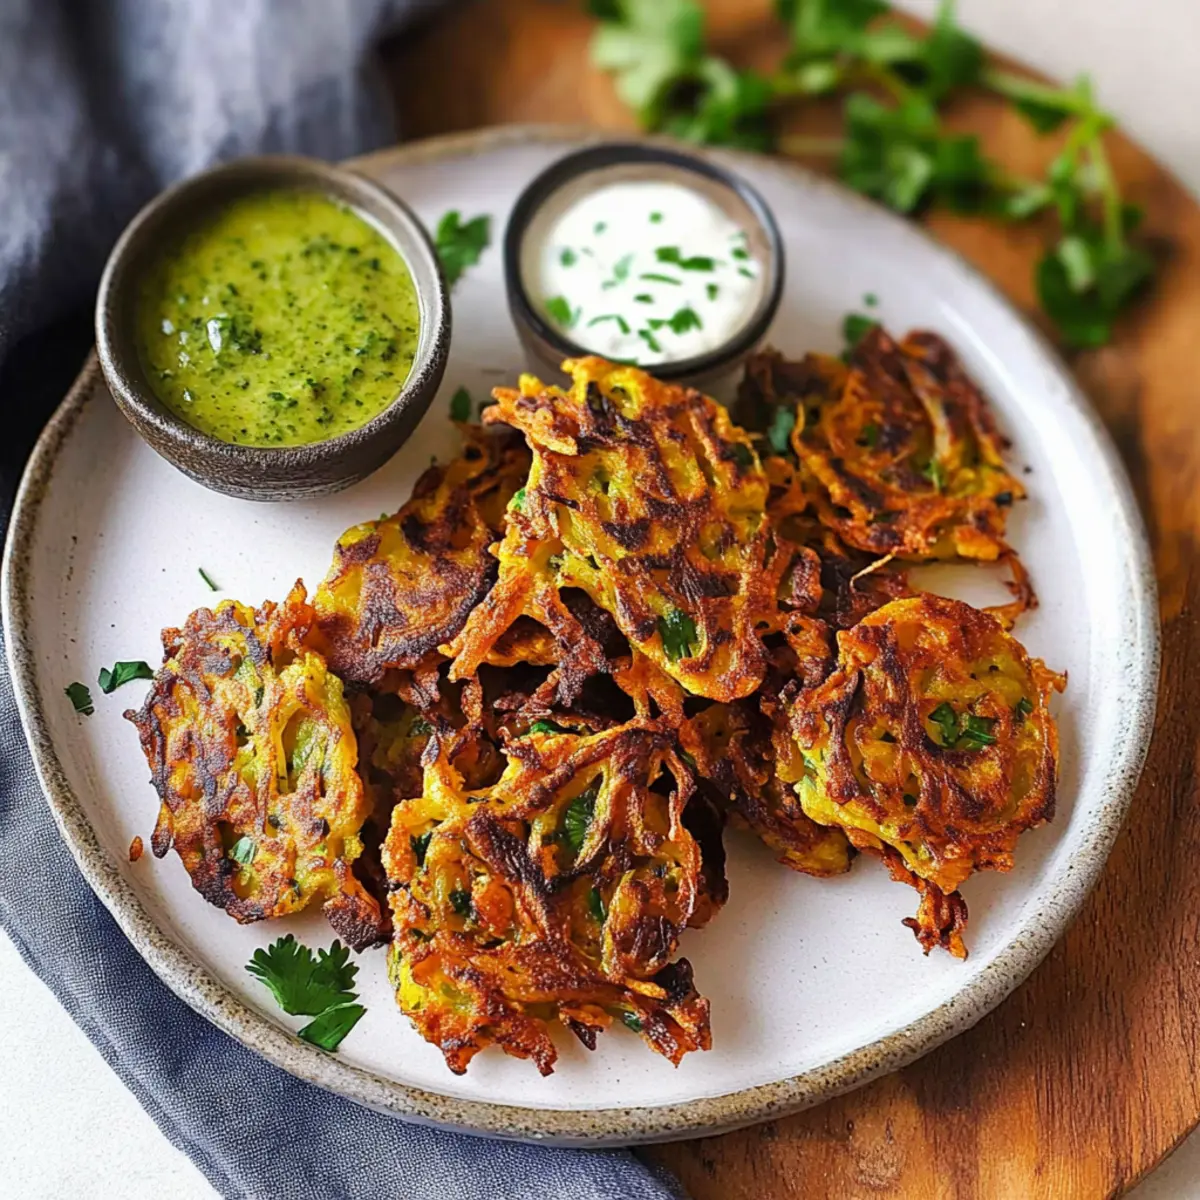
What to Serve with Healthy Indian Onion Bhaji
Create a delightful dining experience by pairing crispy fritters with vibrant flavors and comforting sides.
-
Mint Yogurt Dip: A cooling accompaniment that balances the spices of the bhaji, enhancing your taste experience greatly. It’s creamy and refreshing, perfect for dipping.
-
Cucumber Raita: This traditional yogurt side dish adds a refreshing crunch, countering the crispy bhaji beautifully while elevating your meal with its cooling effect.
-
Spicy Mango Chutney: Provide an added layer of flavor with its sweet and savory taste, perfectly complementing the spices in the bhaji. Its tanginess will make every bite an adventure!
-
Chickpea Salad: A protein-packed salad with fresh veggies and a light vinaigrette adds a satisfying crunch that pairs harmoniously with the bhaji’s crispy texture.
-
Coconut Rice: This fragrant, slightly sweet rice dish provides a lovely backdrop for the spiced flavors of the bhaji, creating a comforting and well-rounded meal.
-
Masala Chai: A warm beverage filled with spices that can enhance the meal experience, making it cozy and inviting, especially during chilly evenings.
-
Sautéed Greens: Serve up some lightly sautéed spinach or kale for a nutrient boost and a vibrant color contrast to the golden bhaji. Their earthiness pairs well with the dish.
-
Gulab Jamun: For dessert, this sweet indulgence contrasts beautifully with the savory bhaji, leaving your meal on a satisfying, sweet note.
Diving into these pairings will ensure every bite is a celebration of flavors and textures!
Indian Onion Bhaji: Variations & Substitutions
Feel free to mix and match these ideas to create your own unique twist on this delicious recipe!
-
Vegetable Swap: Substitute onions with thinly shredded carrots or zucchini to introduce a sweet yet savory flavor. The vibrant colors will add extra appeal to your bhajis.
-
Herb Infusion: Incorporate fresh herbs like mint or dill for a refreshing lift in flavor. This option is especially great for summer gatherings, offering a delightful twist on the classic taste.
-
Spice Boost: Increase the heat by adding more green hot chili peppers or even a pinch of cayenne for a fiery kick. Just a small amount can transform your bhajis into a spicy sensation!
-
Cheesy Flavor: For an extra layer of taste, mix in some vegan cheese or nutritional yeast. This will give your bhajis a delicious umami boost that both kids and adults will love.
-
Crunchy Coating: Add a coating of panko breadcrumbs before frying for an even crunchier exterior. This little technique results in a crispy crust that perfectly contrasts the soft onions inside.
-
Greens Addition: Toss in finely chopped spinach or kale into the batter for added nutrients and a pop of color. This small addition makes your snack not only tastier but healthier too!
-
Curry Flavor: Spice up your bhaji by adding curry powder or garam masala to the batter for an aromatic twist. Your kitchen will fill with enticing scents that remind you of bustling Indian street markets.
Feel inspired to explore and enjoy these variations, and consider trying them alongside your favorite dips like mango chutney or a refreshing cucumber raita!
Make Ahead Options
These Indian Onion Bhajis are perfect for meal prep enthusiasts! You can prepare the batter (chickpea flour mixture) up to 24 hours in advance and store it in an airtight container in the refrigerator. Additionally, the sliced onions can be prepped ahead and kept in the fridge for up to 3 days, just make sure to cover them to prevent browning. When you’re ready to fry, simply combine the soaked onions with the batter and drop spoonfuls into hot oil, ensuring not to overcrowd the skillet. This way, you’ll have delicious, crispy bhajis with minimal effort and just as mouthwatering as if made fresh!
Expert Tips for Indian Onion Bhaji
-
Batter Consistency: If the batter feels too thick, gradually add water to reach a medium-thick texture. Proper consistency is key for the best Indian onion bhaji.
-
Oil Temperature: Ensure the oil is hot enough before frying to avoid soggy bhajis. A properly heated oil allows for that perfect golden crunch.
-
Fry in Batches: To cook evenly, fry only 4 fritters at a time. Overcrowding the skillet might drop the oil temperature and lead to uneven cooking.
-
Storage Wisdom: Leftover bhajis can be stored in an airtight container for up to 3 days. For best results when reheating, opt for a skillet or air fryer to retain crispiness.
-
Spice It Up: Feel free to adjust the heat level by using more or less green chili pepper. Tailoring the spice can make your Indian onion bhaji uniquely yours!
How to Store and Freeze Indian Onion Bhaji
Fridge: Store cooled bhajis in an airtight container for up to 3 days. This helps keep them fresh while preventing them from becoming soggy.
Freezer: For longer storage, flash freeze cooked bhajis on a baking sheet, then transfer to a freezer-safe container for up to 2 months. This method preserves their crispy texture.
Reheating: Reheat in a skillet with a bit of oil or in an air fryer for optimal crispness. This ensures your Indian onion bhaji remains delicious as when they were first made.
Indian Onion Bhaji Recipe FAQs
What type of onions should I use for onion bhaji?
For the best flavor and texture, I recommend using medium-sized onions, which should be thinly sliced. Yellow or red onions work well, as they provide a natural sweetness that complements the spices beautifully.
How long can I store leftover onion bhaji in the fridge?
Cooled bhajis can be stored in an airtight container in the refrigerator for up to 3 days. To keep them fresh and prevent sogginess, it’s essential to let them cool completely before storing.
Can I freeze cooked onion bhaji?
Absolutely! To freeze cooked bhajis, flash freeze them by placing the cooked fritters on a baking sheet in a single layer. Once frozen, transfer them to a freezer-safe container or zip-top bag. They can be stored for up to 2 months.
How do I reheat frozen onion bhaji?
To retain crispiness when reheating, I recommend using an air fryer or a skillet with a little oil. Heat them at medium heat for about 5-7 minutes until they’re warmed through and crispy again. This provides the best texture compared to using a microwave.
What can I do if my bhaji batter is too thick?
If you find the batter is too thick, you can gradually add water, one tablespoon at a time, while whisking until you achieve a medium-thick consistency that easily coats the onions. Proper batter consistency is crucial for the perfect crunchy bhaji!
Are onion bhajis safe for individuals with gluten allergies?
Yes, these Indian onion bhajis are gluten-free! The primary ingredient, chickpea flour, is naturally gluten-free. However, always double-check your substitutes if using different kinds of flour to ensure they are also gluten-free.
Crispy Indian Onion Bhaji: Healthy, Vegan, and Irresistible
Ingredients
Equipment
Method
- Begin by peeling the medium onions and slicing them into thin strips. Set the onion slices aside.
- In a mixing bowl, combine the chickpea flour, ground cumin, salt, ground turmeric, and optional nutritional yeast. Gradually add water while whisking until you achieve a medium-thick batter consistency.
- Carefully fold the sliced onions into the prepared batter, ensuring each piece is evenly coated.
- Heat 1-2 tablespoons of coconut oil in a skillet over medium heat until shimmering.
- Drop spoonfuls of the batter-coated onion mixture into the hot oil, frying for approximately 2-4 minutes per side until golden brown.
- Remove the bhajis from the skillet and let them drain on paper towels. Serve immediately with chutney or raita.
Leave a Reply