
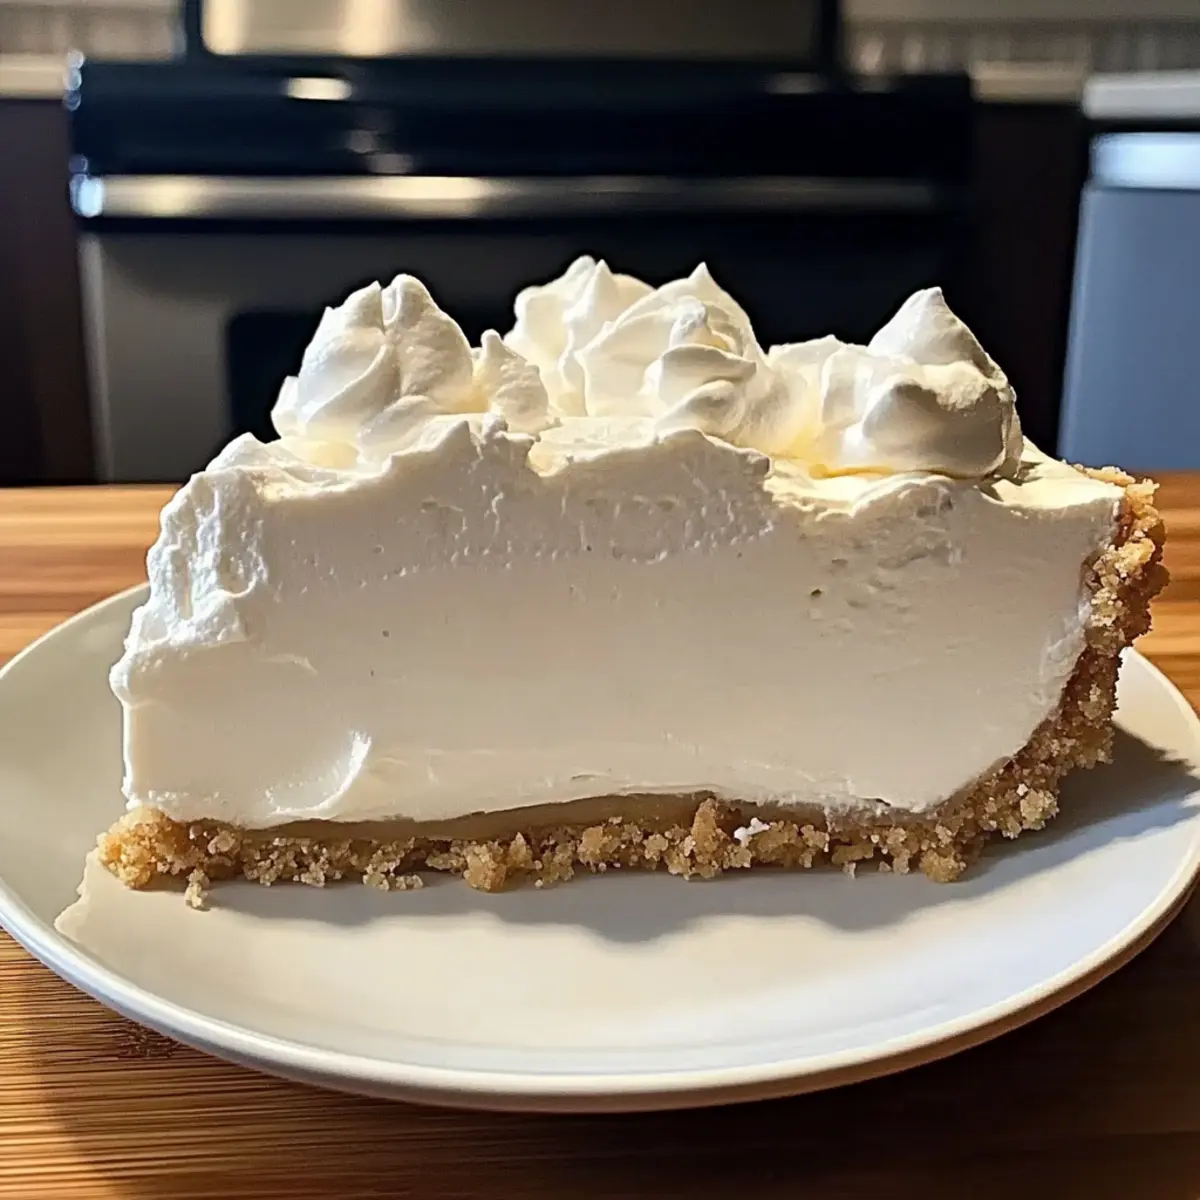
As the sun sets on a warm summer evening, there’s nothing quite like the anticipation of dessert floating through the air. That’s when my homemade No-Bake Marshmallow Whip Cheesecake makes its grand entrance, stealing the spotlight at any gathering. This delightful cheesecake combines a fluffy texture and a hint of cream cheese tang, creating an irresistible treat that’s surprisingly easy to make. Not only is it a crowd-pleaser, but it’s also a gluten-free option with just a twist! Perfect for those warm days when nobody wants to heat up the kitchen, this dessert can be prepped in no time and chilled to perfection. Whether it’s a family celebration or just a cozy night in, you’ll want to keep this recipe in your back pocket. Curious about how to whip up this light and airy delight? Let’s dive into the details!
Why is this cheesecake a must-try?
Irresistible Fluffiness: This Marshmallow Whip Cheesecake boasts a light, airy texture that’s simply divine. No-Bake Wonder: With minimal effort, you can achieve a stunning dessert without turning on the oven. Flavor Fusion: The blend of sweet marshmallow and tangy cream cheese creates a taste sensation everyone will adore. Perfect for Summer: Refreshing and cool, this cheesecake is the ultimate treat for warm-weather gatherings. Versatile Base: Feel free to customize the toppings to your liking, from chocolate drizzles to fresh berries. Whether you’re entertaining guests or treating yourself, this cheesecake is destined to impress!
Marshmallow Whip Cheesecake Ingredients
For the Crust
• Graham Cracker Crust – Provides structure and a buttery crunch; substitute with a gluten-free graham cracker crust for a GF option.
For the Filling
• Cream Cheese (8 oz) – Contributes a rich and slightly tangy flavor; ensure it’s softened for easy blending.
• Marshmallow Creme (7 oz) – Adds sweetness and a fluffy texture; mini marshmallows can be used as a substitute when melted with a bit of butter.
• Whipped Topping (8 oz, Cool Whip) – Lightens the filling and gives it a creamy consistency; real whipped cream can be used, just whip it to stiff peaks.
• Vanilla Extract (1 tsp) – Enhances flavor depth; optional for additional zest.
Optional Garnish
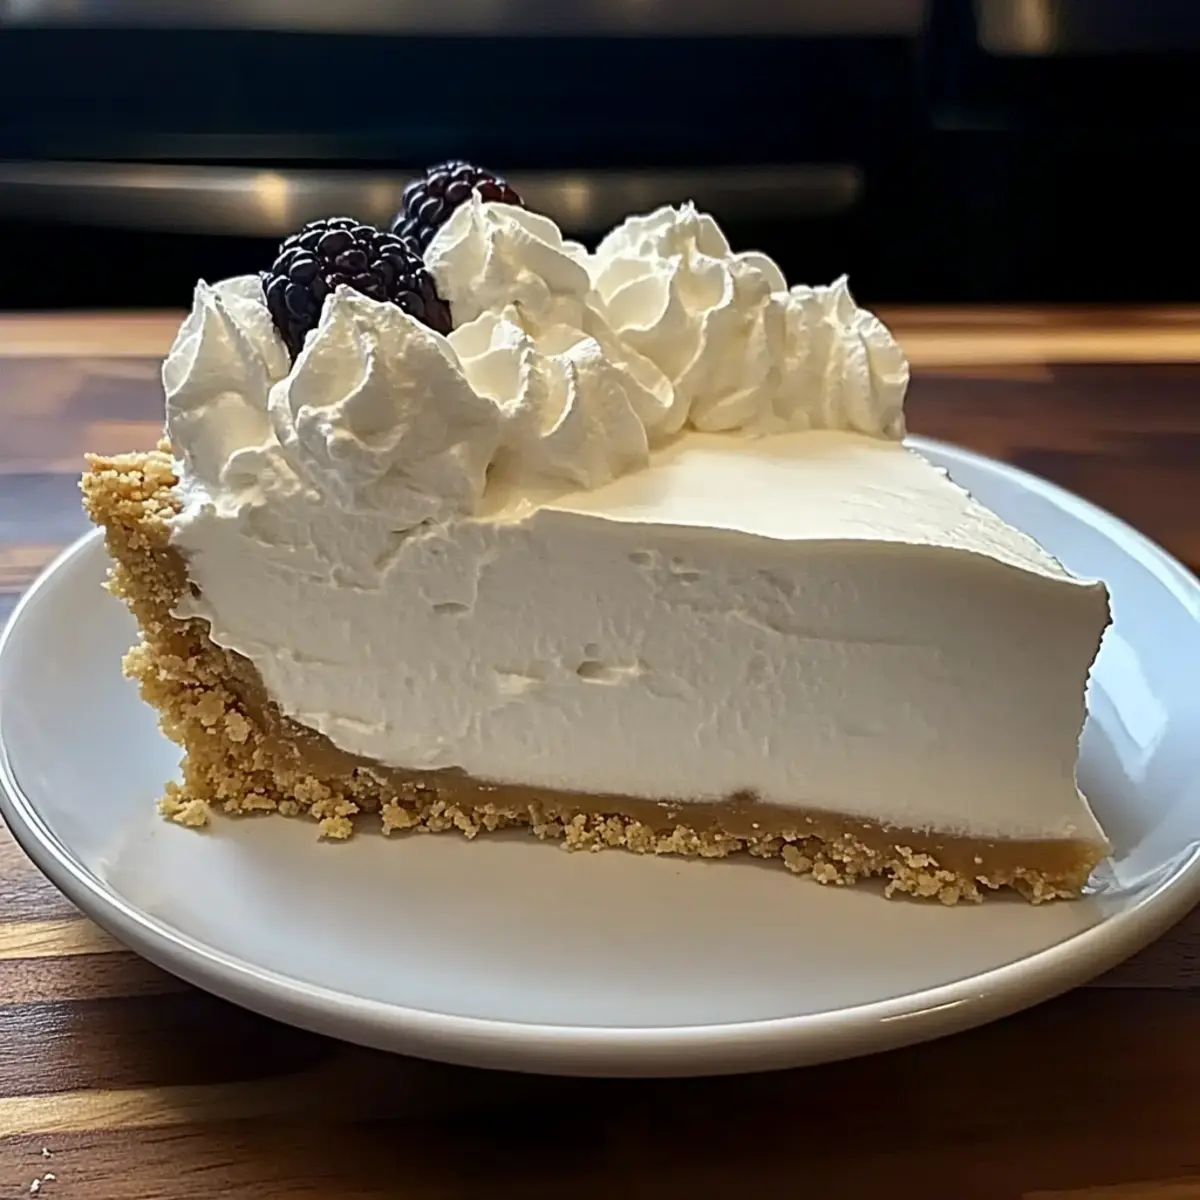
• Whipped Cream or Fresh Berries – Perfect for decoration and adds a refreshing element to the Marshmallow Whip Cheesecake.
Step‑by‑Step Instructions for Marshmallow Whip Cheesecake
Step 1: Prepare the Crust
Start by preheating your oven to 350°F (175°C) if you’re using a baked crust method. If using a store-bought graham cracker crust, skip this. For a homemade crust, crush 1 ½ cups of graham crackers and mix with ½ cup of melted butter until well combined. Press this mixture firmly into the bottom of a 9-inch round pan to form an even layer. Bake for 10 minutes, then let it cool completely.
Step 2: Beat the Cream Cheese
In a large mixing bowl, combine 8 oz of softened cream cheese using an electric mixer on medium speed. Beat for about 2-3 minutes until the cream cheese is smooth and fluffy, ensuring there are no lumps. This is crucial for achieving that delightful creamy texture in your Marshmallow Whip Cheesecake.
Step 3: Mix in Marshmallow Creme
Gradually add in 7 oz of marshmallow creme and 1 tsp of vanilla extract to the beaten cream cheese. Continue mixing on low speed until well combined, approximately 2 minutes. You’ll notice a smooth and sweet mixture developing. Take a moment to taste it; it should be light and fluffy, perfect for cheesecake.
Step 4: Fold in the Whipped Topping
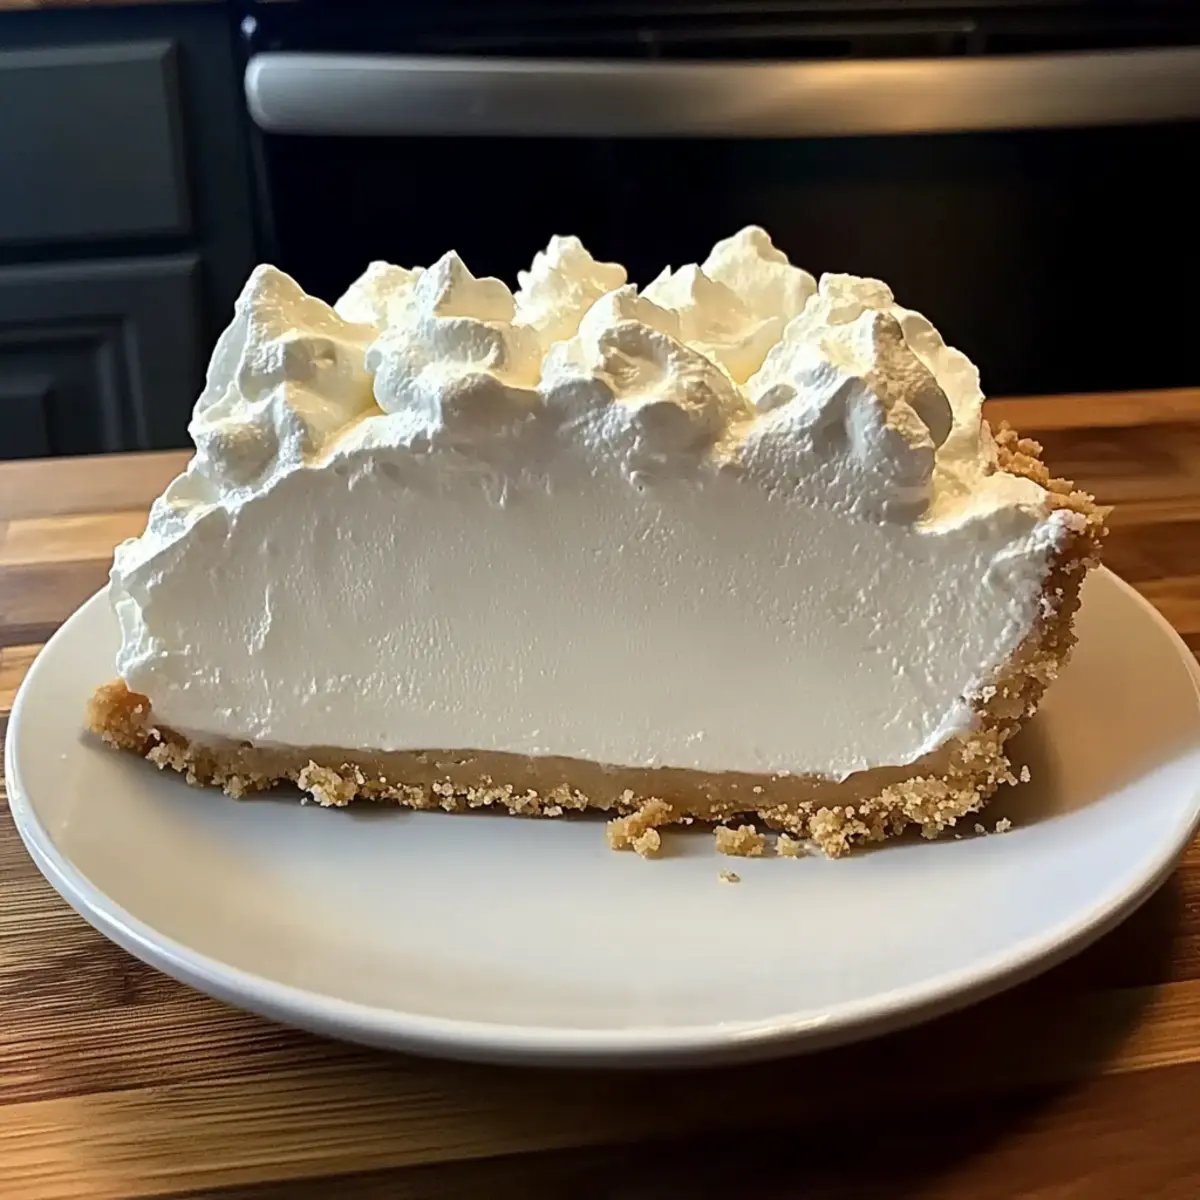
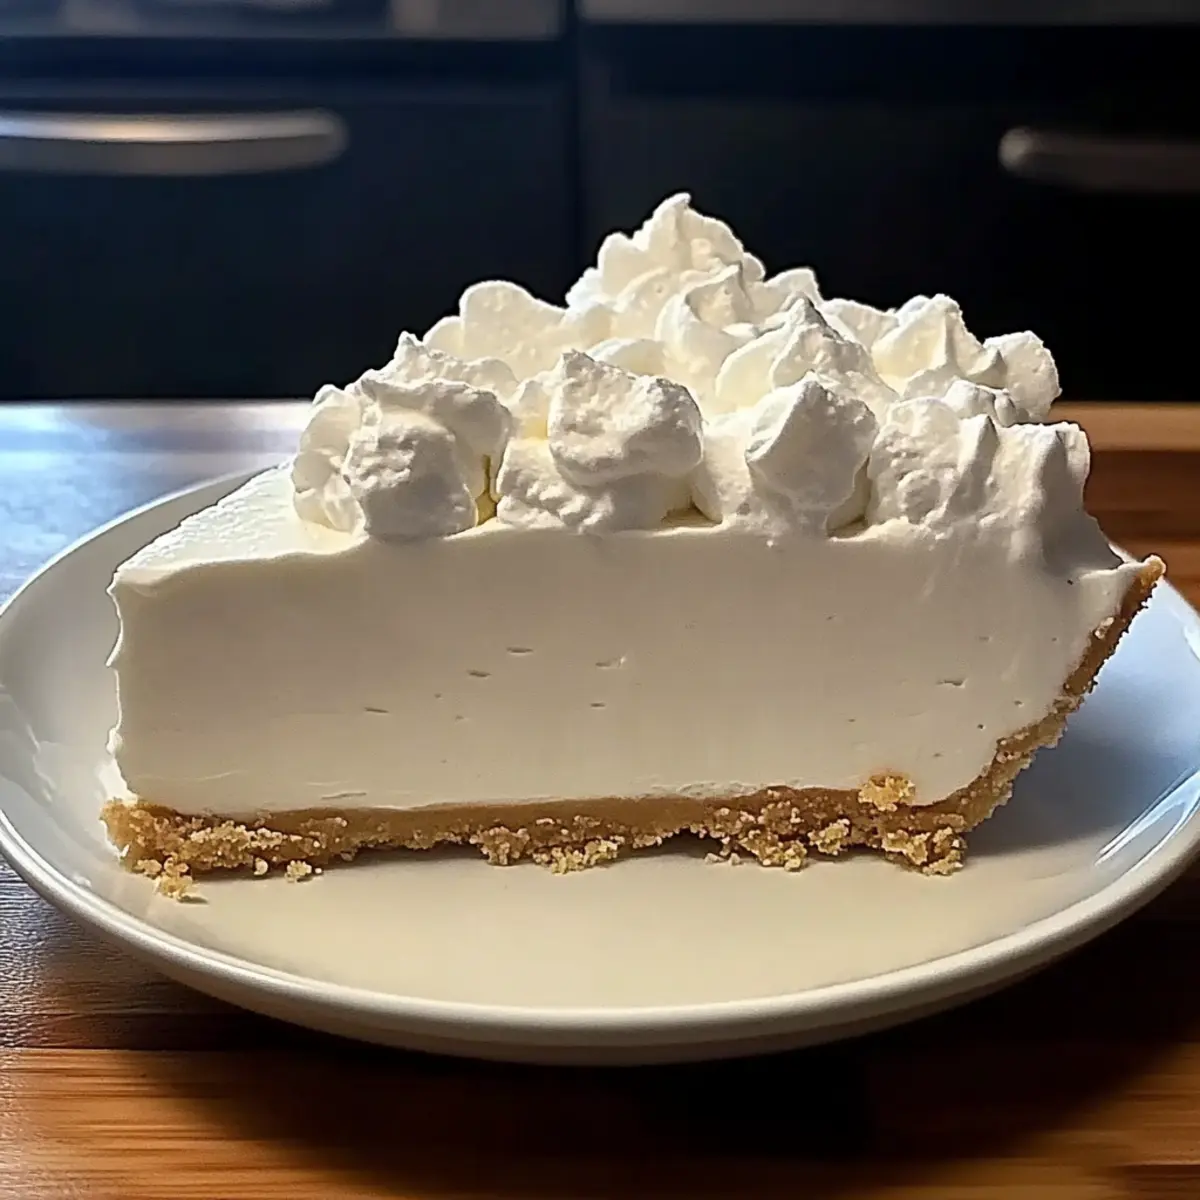
Gently take 8 oz of thawed Cool Whip and fold it into the cream cheese mixture using a spatula. Be careful to fold rather than stir; this keeps the mixture light and airy. Continue folding until no streaks remain, showcasing a beautifully cohesive filling for your cheesecake that’s all about that airy texture.
Step 5: Assemble the Cheesecake
Take the cooled graham cracker crust and pour the fluffy cheesecake filling into it. Use a spatula to spread it evenly from the center outwards, smoothing the top for an elegant finish. This is where your Marshmallow Whip Cheesecake starts to take shape, looking absolutely irresistible and inviting.
Step 6: Chill to Set
Cover the cheesecake with plastic wrap and refrigerate for at least 4 hours, or ideally overnight. This chilling period allows the flavors to meld beautifully and the filling to firm up to a perfect sliceable consistency. When ready to serve, it will look delightfully set and tempting.
Step 7: Garnish & Serve
Before serving, add your favorite garnishes, such as whipped cream dollops or fresh berries, for an extra touch of elegance. Slice with a sharp knife for clean pieces and enjoy the deliciously fluffy Marshmallow Whip Cheesecake with family and friends.
What to Serve with Marshmallow Whip Cheesecake?
Indulging in a slice of fluffy cheesecake is a delightful experience, but let’s elevate that moment with some sensational pairings.
-
Fresh Berry Compote:
The tangy sweetness of mixed berries adds a refreshing contrast, enhancing the creamy texture of the cheesecake. -
Chocolate Drizzle:
A rich chocolate sauce drizzled on top gives a decadent touch, creating an indulgent flavor explosion with every bite. -
Whipped Cream:
Light and airy whipped cream brings an extra softness, mirroring the cheesecake’s fluffiness while offering a touch of sweetness. -
Mint Sprig Garnish:
A fresh mint garnish brightens both the presentation and palate, providing a natural freshness to balance the sweetness. -
Coconut Flakes:
Toasted coconut flakes sprinkled on top add a delightful crunch and a tropical flair that perfectly complements the cheesecake’s flavors. -
Lemon Slices:
A few lemon slices served alongside the cheesecake introduce a zesty brightness, cutting through the richness for a well-rounded dessert experience. -
Iced Tea or Lemonade:
A refreshing glass of iced tea or lemonade serves as a perfect drink accompaniment, enhancing the summery feel of the cheesecake. -
Fruit Salad:
A light fruit salad brings in seasonal flavors and textures, creating a vibrant side that pairs wonderfully with the cheesecake. -
Vanilla Ice Cream:
A scoop of vanilla ice cream adds creamy richness, making every bite of cheesecake even more indulgent and satisfying.
Expert Tips for Marshmallow Whip Cheesecake
-
Softened Cream Cheese: Always use softened cream cheese to ensure a smooth filling. Let it sit at room temperature for at least 30 minutes before mixing to avoid lumps.
-
Gentle Folding: When incorporating the whipped topping, use a gentle folding motion. This maintains the airy texture of your Marshmallow Whip Cheesecake, making it light and fluffy.
-
Chill Overnight: For the best flavor and texture, refrigerate the cheesecake overnight. This allows the filling to set perfectly and the flavors to meld together.
-
Crust Alternatives: If you’re making a gluten-free version, opt for a gluten-free graham cracker crust. Ensure that all ingredients you use meet dietary restrictions for a worry-free treat.
-
Creative Toppings: Don’t shy away from customizing your cheesecake! Consider adding chocolate drizzles or fresh fruit to enhance flavor and presentation while also complementing the lightness of the cheesecake.
Marshmallow Whip Cheesecake Variations
Feel free to explore these delightful twists to personalize your cheesecake and make it uniquely yours!
-
Gluten-Free Crust: Substitute the graham cracker crust with a gluten-free version using gluten-free graham crackers for the same buttery crunch. It’s a great way to accommodate dietary needs without sacrificing flavor.
-
Mini Cheesecakes: Pour the cheesecake filling into muffin tins lined with cupcake liners for adorable mini versions—perfect for parties! They’re easy to grab and will surely be a hit.
-
Chocolate Swirl: Add a luscious chocolate swirl to your cheesecake by melting chocolate and gently folding it into the filling before placing it in the crust. This adds a rich flavor that compliments the fluffiness.
-
Berry Bliss: Mix in fresh berries like blueberries or strawberries into the filling before chilling. Their burst of juiciness will elevate the cheesecake and provide a gorgeous pop of color.
-
Citrus Twist: For a zingy flavor addition, incorporate a tablespoon of lemon or orange zest into the filling. The citrus notes create a refreshing contrast to the sweetness of the marshmallow.
-
Nutty Crunch: Fold in crushed nuts, such as toasted almonds or pecans, into the filling for delightful texture. This adds a warm, nutty flavor that beautifully complements the creamy cheesecake.
-
Spiced Version: Sprinkle in a pinch of cinnamon or nutmeg to the filling mixture for a cozy, warm undertone. It’s a fun way to play with flavors, especially delightful during the holidays!
-
Peanut Butter Delight: For peanut butter lovers, add a half cup of creamy peanut butter to the filling for a nutty, rich variation. It pairs excellently with chocolate drizzles on top for a dream dessert!
These variations can take your Marshmallow Whip Cheesecake to a new level of deliciousness. Let your creativity shine, and enjoy the delicious journey!
Storage Tips for Marshmallow Whip Cheesecake
Fridge: Store your cheesecake covered in the refrigerator. It’s best enjoyed within a few days, but it can last up to a week without sacrificing flavor or texture.
Freezer: If you want to make it ahead, this Marshmallow Whip Cheesecake can be frozen for up to 2 months. Wrap slices tightly in plastic wrap and then foil to avoid freezer burn.
Thawing: When you’re ready to enjoy your frozen cheesecake, transfer it to the fridge to thaw for several hours or overnight. This step ensures the texture remains light and fluffy.
Serving: For optimal enjoyment, allow the cheesecake to sit at room temperature for about 15-20 minutes before serving to bring back its creamy goodness.
Make Ahead Options
These Marshmallow Whip Cheesecakes are perfect for busy home cooks looking to save time without sacrificing flavor! You can prepare the cheesecake filling and pour it into the graham cracker crust up to 24 hours in advance. Simply refrigerate the uncut cheesecake covered with plastic wrap to prevent it from absorbing any odors. When ready to serve, just take it out, garnish with your favorite toppings, such as whipped cream or fresh berries, and slice for that amazing presentation. This method not only allows the flavors to meld beautifully but also guarantees restaurant-quality results with minimal effort when entertaining!
Marshmallow Whip Cheesecake Recipe FAQs
What type of graham cracker crust should I use?
You can use either a traditional graham cracker crust or a gluten-free option. For a homemade crust, crush about 1 ½ cups of graham crackers, mix with ½ cup melted butter, and press it into a baking dish. If you’re in a hurry, store-bought works wonderfully too!
How do I store leftover cheesecake?
To keep your Marshmallow Whip Cheesecake fresh, store it covered in the refrigerator. It’s best enjoyed within 3 to 4 days but can last up to a week without compromising its flavor or texture. If you want to save it for later, consider freezing it!
Can I freeze this cheesecake?
Absolutely! You can freeze your Marshmallow Whip Cheesecake for up to 2 months. Slice it first, then wrap individual pieces tightly in plastic wrap followed by aluminum foil to prevent freezer burn. Just be sure to thaw in the fridge for several hours or overnight when you’re ready to enjoy it!
What should I do if my cream cheese is lumpy?
If your cream cheese isn’t soft enough and results in a lumpy filling, don’t panic! Simply transfer it to a microwave-safe bowl and microwave it (uncovered) for about 15-20 seconds. Then, mix it again until smooth. This should ensure a perfectly creamy texture for your cheesecake.
Is this cheesecake suitable for those with allergies?
Check the ingredient labels carefully, as the Marshmallow Whip Cheesecake contains dairy and gluten if using conventional graham crackers. If you’re serving someone with allergies, opt for gluten-free graham crackers and substitute the whipped topping with a dairy-free alternative will help make it allergen-friendly!
Fluffy Marshmallow Whip Cheesecake: Your New Summer Favorite
Ingredients
Equipment
Method
- Preheat your oven to 350°F (175°C) for a baked crust. Crush graham crackers and mix with melted butter. Press into a 9-inch pan and bake for 10 minutes, then cool.
- Beat softened cream cheese with an electric mixer for 2-3 minutes until smooth and fluffy.
- Gradually add marshmallow creme and vanilla extract, mixing on low speed for 2 minutes.
- Fold in thawed Cool Whip gently until no streaks remain.
- Pour cheesecake filling into cooled crust and smooth the top.
- Cover with plastic wrap and refrigerate for at least 4 hours, preferably overnight.
- Garnish with whipped cream or fresh berries before serving.
Leave a Reply