
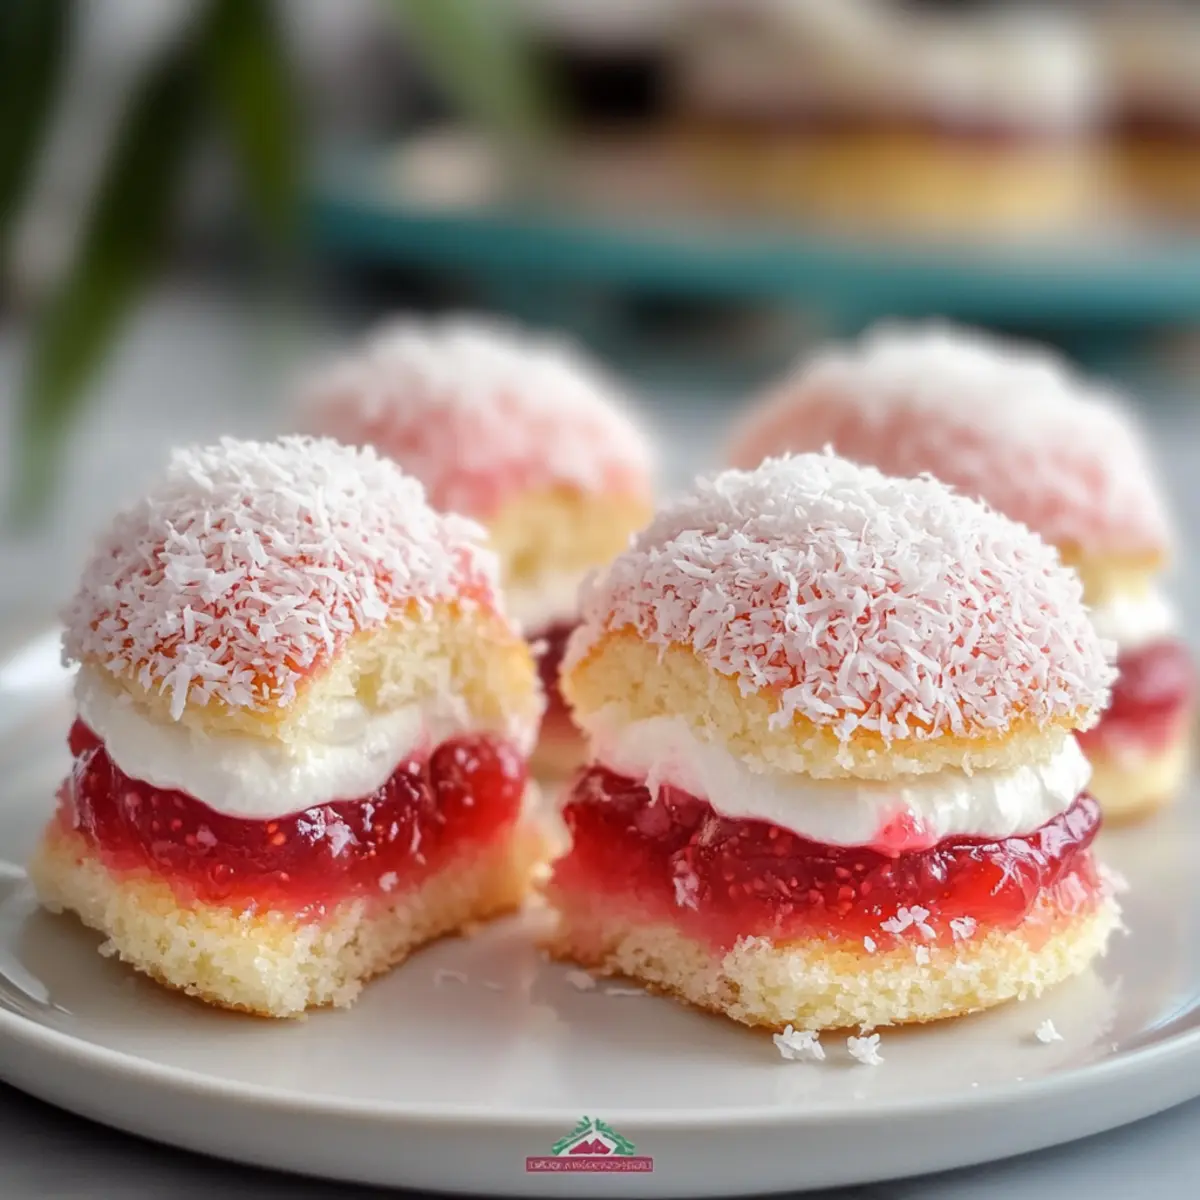
As I stood in my kitchen, the scent of vanilla wafting through the air, it felt like a warm hug from my childhood. That’s the magic of Old-Fashioned Pink Jelly Cakes—a traditional Australian delight that effortlessly brings back memories of sunny afternoons spent with loved ones. This recipe combines the fluffy goodness of vanilla sponge with sweet strawberry jelly and a crunchy desiccated coconut coating, resulting in a treat that not only looks gorgeous but also tastes divine. Perfect for elevating afternoon teas or adding a touch of nostalgia to any gathering, these cakes are a true crowd-pleaser and simple to whip up in a snap. Ready to indulge in a slice of this sweet memory? Let’s dive into the delightful world of Old-Fashioned Pink Jelly Cakes together!
Why Are These Cakes So Special?
Nostalgic Delight: Experience a trip down memory lane with every bite of these classic Old-Fashioned Pink Jelly Cakes, beloved in Australian homes for generations.
Effortless Preparation: This simple recipe features easy-to-follow steps that deliver impressive results, making it perfect for both novice and seasoned bakers.
Versatile Flavor: While strawberry jelly is a traditional choice, you can experiment by swapping in raspberry or orange, allowing you to customize the flavor to your liking.
Textural Harmony: Delight in the contrast of soft sponge, crunchy coconut, and creamy filling, creating a mouthwatering experience that everyone will love.
Perfect for Sharing: Whether you’re hosting a tea party or a family gathering, these charming cakes are sure to impress your guests and spark joy.
Old-Fashioned Pink Jelly Cakes Ingredients
Unlock the secrets to crafting these delightful treats!
For the Sponge
- Vanilla Extract – If you want that lovely aroma, always use pure vanilla extract for the best flavor.
- Cake Flour – This unique flour will give your sponge the light, fluffy texture that makes these cakes irresistible.
- Sugar – Sweetens the sponge; feel free to use coconut sugar for a healthier twist.
- Baking Powder – Ensures a lovely rise in your sponge; don’t skip this crucial ingredient!
- Eggs – Acts as a binding agent, creating the sponge’s structure and richness; room temperature eggs work best.
For the Jelly Layer
- Strawberry Jelly – Adds sweetness and flavor; can be swapped with raspberry or orange jelly to change things up.
For the Topping
- Desiccated Coconut – Provides a crunchy coating; choose unsweetened coconut for the right balance against the sweet jelly.
- Whipped Cream – Adds a rich, velvety filling; for a lighter option, consider substituting with Greek yogurt.
With these simple ingredients in hand, you’re ready to create your very own Old-Fashioned Pink Jelly Cakes and evoke sweet nostalgia with every bite!
Step‑by‑Step Instructions for Old-Fashioned Pink Jelly Cakes
Step 1: Prepare the Sponge Batter
Preheat your oven to 350°F (175°C). In a mixing bowl, whisk together the cake flour, sugar, and baking powder until well combined. In a separate bowl, beat the eggs with pure vanilla extract until the mixture is fluffy and slightly frothy. Combine the wet ingredients with the dry mixture, stirring gently until a smooth batter forms.
Step 2: Bake the Sponge
Pour the batter into a greased and lined 9-inch round cake pan, spreading it evenly. Bake in the preheated oven for about 18 minutes, or until the top is golden brown and a toothpick inserted comes out clean. Once done, remove the cake from the oven and let it cool in the pan for a few minutes before transferring it to a wire rack.
Step 3: Cool the Cakes Completely
Allow the cakes to cool completely on the wire rack, which might take around 30 minutes. This step is crucial before assembly, as it ensures the sponge holds its shape when dipped in jelly. As the sponge cools, prepare your jelly according to package instructions, ensuring it has a syrupy consistency.
Step 4: Assemble the Cakes
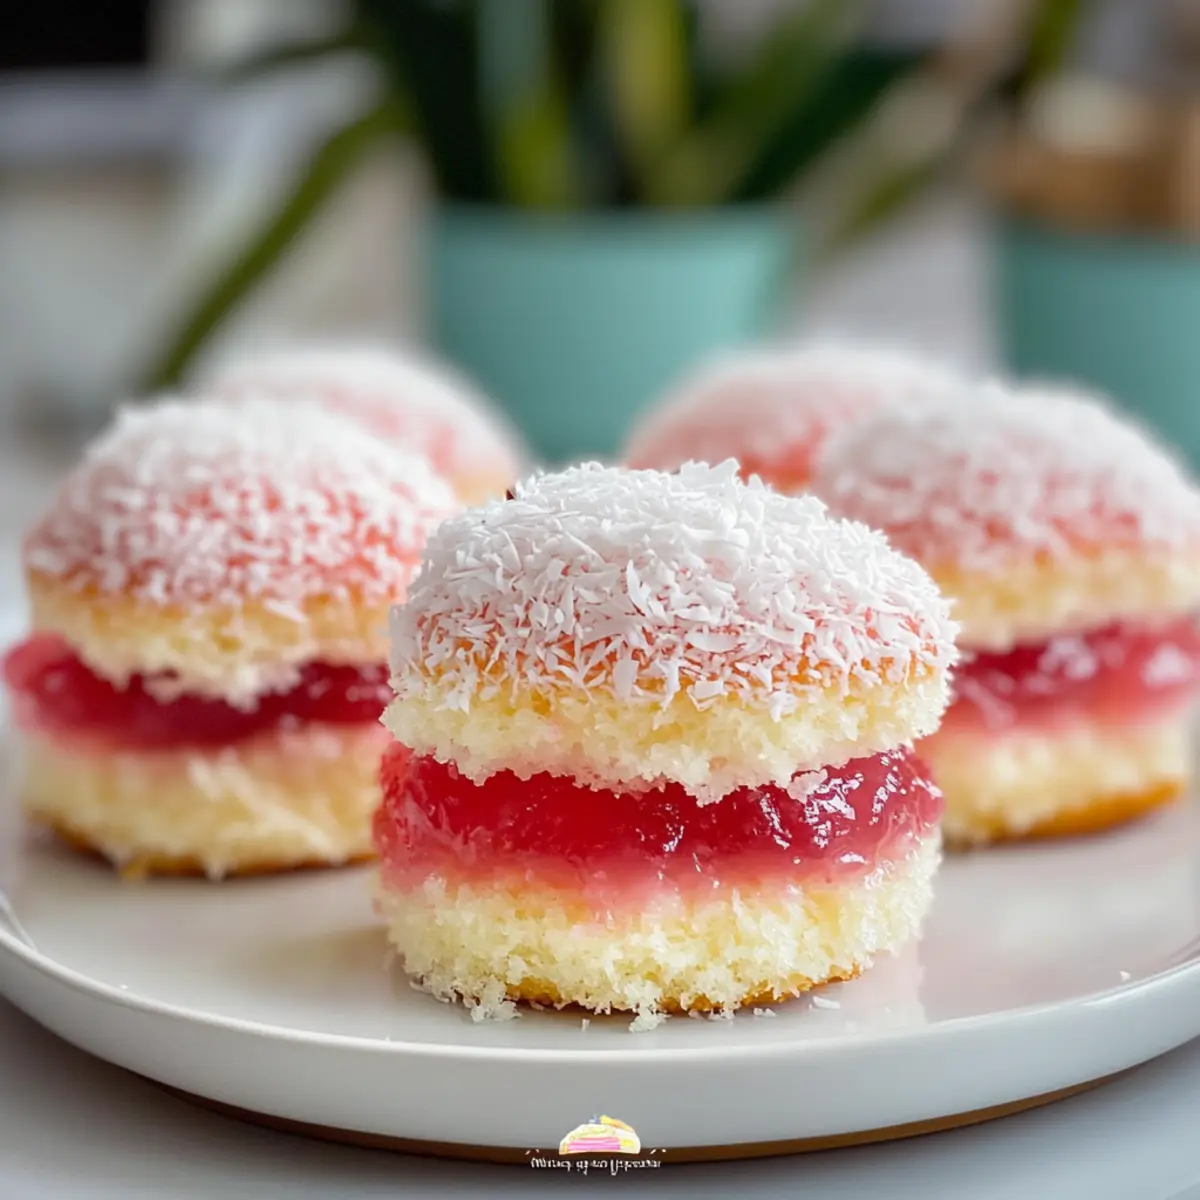
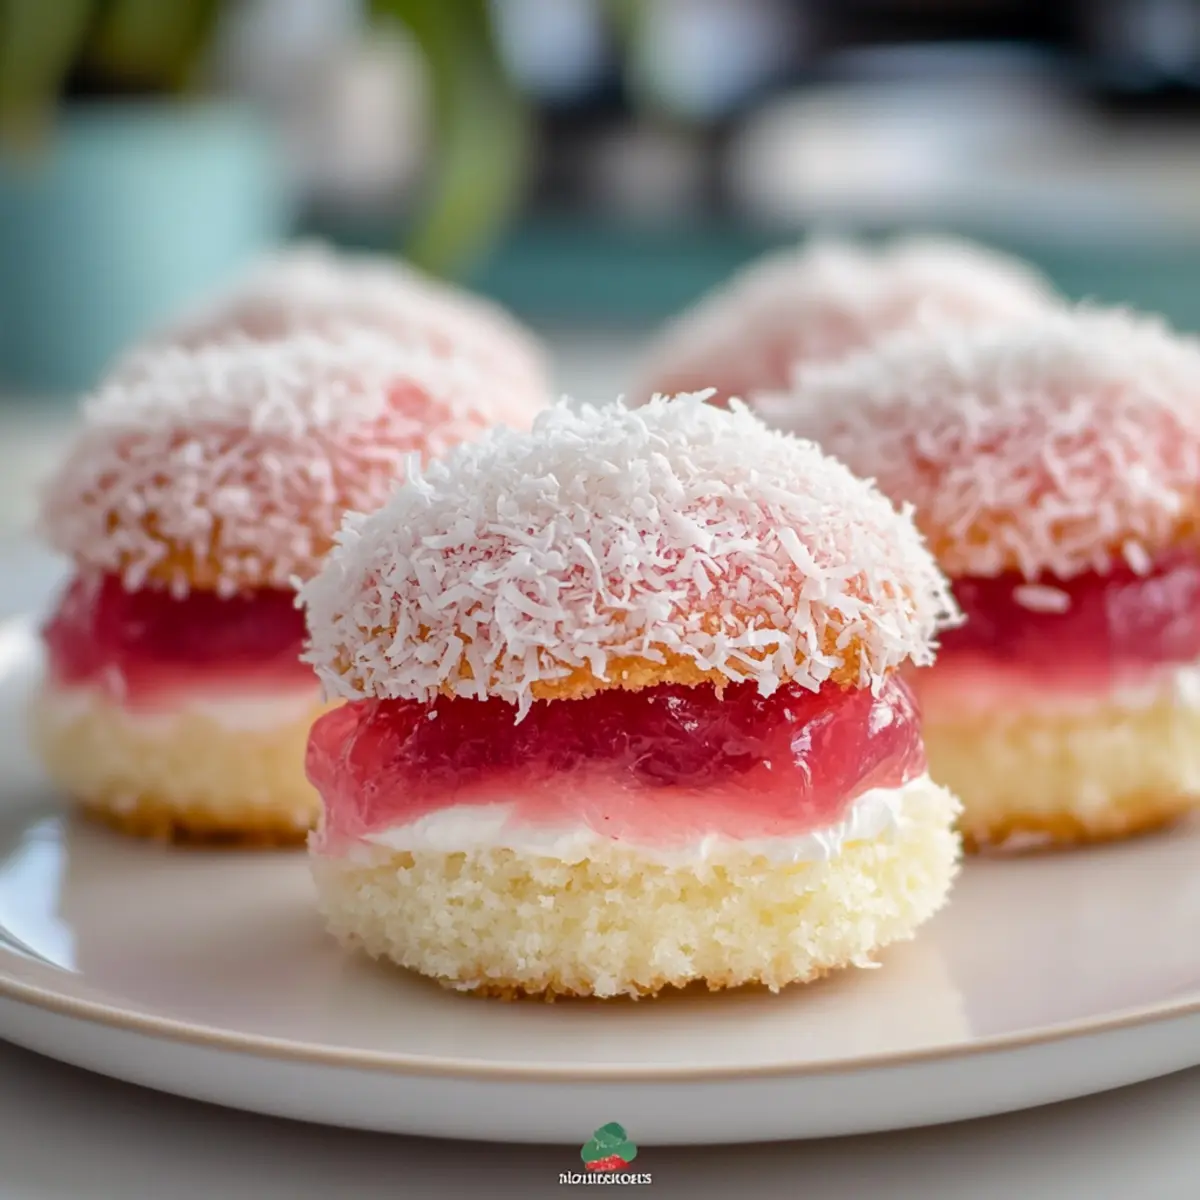
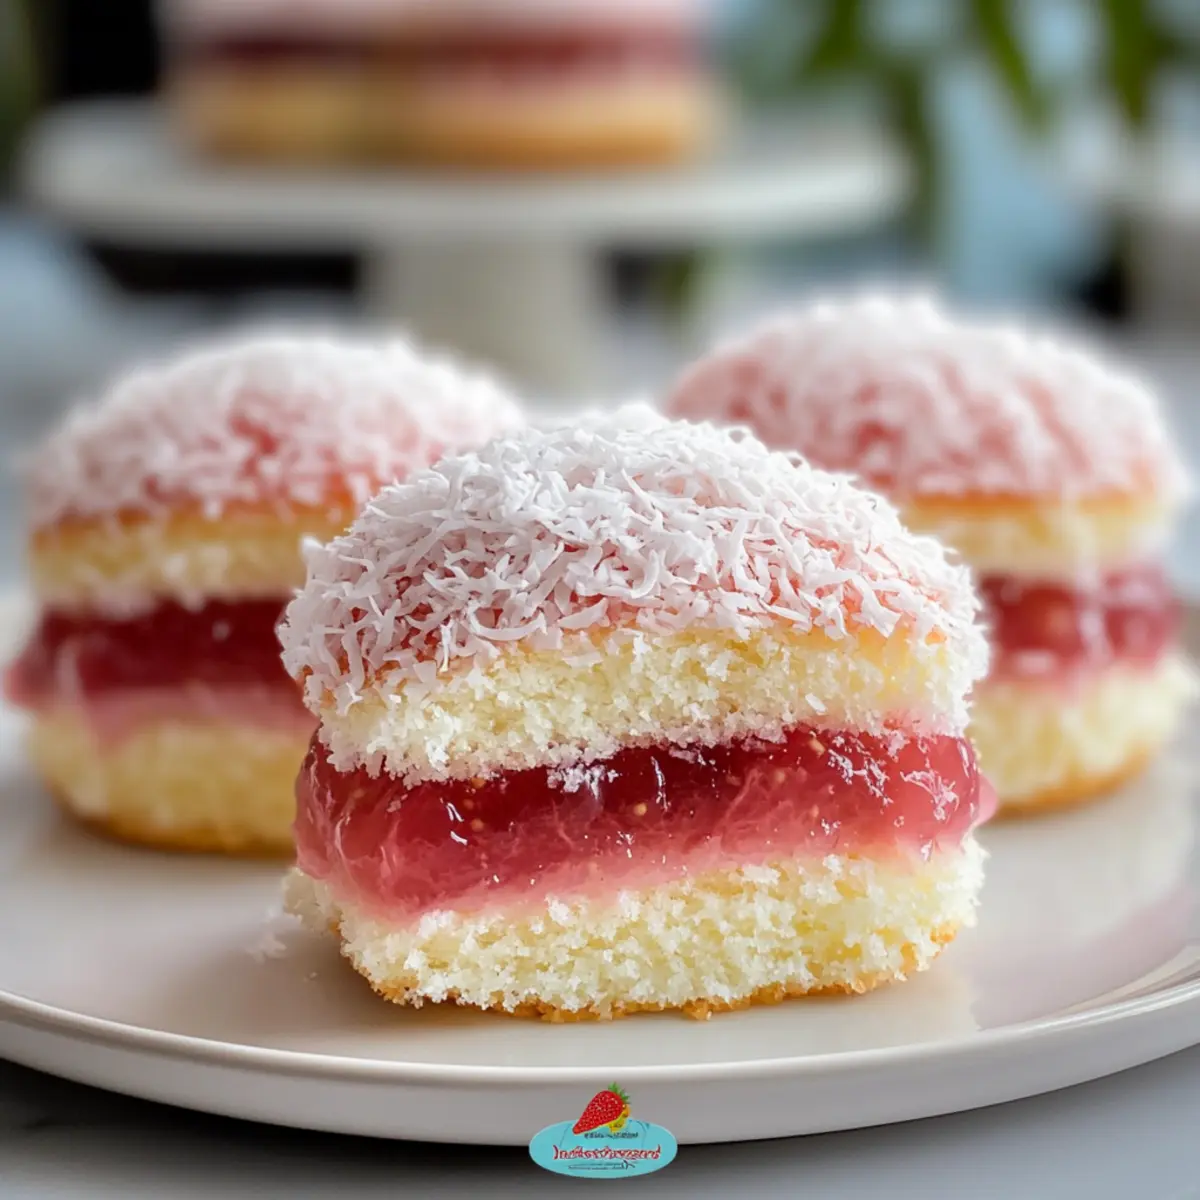
Once cooled, cut the sponge into equal-sized squares or circles, depending on your preference for the Old-Fashioned Pink Jelly Cakes. Gently dip each piece into the warmed strawberry jelly, allowing the excess to drip off. Then, roll the coated cakes in desiccated coconut, ensuring an even covering for that delightful crunch.
Step 5: Fill with Whipped Cream
After coating all the cake pieces, take a knife and slice them horizontally to create a pocket for the whipped cream filling. Spoon in your lightly whipped cream, ensuring a generous amount for added flavor and richness. Close the cakes gently, keeping the filling tucked inside.
Step 6: Chill to Set
Place the assembled Old-Fashioned Pink Jelly Cakes in the refrigerator for at least 30 minutes. This chilling period allows the jelly to set properly and melds the flavors together, enhancing the overall texture. After chilling, remove from the fridge and your nostalgic treat is ready to be served!
Expert Tips for Old-Fashioned Pink Jelly Cakes
- Quality Ingredients: Use fresh, high-quality jelly for optimal flavor; it should have a thick, syrupy consistency for the best results.
- Avoid Overmixing: Take care not to overmix the sponge batter, as this can result in dense cakes instead of the light, airy texture we desire.
- Chill for Perfection: Allow the assembled cakes to chill for at least 30 minutes to ensure the jelly sets properly, enhancing both flavor and texture.
- Cut Evenly: When slicing your sponge, aim for uniform pieces to ensure consistent assembly and a lovely presentation of your Old-Fashioned Pink Jelly Cakes.
- Personalize the Flavor: Experiment with different jelly flavors like raspberry or orange to create your unique twist on this classic dessert.
Make Ahead Options
These Old-Fashioned Pink Jelly Cakes are perfect for busy home cooks looking to save time without sacrificing taste! You can prepare the vanilla sponge and strawberry jelly up to 24 hours in advance. Simply bake the sponge, cool it completely, and store it in an airtight container at room temperature. To maintain freshness, keep the jelly refrigerated and assemble the cakes just before serving; this helps prevent the sponge from becoming soggy. When ready to enjoy, dip the cooled sponge in the jelly, coat with desiccated coconut, fill with whipped cream, and chill for 30 minutes. You’ll have delightful cakes that feel just as fresh and delicious as if they were made on the spot!
How to Store and Freeze Old-Fashioned Pink Jelly Cakes
Fridge: Keep your Old-Fashioned Pink Jelly Cakes in an airtight container in the refrigerator for up to 3 days. This helps maintain their fresh texture and prevent them from drying out.
Freezer: For longer storage, you can freeze the unassembled sponge and jelly layers separately for up to 2 months. Once thawed, assemble them fresh for the best taste.
Reheating: If you’ve frozen your cakes, let them thaw in the fridge overnight before assembly. Avoid reheating, as the jelly and whipped cream are best enjoyed cold.
Make-Ahead Tips: Prepare the sponge and jelly a day in advance; assemble just before serving for optimal texture, ensuring that the flavors meld beautifully.
Old-Fashioned Pink Jelly Cakes Variations
Feel free to get creative with this recipe and make it your own with these colorful twists!
- Raspberry Jelly: Swap out the strawberry jelly for raspberry for a different fruity flavor that adds a tart kick.
- Citrus Zest: Fold in a teaspoon of lemon or lime zest into the sponge for a refreshing, zesty note that brightens each bite.
- Yogurt Filling: Replace the whipped cream with Greek yogurt for a tangy, lighter filling that also boosts the protein content.
- Coconut Essence: Add a few drops of coconut extract to the sponge batter for an extra tropical flair that pairs beautifully with the jelly.
- Nutty Crunch: Incorporate chopped nuts like almonds or hazelnuts sprinkled into the coconut coating for a delightful crunch and nutty flavor.
- Chocolate Drizzle: For a sweet twist, drizzle melted chocolate over the cooled cakes before serving for an extra indulgent touch.
- Spice It Up: Add a pinch of ground cinnamon or nutmeg into the sponge mix for a warm, aromatic flavor boost that complements the jelly.
- Mini Cakes: Create mini versions by using a muffin tin instead of a cake pan, perfect for delightful bite-sized treats for gatherings.
Experiment with these variations, and if you’re feeling adventurous, you might consider trying out a flavorful yogurt parfait to enjoy on the side! With a little imagination, your Old-Fashioned Pink Jelly Cakes can become a signature dessert everyone will adore!
What to Serve with Old-Fashioned Pink Jelly Cakes?
These delightful treats are perfect for rounding out a memorable meal or gathering; let your imagination run wild with these pairing ideas!
- Fresh Berries: Juicy strawberries or raspberries provide a vibrant, fruity counterpoint that enhances the sweetness of the cakes beautifully.
- Creamy Vanilla Ice Cream: A scoop of smooth ice cream will elevate the experience, adding a luscious touch to each bite.
- Tea or Coffee: A nice cuppa can complement the sweet, nostalgic flavors perfectly—consider a light Earl Grey or a rich espresso.
- Citrus Salad: A refreshing mix of oranges and grapefruits provides a zesty contrast, cutting through the sweetness while adding a burst of freshness.
- Chocolate Dipping Sauce: For those extra indulgent moments, a warm chocolate sauce can turn your jelly cakes into a decadent dessert.
- Toast with Jam: Serve the cakes alongside buttery toast topped with your favorite jam to create a charming afternoon tea spread.
- Cheese Platter: A selection of soft cheeses, like brie or goat cheese, can add an unexpected savory note, balancing the sweet confections deliciously.
- Sparkling Water with Lime: Refreshing and light, sparkling water infused with lime brightens up the dessert-heavy table without overwhelming the palate.
- Caramel Flan: This rich, creamy dessert works well in contrast to the lightness of your Old-Fashioned Pink Jelly Cakes, creating a varied dessert offering.
Old-Fashioned Pink Jelly Cakes Recipe FAQs
How do I choose the right jelly for my cakes?
Absolutely! For the best flavor, opt for a high-quality jelly, preferably one that has a thick, syrupy consistency. Strawberry jelly is traditional, but feel free to experiment with raspberry, orange, or even passionfruit jellies for a unique twist that complements the soft sponge beautifully.
What’s the best way to store my Old-Fashioned Pink Jelly Cakes?
To keep your cakes fresh, store them in an airtight container in the refrigerator where they will last up to 3 days. This ensures they maintain their delightful texture and keep the sweet jelly from drying out.
Can I freeze the Old-Fashioned Pink Jelly Cakes?
Yes, you can absolutely freeze the layers! For the best results, freeze the unassembled sponge and jelly separately for up to 2 months. When you’re ready to enjoy them, simply thaw in the fridge overnight. Once thawed, assemble the cakes fresh for that delightful taste!
What should I do if my sponge turns out dense?
Very! If your sponge is dense, it could be due to overmixing the batter. Remember, less is more! Mix gently until just combined after adding the wet ingredients. Additionally, ensuring your baking powder is fresh will help your sponge rise properly. Always check the expiration date on your leavening agents for the best results.
Are there any dietary considerations for my guests?
Absolutely! These Old-Fashioned Pink Jelly Cakes are vegetarian-friendly, but if you’re serving guests with dietary restrictions or allergies, be sure to use gluten-free cake flour and check that the jelly and cream don’t contain any allergens like dairy (if substituting with yogurt). Always communicate with your guests to ensure everyone can indulge in these nostalgic treats!
Irresistible Old-Fashioned Pink Jelly Cakes for Sweet Nostalgia
Ingredients
Equipment
Method
- Preheat your oven to 350°F (175°C). In a mixing bowl, whisk together the cake flour, sugar, and baking powder until well combined. In a separate bowl, beat the eggs with pure vanilla extract until fluffy. Combine wet and dry ingredients until smooth.
- Pour the batter into a greased and lined 9-inch round cake pan and bake for about 18 minutes, until golden brown. Let it cool in the pan for a few minutes before transferring to a wire rack.
- Allow the sponge to cool completely on the wire rack for about 30 minutes, then prepare your jelly according to package instructions.
- Cut the cooled sponge into squares or circles. Dip each piece in the warmed strawberry jelly, allowing excess to drip off. Roll in desiccated coconut.
- Slice the coated cake pieces horizontally to create pockets for the whipped cream filling. Spoon in whipped cream generously and close the cakes.
- Place assembled cakes in the refrigerator for at least 30 minutes to set the jelly properly before serving.
Leave a Reply