
The warm scent of toasty tortillas filled with creamy, spiced chicken always brings me back to family gatherings where laughter and good food filled the air. This is why I’m excited to share my easy recipe for Crispy Chicken Taquitos, a fun twist on a classic Mexican appetizer. Perfect for those busy nights or impromptu gatherings, these taquitos are not just quick to whip up; they’re also a customizable crowd-pleaser that will elevate your snack game. Baked to a golden perfection, they offer a delightfully crispy texture without the guilt of frying. Whether you fill them with leftover rotisserie chicken or switch it up with a spicy cheese blend, these easy taquitos are sure to become a go-to for any occasion. Curious about how you can make these delicious bites? Let’s get started!
Why Are Crispy Chicken Taquitos So Irresistible?
Flavorful, creamy filling: The combination of cream cheese and shredded chicken creates a melt-in-your-mouth experience that’s hard to resist.
Versatile ingredients: You can easily swap in your favorite toppings or cheeses for a personalized touch.
Quick preparation: With only a handful of steps, you’ll have these crispy delights ready in no time—perfect for busy weeknights!
Healthier than frying: Baked instead of fried, these taquitos maintain that crunchy texture while being a lighter option for snack time.
Crowd-pleasing appeal: Whether served at parties or game days, everyone loves a tasty, handheld treat! Pair them with a zesty avocado sauce or homemade pico de gallo for an unforgettable presentation. Don’t miss out on your chance to impress your guests with these delightful bites!
Crispy Chicken Taquito Ingredients
Get ready to create these deliciously crispy chicken taquitos with the perfect balance of flavors!
For the Filling
- Cooked Shredded Chicken – Use rotisserie chicken for a time-saving option that still packs a punch of flavor.
- Cream Cheese – Soften it before use for a smooth and creamy filling that binds the ingredients together.
- Shredded Cheddar/Mexican Blend Cheese – Provides gooey, melty goodness; feel free to swap in your favorite cheese for a unique twist.
- Salsa – Adds moisture and flavor; choose based on your preferred spice level—mild or fiery!
- Garlic Powder – Enhances the depth of flavor effortlessly; fresh minced garlic can be used for a stronger kick.
- Chili Powder – Infuses warmth and mild spice; adjust the amount according to your taste for crispy chicken taquitos.
- Cumin – Delivers earthy notes that perfectly complement the other spices.
- Salt and Black Pepper – Essential seasonings to taste, bringing everything together beautifully.
For the Taquitos
- Small Flour or Corn Tortillas – Use flour tortillas for softness or corn tortillas for a gluten-free option; both encase the filling perfectly.
- Cooking Spray/Oil – Brush on your taquitos to achieve a crisply baked exterior in the oven or air fryer.
Optional Toppings
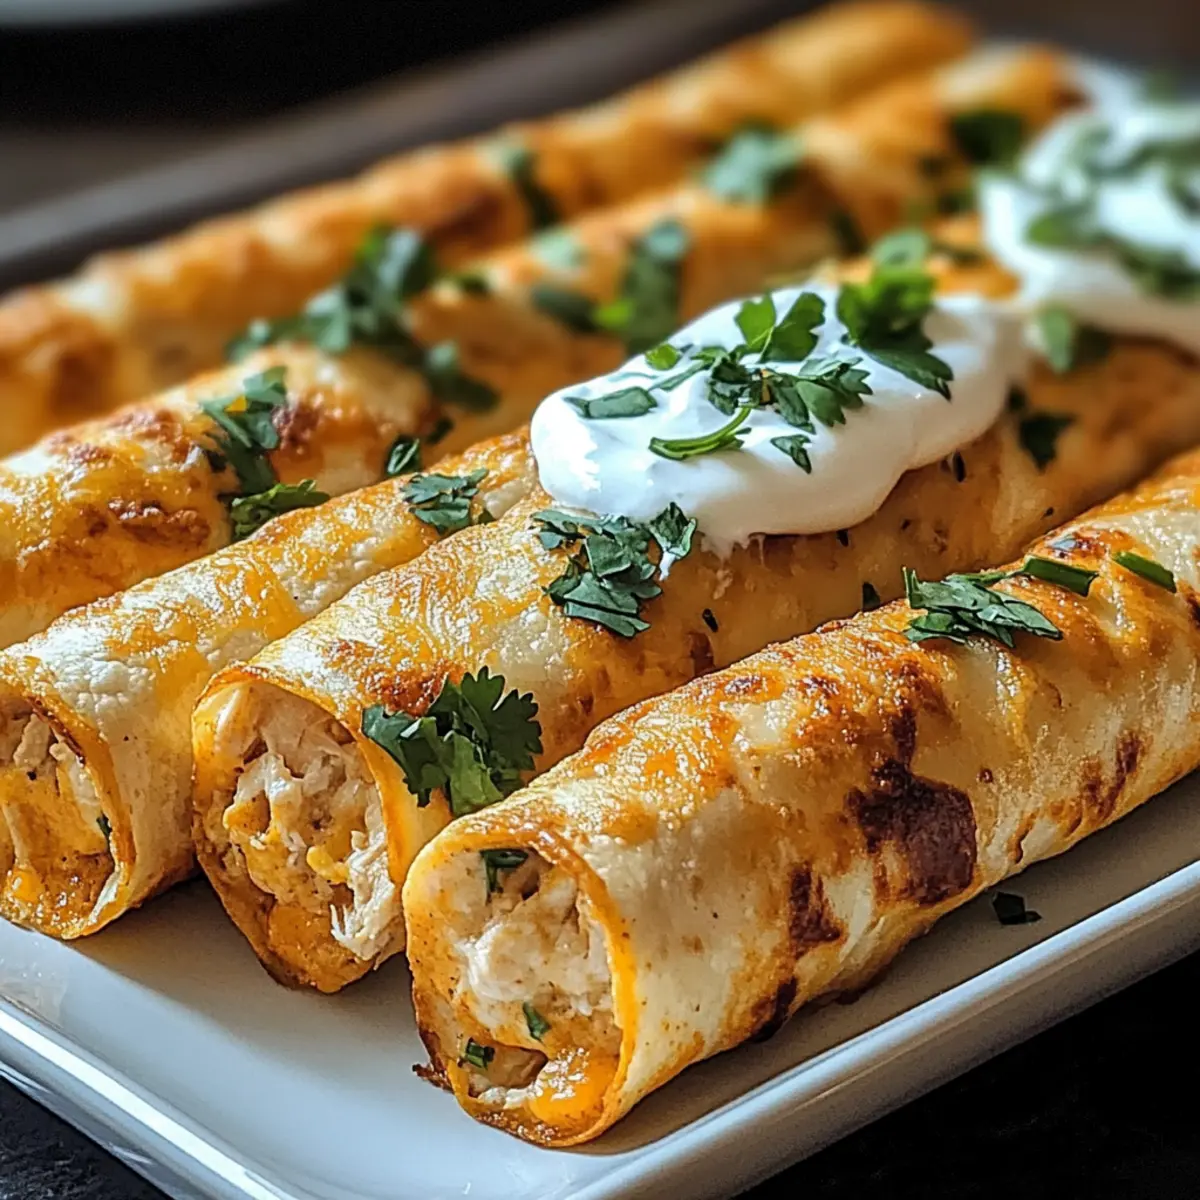
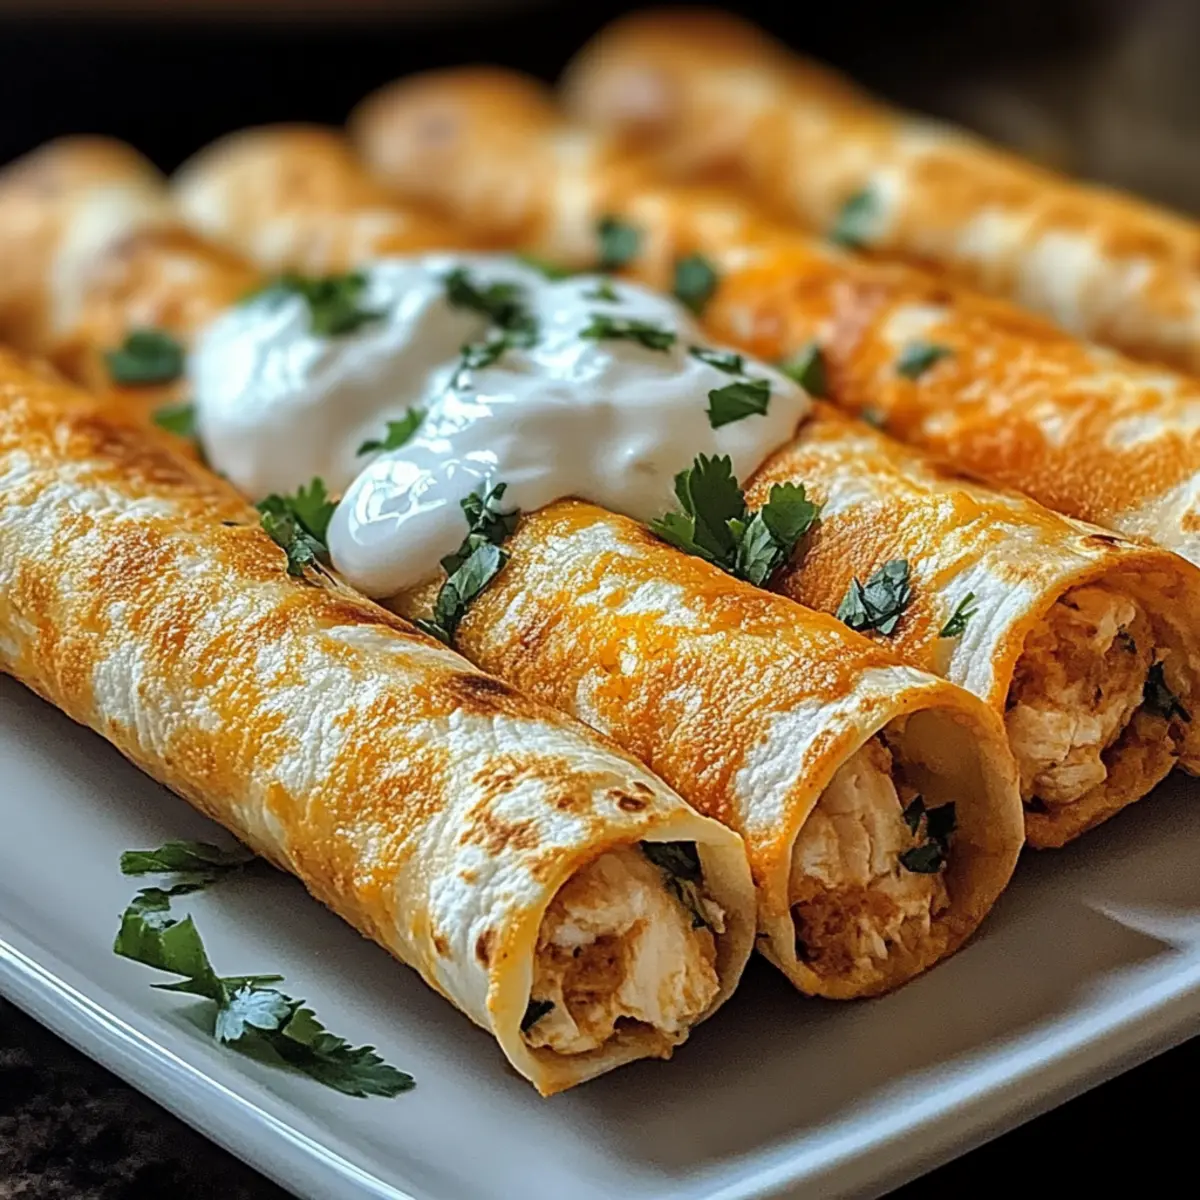
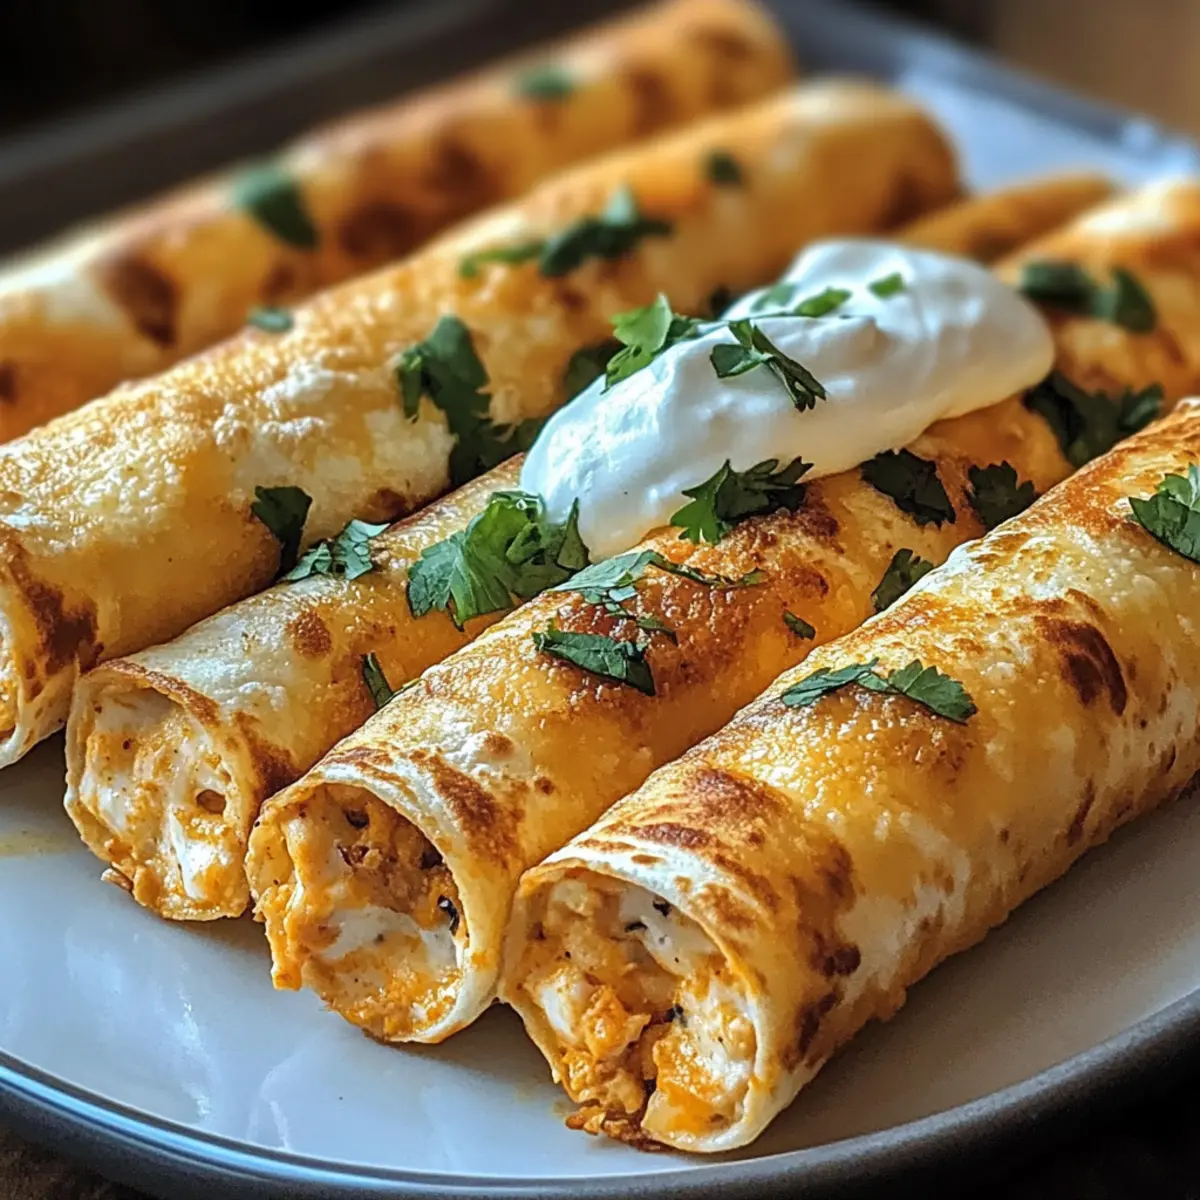
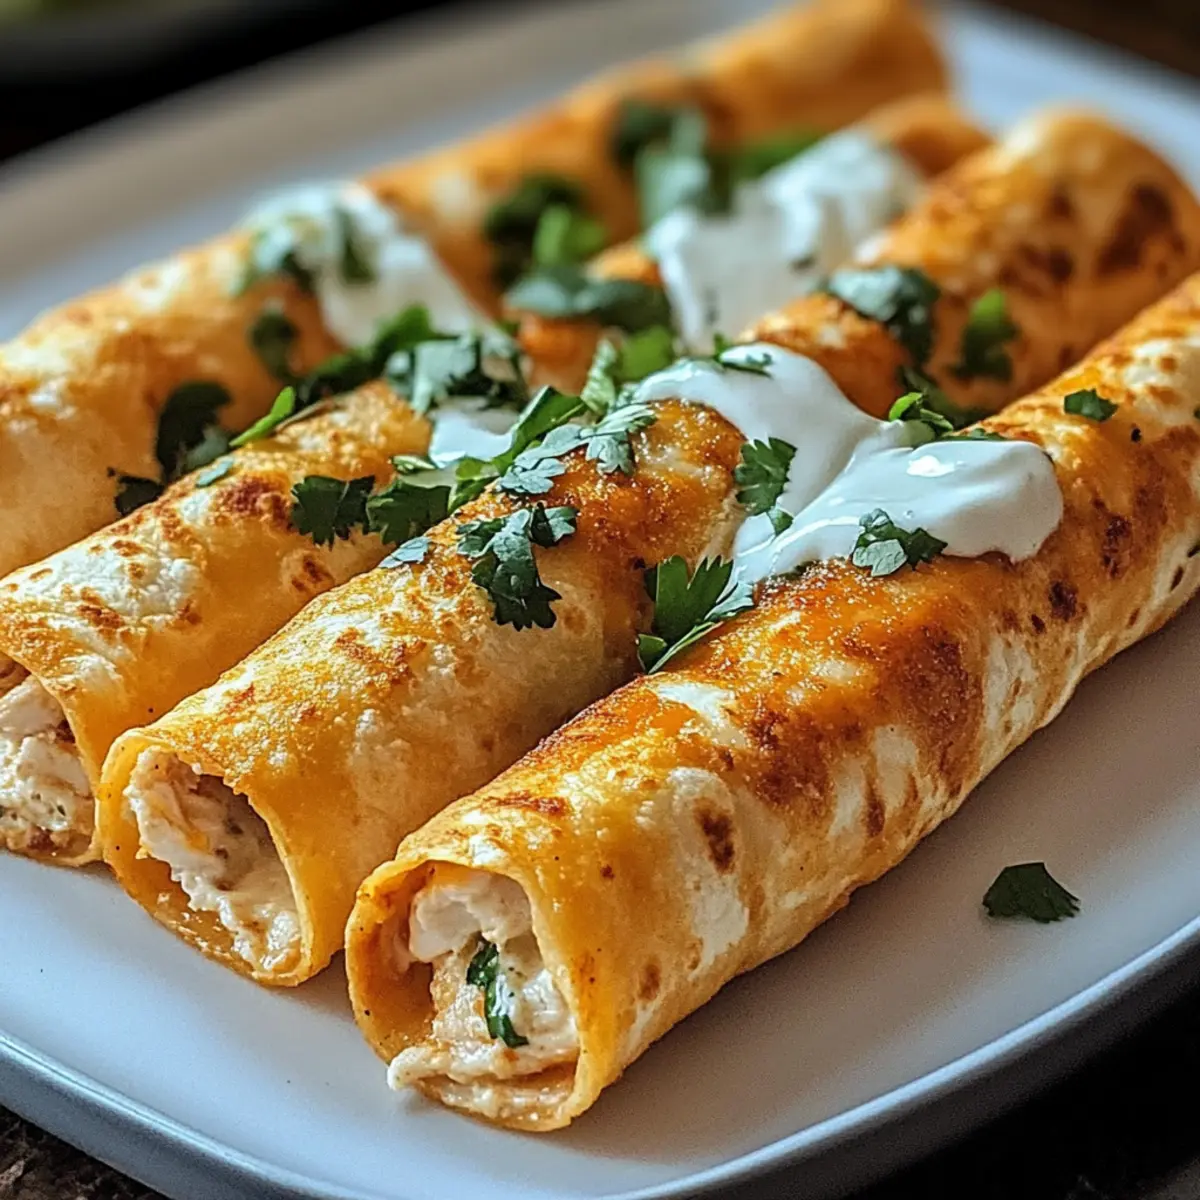
- Chopped Cilantro – Adds freshness and a pop of color to the finished dish.
- Sour Cream – Offers a cool, creamy contrast; it’s a classic pairing for taquitos!
- Guacamole – A deliciously creamy dip that complements the flavors in each bite.
- Extra Shredded Cheese – Because you can never have too much cheese, right? Add it on top before serving for ultimate cheesiness!
Step‑by‑Step Instructions for Crispy Chicken Taquitos
Step 1: Preheat the Oven
Begin by preheating your oven to 425°F (220°C). This temperature is ideal for achieving that golden-brown, crispy texture on your taquitos. While it warms up, prepare a baking sheet by lining it with parchment paper or lightly greasing it—this will help prevent sticking and promote even baking.
Step 2: Prepare the Filling
In a large mixing bowl, combine the cooked shredded chicken, softened cream cheese, shredded cheese, salsa, garlic powder, chili powder, cumin, salt, and black pepper. Stir well until all ingredients are thoroughly mixed and the filling is creamy and flavorful. You want to create a cohesive mixture that will pack a punch in your Crispy Chicken Taquitos!
Step 3: Warm the Tortillas
To make rolling easier, warm your small flour or corn tortillas in the microwave. Heat them in a covered dish or wrap them in a damp paper towel for about 20 seconds. This will make them pliable without breaking. Carefully check if they are warm, as this ensures they will roll tightly around the flavorful filling.
Step 4: Fill the Tortillas
Take each warmed tortilla and spoon 2-3 tablespoons of the chicken filling onto one side. Gently fold the tortilla over the filling, rolling it tightly towards the other end to encase all that goodness. Be sure to seal the edges securely to prevent any filling from escaping during baking.
Step 5: Position the Taquitos
Place the rolled taquitos seam-side down on your prepared baking sheet. This will help them hold their shape while baking. Make sure to leave a little space between each taquito for proper air circulation, which is essential for achieving that desired crispiness.
Step 6: Add Crispy Coating
Lightly brush or spray the taquitos with cooking spray or a bit of oil. This step is crucial for ensuring that your Crispy Chicken Taquitos develop a wonderfully crispy exterior. Make sure to evenly coat each taquito for consistent browning and deliciousness throughout the batch.
Step 7: Bake the Taquitos
Slide the baking sheet into the preheated oven and bake the taquitos for 15-20 minutes. Keep an eye on them; you want them to emerge golden brown and crispy. For an extra crunch, you can switch your oven to broil for an additional 1-2 minutes. Just watch closely to avoid burning!
Step 8: Serve and Enjoy
Once baked to perfection, remove the Crispy Chicken Taquitos from the oven and let them cool slightly. Serve warm with your choice of optional toppings like sour cream, guacamole, or fresh cilantro. These delightful bites are perfect for sharing, so grab your favorite sides and dig in!
Make Ahead Options
Crispy Chicken Taquitos are a fantastic option for meal prep, allowing you to savor homemade snacks even on your busiest days. You can prepare the filling up to 24 hours in advance by mixing the cooked shredded chicken, cream cheese, and spices, then store it in an airtight container in the refrigerator. Additionally, you can assemble the taquitos and refrigerate them before baking, ensuring they’re just as fresh when you’re ready to cook. When you’re ready to enjoy, simply preheat your oven and bake directly from the fridge, adding a few extra minutes to the cooking time for perfectly crispy results. This process not only saves you time but also guarantees delicious, flavorful taquitos that everyone will love!
Crispy Chicken Taquitos Variations
Feel free to explore these creative twists on your crispy chicken taquitos for an unforgettable experience!
-
Spicy Pepper Jack: Substitute shredded cheddar for pepper jack cheese to add a delightful kick with every bite. Spice lovers will rejoice!
-
Vegetarian Delight: Swap shredded chicken for black beans or sautéed veggies, making these taquitos a tasty meatless option that’s just as satisfying.
-
Zesty Avocado: Top with a zesty avocado sauce before serving to enhance the creamy filling with a refreshing twist that perfectly complements the crunch.
-
Bold Buffalo: Mix in buffalo sauce with the chicken filling for a fiery twist—a great way to enjoy a different flavor profile with just one easy addition!
-
Heat Factor: Incorporate diced jalapeños into the chicken mixture to turn up the heat, perfect for those who crave a little extra excitement in their taquitos.
-
Cheesy Variations: Add a layer of queso fresco or crumbled feta on top for a rich flavor boost that adds creaminess to every crunchy bite.
-
Saucy Finale: Serve your taquitos with a variety of dips like homemade pico de gallo or classic sour cream for a fun and interactive culinary experience.
Don’t forget, these versatile taquitos can also be enjoyed alongside dishes like Baked Chicken Chimichangas or refreshing Chicken Taquitos Wow for a complete Mexican spread!
What to Serve with Crispy Chicken Taquitos
Dive into a colorful spread that perfectly complements the crunchy, flavor-packed taquitos!
-
Fresh Salad: A crisp garden salad with a tangy vinaigrette brightens the meal and adds refreshing crunch.
-
Mexican Street Corn: This creamy and slightly spicy dish offers a delightful contrast to the taquitos’ crunchiness.
-
Black Bean Salsa: Combining black beans, corn, and diced tomatoes, this salsa brings an explosion of flavors and textures that harmonize beautifully.
-
Guacamole: Creamy and rich, fresh guacamole enhances every bite with its zesty and creamy goodness, balancing the spiced chicken.
-
Zesty Avocado Sauce: Drizzled over the taquitos, this smooth sauce adds a fresh and vibrant kick that complements their savory richness.
-
Margaritas: A classic pairing, these refreshing cocktails elevate the festive mood, making your taquito night even more special.
-
Churros: For dessert, crispy churros dusted with cinnamon sugar create a delightful end to your taquito feast—sweet and comforting!
-
Spicy Roasted Potatoes: Crispy, seasoned potatoes deliver a hearty side, perfectly balancing the lightness of the taquitos.
Mix and match these sides to create a memorable meal with your delicious Crispy Chicken Taquitos!
How to Store and Freeze Crispy Chicken Taquitos
Fridge: Store leftover crispy chicken taquitos in an airtight container for up to 3 days. Reheat in the oven to restore their crispiness.
Freezer: For longer storage, freeze uncooked taquitos on a baking sheet until firm, then transfer to a freezer bag; they’ll keep for up to 3 months. Bake directly from frozen for a quick snack.
Reheating: To enjoy taquitos later, reheat baked ones in a preheated oven at 375°F (190°C) for 10-15 minutes, ensuring they regain their crunch.
Make-Ahead: Assemble taquitos ahead of time and refrigerate for up to 24 hours before baking. This allows for a speedy dinner solution!
Expert Tips for Crispy Chicken Taquitos
• Warm Tortillas Well: Microwaving tortillas makes them pliable, preventing tears. Warm them just right—around 20 seconds should do the trick.
• Seal Properly: Rolling taquitos tightly helps keep the filling inside during baking. Make sure to tuck in the ends to avoid spills!
• Customize Your Fillings: Don’t hesitate to experiment! Substitute the chicken with leftover veggies or beans for delicious vegetarian crispy chicken taquitos.
• Watch The Baking Time: Every oven is different, so keep an eye on your taquitos as they bake. Look for a golden brown hue for perfect crispiness.
• Serve with Dips: Enhance your crispy chicken taquitos with zesty dips like avocado sauce or homemade salsa for an extra flavor boost.
Crispy Chicken Taquitos Recipe FAQs
How do I choose the right chicken for my taquitos?
Absolutely! For the best results, using cooked shredded chicken is key. A rotisserie chicken is a fantastic time-saver and adds great flavor. Look for chicken that’s juicy and tender, avoiding any dark spots or dry edges.
How should I store leftover taquitos?
You can store leftover crispy chicken taquitos in an airtight container in the fridge for up to 3 days. Just reheat them in the oven to bring back that crispy texture! I often recommend placing them on a baking sheet to prevent sogginess.
Can I freeze taquitos before baking?
Yes, indeed! To freeze, assemble the taquitos without baking them first. Lay them on a baking sheet until firm, then transfer to a freezer bag. They can be stored for up to 3 months. When you’re ready to eat, bake them directly from frozen, adding a few extra minutes to the cooking time for perfect crispiness.
What should I do if my taquitos unroll during baking?
Very! If your taquitos are unrolling, it might be due to not rolling them tightly enough or the tortillas being too cold. Make sure to roll them snugly and warm the tortillas properly in the microwave—around 20 seconds should do the trick.
Are there any dietary considerations for taquitos?
Yes, you can absolutely customize your crispy chicken taquitos to meet dietary needs! For a gluten-free option, use corn tortillas. Additionally, if you have vegetarian guests, try swapping the chicken for black beans or sautéed veggies. Just be sure any sauces or toppings are also compliant with dietary restrictions!
How long do taquitos keep in the fridge after baking?
Baked taquitos can be stored in the refrigerator for up to 3 days. Just make sure they’re in a well-sealed container! To reheat, pop them back in the oven at 375°F (190°C) for about 10-15 minutes to restore their crunch.
Crispy Chicken Taquitos: A Family Favorite Made Easy
Ingredients
Equipment
Method
- Preheat your oven to 425°F (220°C) and prepare a baking sheet by lining it with parchment paper.
- In a large mixing bowl, combine the cooked shredded chicken, softened cream cheese, shredded cheese, salsa, garlic powder, chili powder, cumin, salt, and black pepper. Stir until well mixed.
- Warm your tortillas in the microwave for about 20 seconds to make them pliable.
- Spoon 2-3 tablespoons of the filling onto each tortilla, fold, and roll tightly. Seal the edges securely.
- Place the rolled taquitos seam-side down on the baking sheet, with space in between each.
- Lightly brush the taquitos with cooking spray or oil for a crispy exterior.
- Bake in the preheated oven for 15-20 minutes until golden brown and crispy.
- Serve warm with optional toppings like sour cream, guacamole, or fresh cilantro.
Leave a Reply