
As a comforting flavor wafted through my kitchen, I couldn’t help but feel transported. The allure of No-Bake Biscoff Cheesecake Bars quickly became my go-to dessert for effortless indulgence. With their creamy filling and delightful spiced cookie crust, these treats embody everything we love about homemade desserts—plus, they’re a breeze to whip up without ever turning on the oven! They’re perfect for busy weeknights or when a special occasion calls for something impressive yet simple. Whether you’re looking to impress guests or simply pamper yourself, these bars tick all the boxes. Curious about how to create this delectable masterpiece? Let’s dive into the recipe!

Why is this dessert a must-try?
Irresistibly Easy: You don’t need any baking skills to enjoy this decadent treat! Just mix, chill, and serve.
Flavor Explosion: With rich Biscoff cookies and creamy filling, each bite is an indulgence that you won’t forget!
Versatile Customization: Feel free to get creative! Add chocolate ganache or fresh berries for an extra layer of flavor.
Make-Ahead Convenience: Perfect for busy schedules, you can prepare these bars up to three days in advance.
Crowd-Pleasing Delight: Ideal for gatherings or cozy nights in, they’ll impress everyone—friends and family alike!
If you love light yet sumptuous desserts, check out my Banana Oatmeal Bars for another quick treat!
Biscoff Cheesecake Bars Ingredients
For the Crust
• Biscoff Cookies – This forms the base for an irresistible crust; substitute with similar speculoos cookies if needed.
• Unsalted Butter – Binds the crust perfectly; using salted butter adds a savory touch.
For the Filling
• Cream Cheese – Provides a rich, creamy filling; ensure it’s at room temperature for smooth blending.
• Powdered Sugar – Sweetens the cheesecake mixture; consider coconut sugar for a healthier option.
• Biscoff Cookie Butter Spread – Adds delightful flavor and creaminess; feel free to double for more intense Biscoff goodness.
• Vanilla Extract – Enhances the overall flavor profile; opt for pure extract for the best results.
• Salt – Balances the sweetness and enhances the overall flavor experience.
For the Whipped Cream
• Heavy Whipping Cream – Whipped to add lightness; coconut cream is a great dairy-free alternative.
• Granulated Sugar – Stabilizes the whipped cream; optional for those on sugar-free diets.
For the Topping
• Additional Biscoff Spread – Perfect for drizzling to finish off your bars elegantly; can be replaced with chocolate sauce for a different twist.
• Extra Biscoff Cookies – Great for garnish; adds an appealing presentation and delightful crunch.
Now that you’re geared up with all the Biscoff Cheesecake Bars ingredients, you’re one step closer to a heavenly dessert experience!
Step‑by‑Step Instructions for No-Bake Biscoff Cheesecake Bars
Step 1: Prepare the Crust
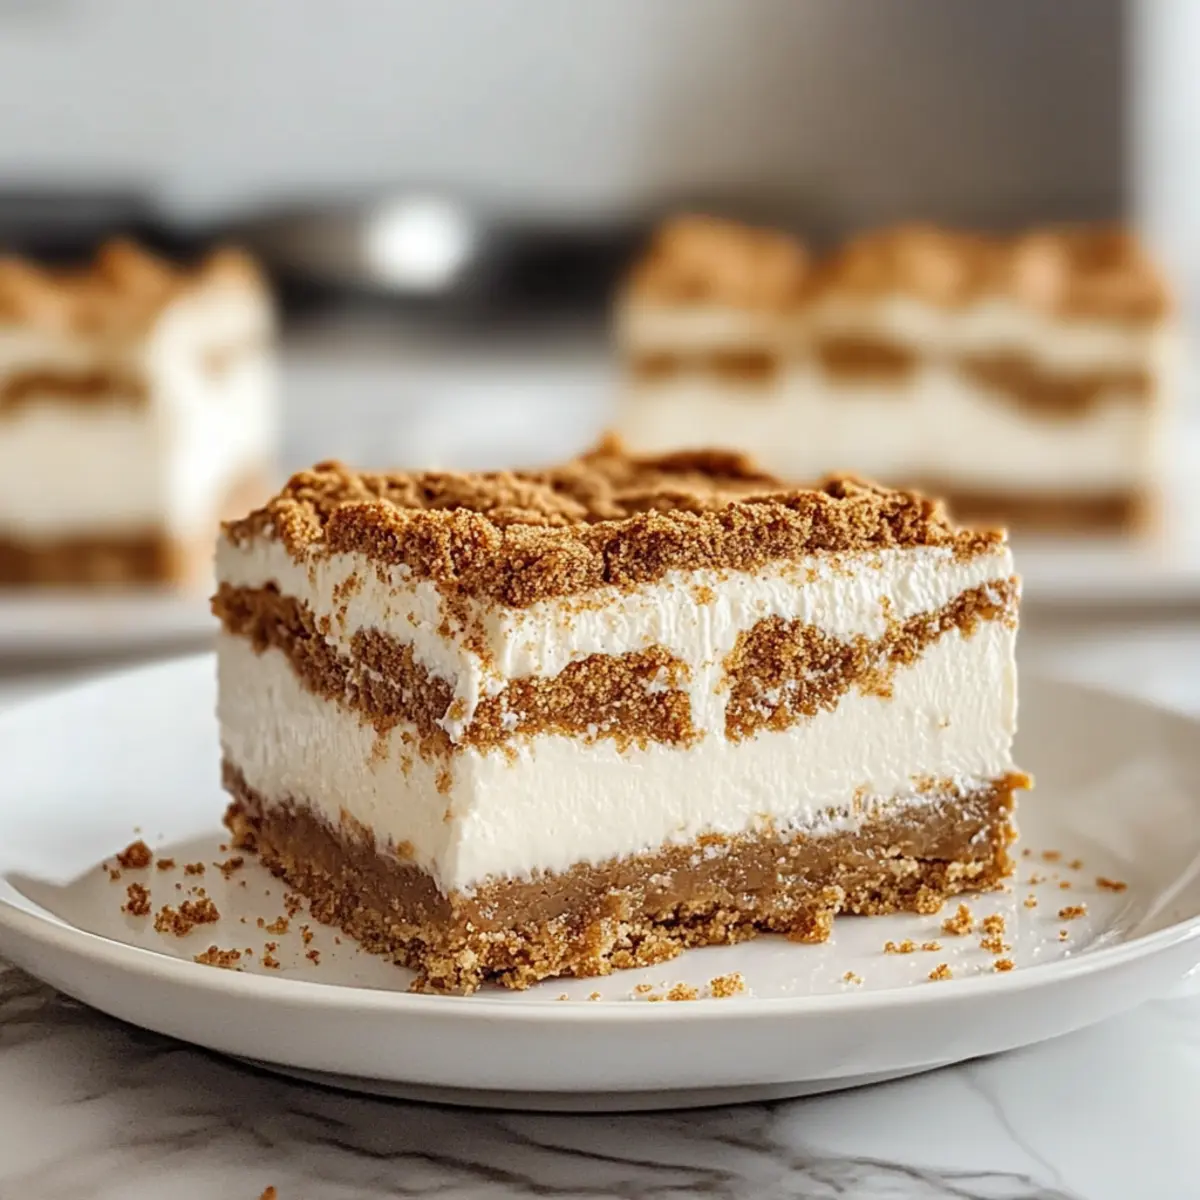
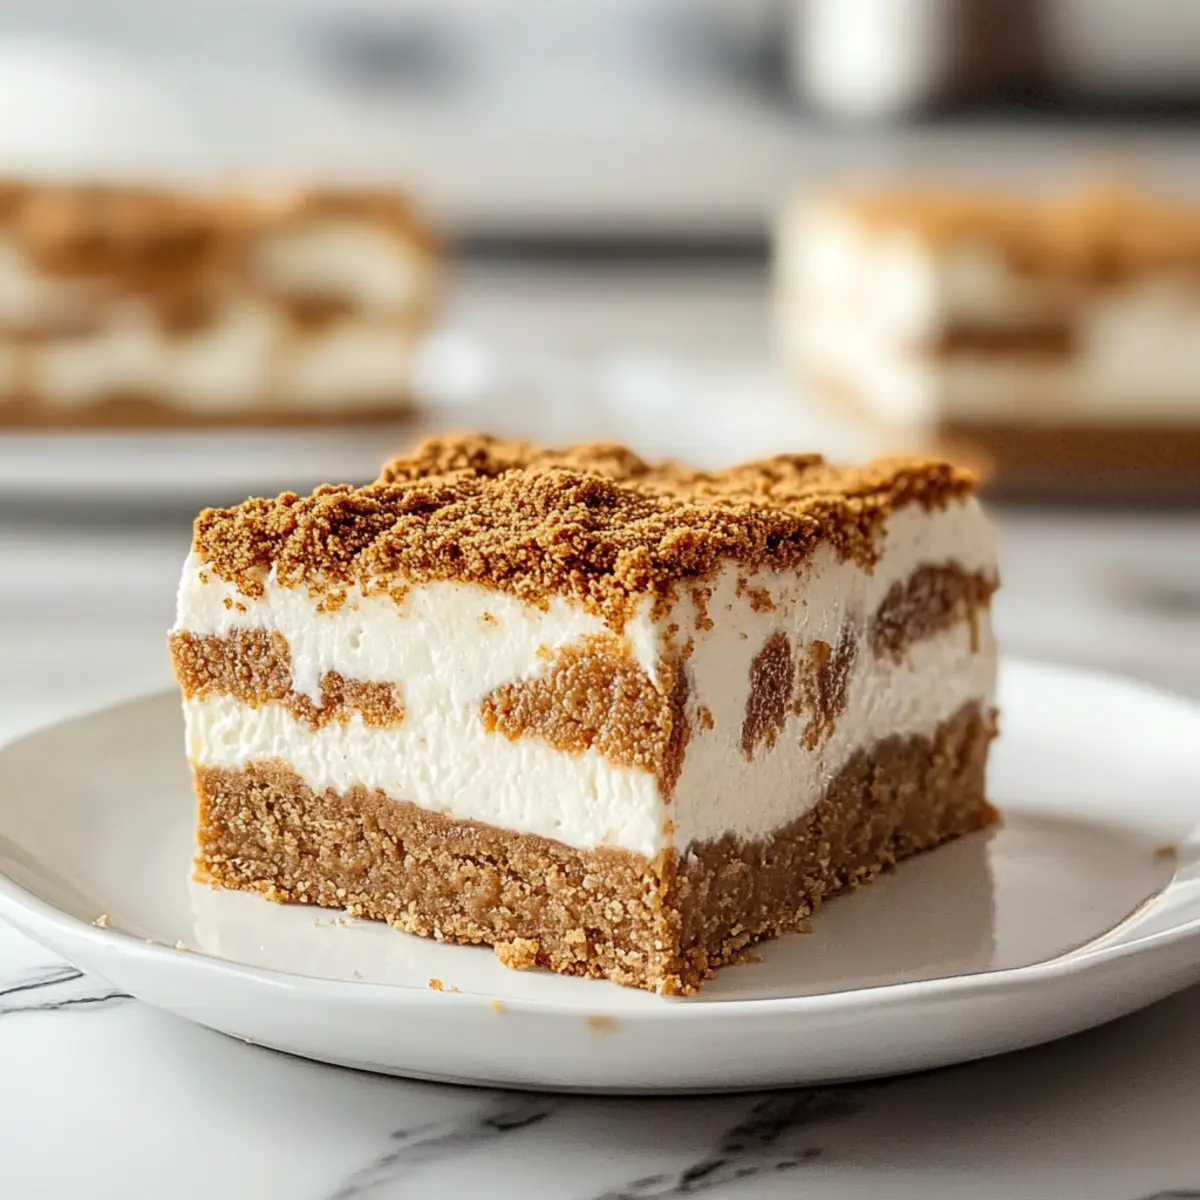
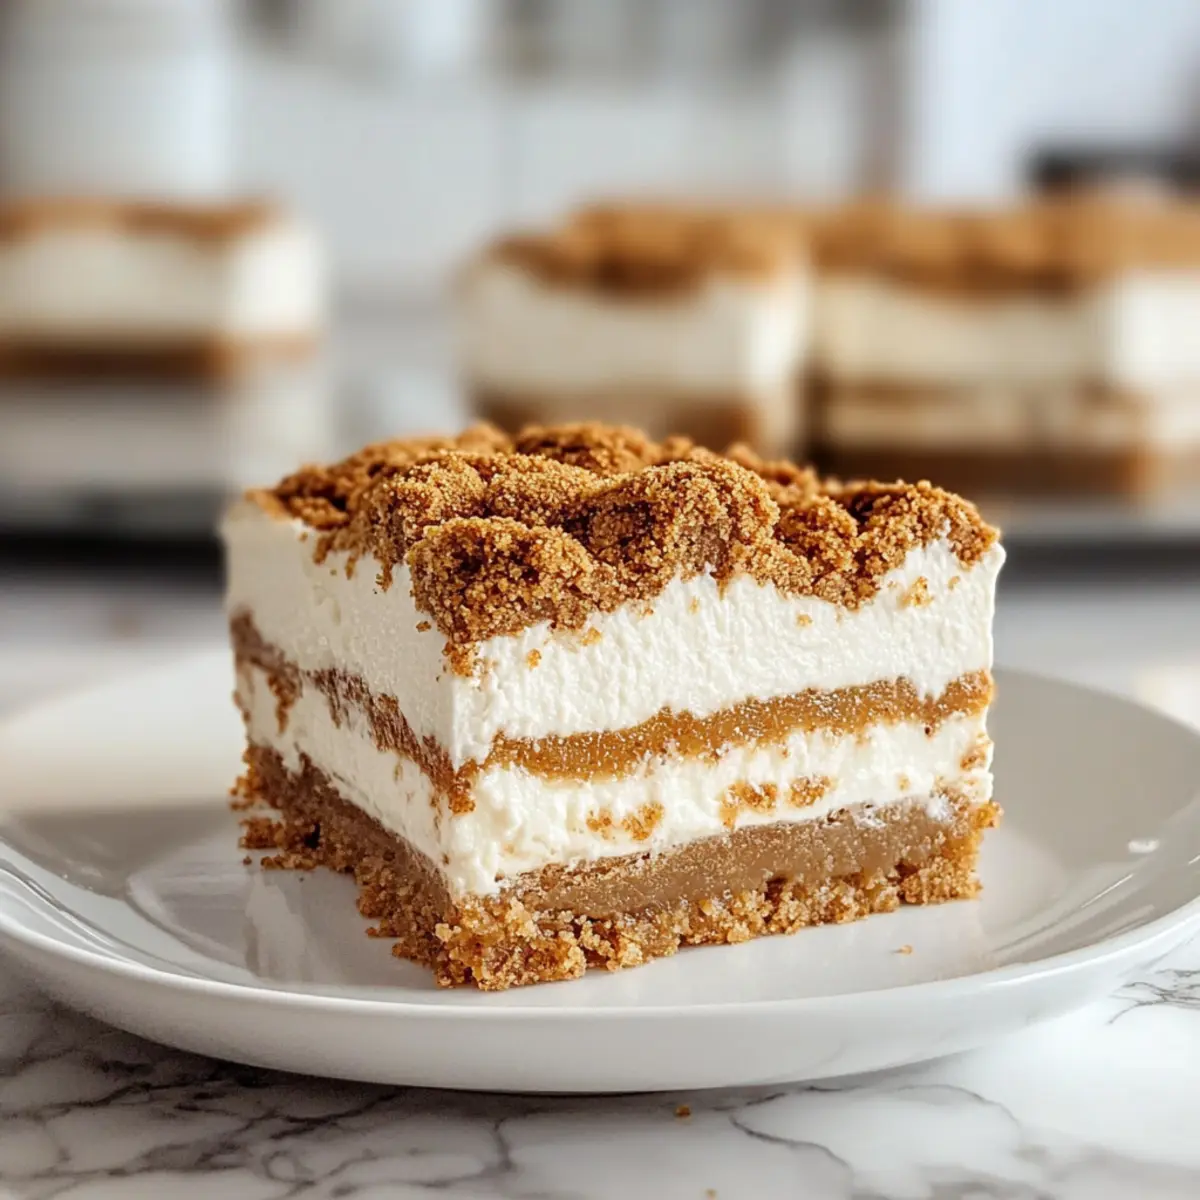
Start by lining a 9×13-inch baking pan with parchment paper and lightly greasing it to prevent sticking. In a food processor, blend Biscoff cookies into fine crumbs, then combine with melted unsalted butter until well mixed. Press this mixture firmly into the bottom of the prepared pan, creating an even layer. Chill the crust in the refrigerator for at least 30 minutes to set.
Step 2: Make the Filling
While the crust chills, gather your ingredients and beat the softened cream cheese in a large mixing bowl until smooth and creamy, about 2 minutes. Gradually add powdered sugar, Biscoff cookie butter spread, vanilla extract, and a pinch of salt, mixing until fully incorporated and silky. This rich filling will give the No-Bake Biscoff Cheesecake Bars their indulgent flavor.
Step 3: Whip Heavy Cream
In a separate bowl, pour in the heavy whipping cream and add granulated sugar. Use an electric mixer to whip the cream on medium-high speed until stiff peaks form, around 2–3 minutes. Be careful not to overwhip; you want a light and airy texture. Gently fold this whipped cream into the cream cheese mixture until just combined, ensuring the filling remains fluffy.
Step 4: Assemble Bars
Remove the chilled crust from the refrigerator and spread the creamy filling evenly over it using a spatula. Drizzle warmed Biscoff spread on top of the filling, then use a toothpick or knife to swirl it gently. The swirls will create a beautiful marbled effect, enhancing the visual appeal of your No-Bake Biscoff Cheesecake Bars.
Step 5: Chill and Serve
Cover the pan with plastic wrap and refrigerate the bars for at least four hours, though overnight is best for maximum flavor development. Once chilled, use a sharp knife dipped in warm water to cut the bars into squares, ensuring clean edges. Optionally, garnish each piece with extra Biscoff cookies for that delightful final touch before serving.
How to Store and Freeze Biscoff Cheesecake Bars
Fridge: Store leftover Biscoff Cheesecake Bars in an airtight container in the refrigerator for up to 5 days. This preserves their creamy texture and flavor.
Freezer: For longer storage, wrap the bars individually in plastic wrap, then place them in a freezer-safe container. They can be frozen for up to 2 months.
Thawing: To enjoy frozen Biscoff Cheesecake Bars, transfer them to the fridge and let them thaw overnight. This will ensure they return to their deliciously creamy state.
Making Ahead: Great for busy schedules, you can assemble the bars up to three days in advance, making your dessert prep a breeze!
Biscoff Cheesecake Bars Variations
Get ready to customize your Biscoff Cheesecake Bars with exciting twists that will enhance their deliciousness!
-
Chocolate Ganache: Add a luscious layer of chocolate ganache between the crust and filling for a rich flavor combination. The chocolate complements the spices of Biscoff beautifully.
-
Caramel Swirl: Stir in a generous swirl of caramel sauce to amp up the sweetness and create a decadent layer. This not only adds flavor but also an elegant touch.
-
Berry Bliss: Top with fresh berries like strawberries or raspberries for a burst of fruity freshness. The tartness will balance the creamy richness of the cheesecake.
-
Nutty Crunch: Incorporate crushed nuts like almonds or pecans into the crust for added texture and a nutty flavor profile. They will add a delightful crunch that complements the creamy filling.
-
Oreo Variation: Swap Biscoff cookies with Oreo cookies for a twist that chocolate lovers will adore. The rich cookie flavor and cream filling will take your bars to a whole new level.
-
Pumpkin Spice: For a seasonal variation, blend in pumpkin puree and a dash of pumpkin spice into the cream cheese filling. This will give your cheesecake a cozy autumn vibe.
-
Minty Freshness: Add a few drops of mint extract to the filling for a refreshing minty twist. Top with crushed peppermint candies for extra flair around the holidays.
-
Sugar-Free Delight: Use sugar substitutes like erythritol for all the sugar elements if you’re looking for a sugar-free option. You can still enjoy these treats without compromising on sweetness!
For another delightful dessert, try my Banana Oatmeal Bars that are equally easy to whip up and bursting with flavor!
What to Serve with No-Bake Biscoff Cheesecake Bars
Indulging in these creamy bars opens up a world of delightful pairings that elevate your dessert experience.
-
Fresh Berries: Juicy strawberries or raspberries add a tart contrast to the rich cheesecake, enhancing every bite with a burst of freshness.
-
Drizzling Chocolate Sauce: A warm drizzle of chocolate adds a luscious touch, complementing the spiced Biscoff flavors perfectly while creating a beautiful presentation.
-
Vanilla Ice Cream: The creaminess of vanilla ice cream creates a dreamy juxtaposition with the bars, making for a truly decadent dessert ensemble.
-
Coffee or Espresso: A hot cup of coffee enhances the flavors beautifully; its bitterness balances the sweetness of the cheesecake bars while enriching the dessert’s overall experience.
-
Spiced Chai Tea: The aromatic spices in chai resonate with the Biscoff cookies, providing warmth and comfort, ideal for chilly evenings.
-
Coconut Whipped Cream: Light yet flavorful, coconut whipped cream offers a tropical twist that pairs well with the spice notes of the bars.
Elevate your dessert table with these choices that create a symphony of flavors and textures around your No-Bake Biscoff Cheesecake Bars!
Expert Tips for Biscoff Cheesecake Bars
-
Soften Cream Cheese: Allow your cream cheese to sit at room temperature for about 30 minutes; this prevents lumps in your filling, leading to a smooth texture.
-
Whip with Care: When whipping your cream, watch for stiff peaks—overwhipping can turn it grainy. Keep that airy lightness for your Biscoff Cheesecake Bars!
-
Chill Time Matters: For the best flavor and texture, refrigerate the bars overnight. This allows the flavors to meld beautifully, creating a richer outcome.
-
Warm Knife Technique: To achieve clean slices, dip your knife in warm water before cutting through the bars, cleaning it in between cuts for pristine edges.
-
Experiment Freely: Feel free to get creative with toppings like chocolate or fruit; just ensure they complement the flavors of the Biscoff cheesecake filling!
Make Ahead Options
These No-Bake Biscoff Cheesecake Bars are perfect for meal prep enthusiasts! You can prepare the crust and filling up to three days in advance, making your weeknights a breeze. Start by making the crust and chilling it as directed; this helps it set for a solid base. The filling can be mixed and refrigerated in an airtight container until you’re ready to assemble. When it’s time to serve, simply spread the filling over the chilled crust, drizzle with warmed Biscoff spread, and swirl for that elegant touch. Chill the assembled bars for at least four hours before serving to ensure they’re just as delicious and refreshing as when first made. Enjoy the time-saving benefits and the delight they bring!
Biscoff Cheesecake Bars Recipe FAQs
What type of Biscoff cookies should I use?
Absolutely! Traditional Biscoff cookies work wonderfully as they provide the iconic spiced flavor, but you can also substitute with similar speculoos cookies if you’re in a pinch. Just ensure they have that same delightful crunch and flavor!
How should I store leftover Biscoff Cheesecake Bars?
To keep your delicious Biscoff Cheesecake Bars fresh, simply store them in an airtight container in the refrigerator for up to 5 days. This will help maintain their creamy texture and indulgent taste. If you notice any dark spots or changes in texture, it might be time to toss them!
Can I freeze Biscoff Cheesecake Bars?
Yes, absolutely! To freeze, wrap the bars individually in plastic wrap and then place them in a freezer-safe container. They can be frozen for up to 2 months. When you’re ready to enjoy them, just transfer them to the fridge and let them thaw overnight for the best results. You’ll be amazed at how creamy they still taste!
What should I do if my whipped cream isn’t reaching stiff peaks?
Very! If your whipped cream isn’t thickening, make sure to start with cold heavy whipping cream and ensure you’re using a clean mixing bowl and beaters. Whip at medium-high speed until you see soft peaks, then continue until you reach stiff peaks, which should take about 2-3 minutes. It’s crucial not to overwhip, as this can lead to grainy texture!
Are Biscoff Cheesecake Bars safe for those with nut allergies?
While the core ingredients, like cream cheese and Biscoff cookies, are typically nut-free, always double-check labels to ensure no cross-contamination has occurred. Additionally, Biscoff spreads sometimes contain traces of nuts. When serving, it’s best to inform guests about the potential for nut allergens to keep everyone safe!
How can I make these bars even more decadent?
If you’re feeling adventurous, try layering chocolate ganache or stirring in caramel sauce to your filling for an extra flavor kick! You can also top them off with fresh berries that will offer a beautiful contrast to the creamy Biscoff flavor. The more, the merrier when it comes to flavor exploration!
Indulge in Biscoff Cheesecake Bars That Dreamy Dessert Twist!
Ingredients
Equipment
Method
- Line a 9x13-inch baking pan with parchment paper and lightly grease it. Blend Biscoff cookies into fine crumbs and mix with melted unsalted butter. Press into the bottom of the pan and chill for at least 30 minutes.
- Beat softened cream cheese until smooth. Gradually add powdered sugar, Biscoff cookie butter, vanilla extract, and salt, mixing until silky.
- Whip the heavy cream and granulated sugar until stiff peaks form. Gently fold into the cream cheese mixture.
- Spread filling evenly over the chilled crust. Drizzle warmed Biscoff spread on top and swirl gently.
- Cover the pan and refrigerate for at least four hours. Cut into squares with a warm knife and garnish with extra cookies.
Leave a Reply