
As autumn leaves begin to paint the world in warm hues, there’s something undeniably magical about the scent of sweet, baked fruit wafting through the kitchen. My Brown Sugar Baked Pears embody the spirit of the season, transforming simple, firm pears into an elegant dessert that’s almost too easy to whip up. With just a handful of ingredients, this vegetarian and gluten-free treat not only saves you time—prepping in under 30 minutes—but also brings that cozy holiday vibe right to your table. Imagine indulging in these tender, caramelized delights straight from the oven, perfectly paired with a scoop of creamy ice cream or a dollop of yogurt. Are you ready to take your fall dessert game to the next level?
Why are Brown Sugar Baked Pears a Must-Try?
Simplicity is Key: These brown sugar baked pears require minimal ingredients and can be ready in under 30 minutes, making them a breeze to prepare.
Comforting Aroma: As they bake, your kitchen will fill with the warm, inviting scents of caramelized sugar and spices—ideal for cozy fall gatherings.
Customizable Flavors: Add a twist by incorporating cranberries or swapping spices; the possibilities to make them your own are endless!
Perfect for Any Occasion: Whether it’s Thanksgiving dinner or a weeknight treat, these pears impress without the fuss.
Crowd-Pleasing Dessert: Everyone loves a delightful, warm dessert, especially one that pairs beautifully with vanilla ice cream or crème fraîche.
Brown Sugar Baked Pears Ingredients
For the Pears
• Pears – Firm varieties like Bosc hold their shape well; Anjou will soften nicely for a tender bite.
• Lemon Juice – Prevents browning and enhances the fruit’s natural flavors.
For the Caramel Sauce
• Brown Sugar – The star of this dish, lending sweetness and a beautiful caramelization.
• Unsalted Butter – Melts into a rich sauce; coconut oil works as a great vegan alternative.
• Kosher Salt – A pinch balances out the sweetness and enhances overall flavor.
• Ground Cinnamon – Optional, but it adds lovely warmth and a classic touch to the dish.
• Ground Nutmeg – Another optional spice that gives depth; use sparingly for added warmth.
• Vanilla Extract – This secret ingredient takes the flavor to another level, adding luxurious depth.
Optional Toppings
• Ice Cream or Yogurt – A creamy side that complements the warm pears beautifully.
• Toasted Nuts – Adds a delightful crunch and nutty flavor contrast to the tender pears.
Indulging in these Brown Sugar Baked Pears is sure to bring happiness to your fall gatherings, making your kitchen smell divine!
Step‑by‑Step Instructions for Brown Sugar Baked Pears
Step 1: Preheat the Oven
Begin by preheating your oven to 400°F (200°C). While the oven is warming up, prepare a baking dish by lining it with parchment paper or spraying it with cooking spray. This ensures your pears bake evenly and easier cleanup afterward, setting the stage for the delicious Brown Sugar Baked Pears to come.
Step 2: Prepare the Pears
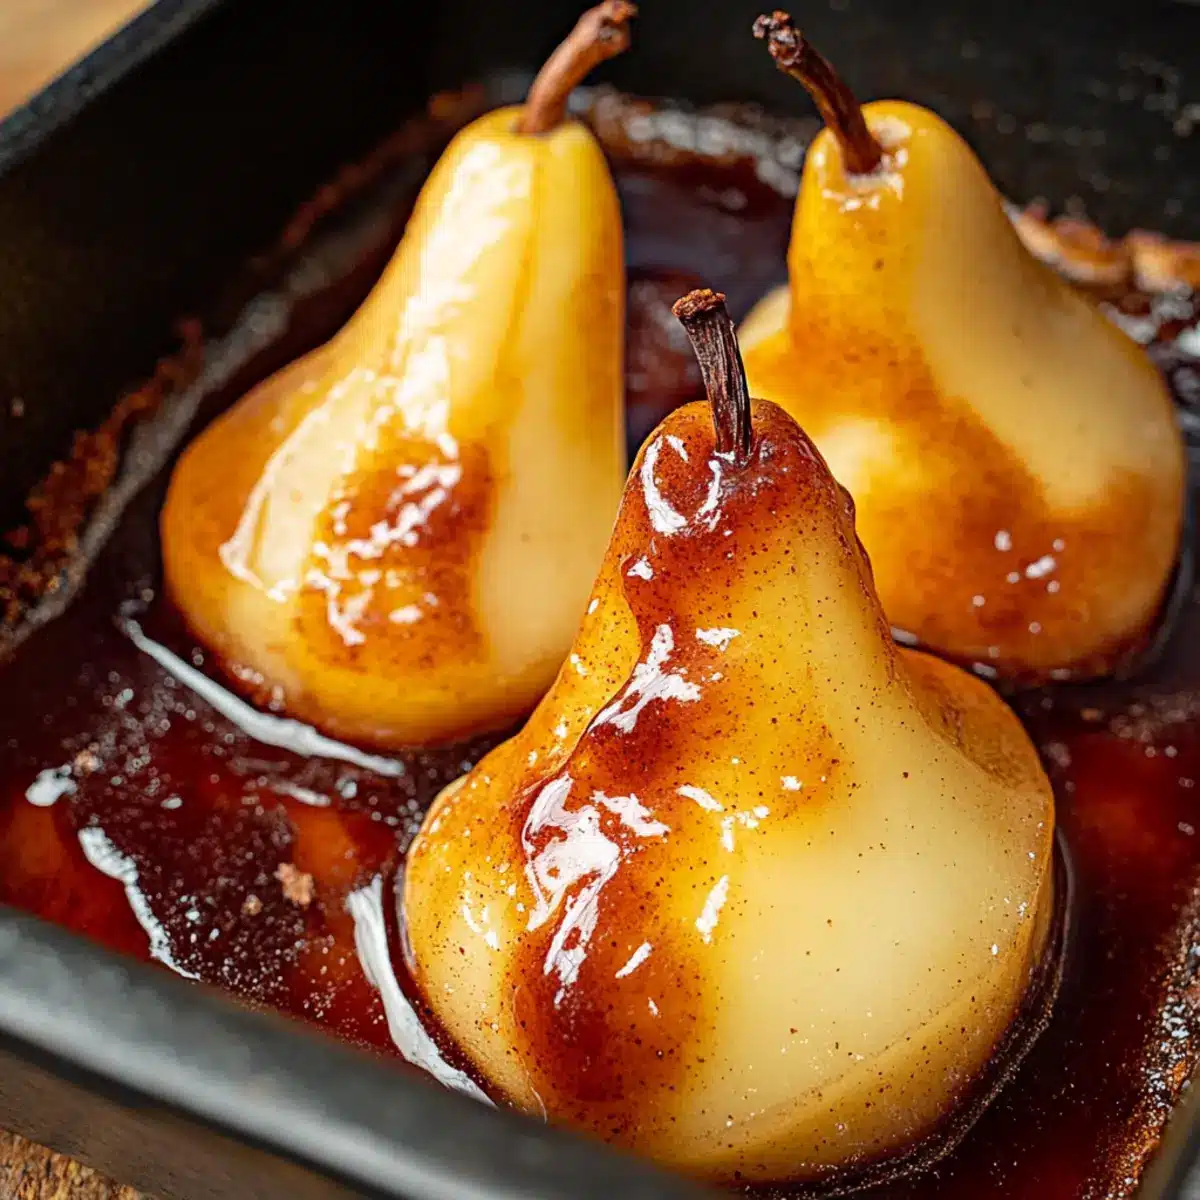
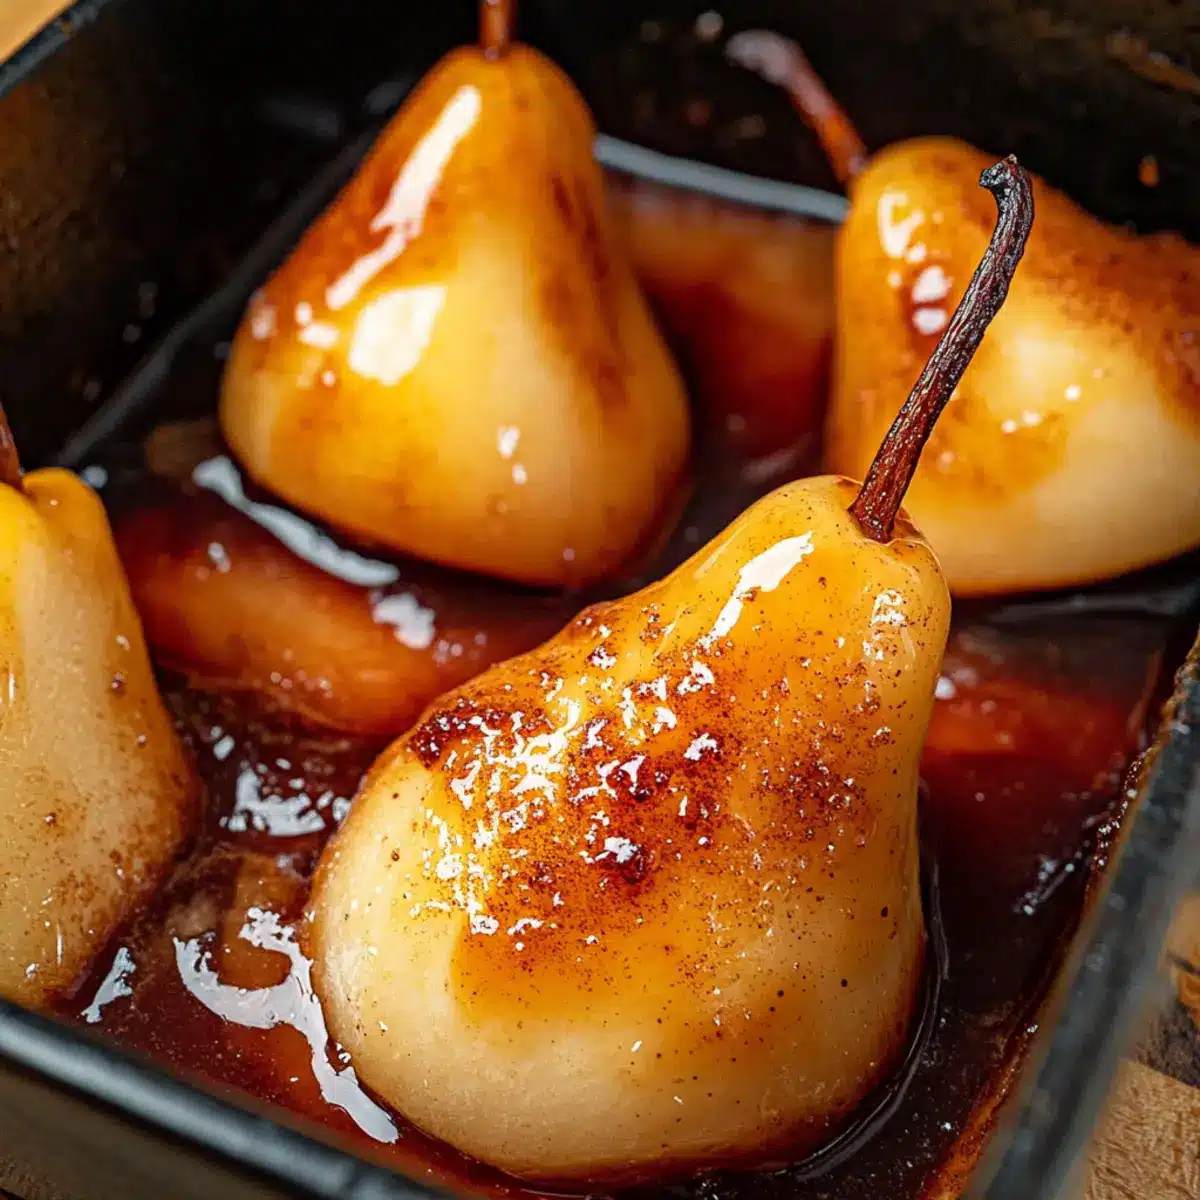
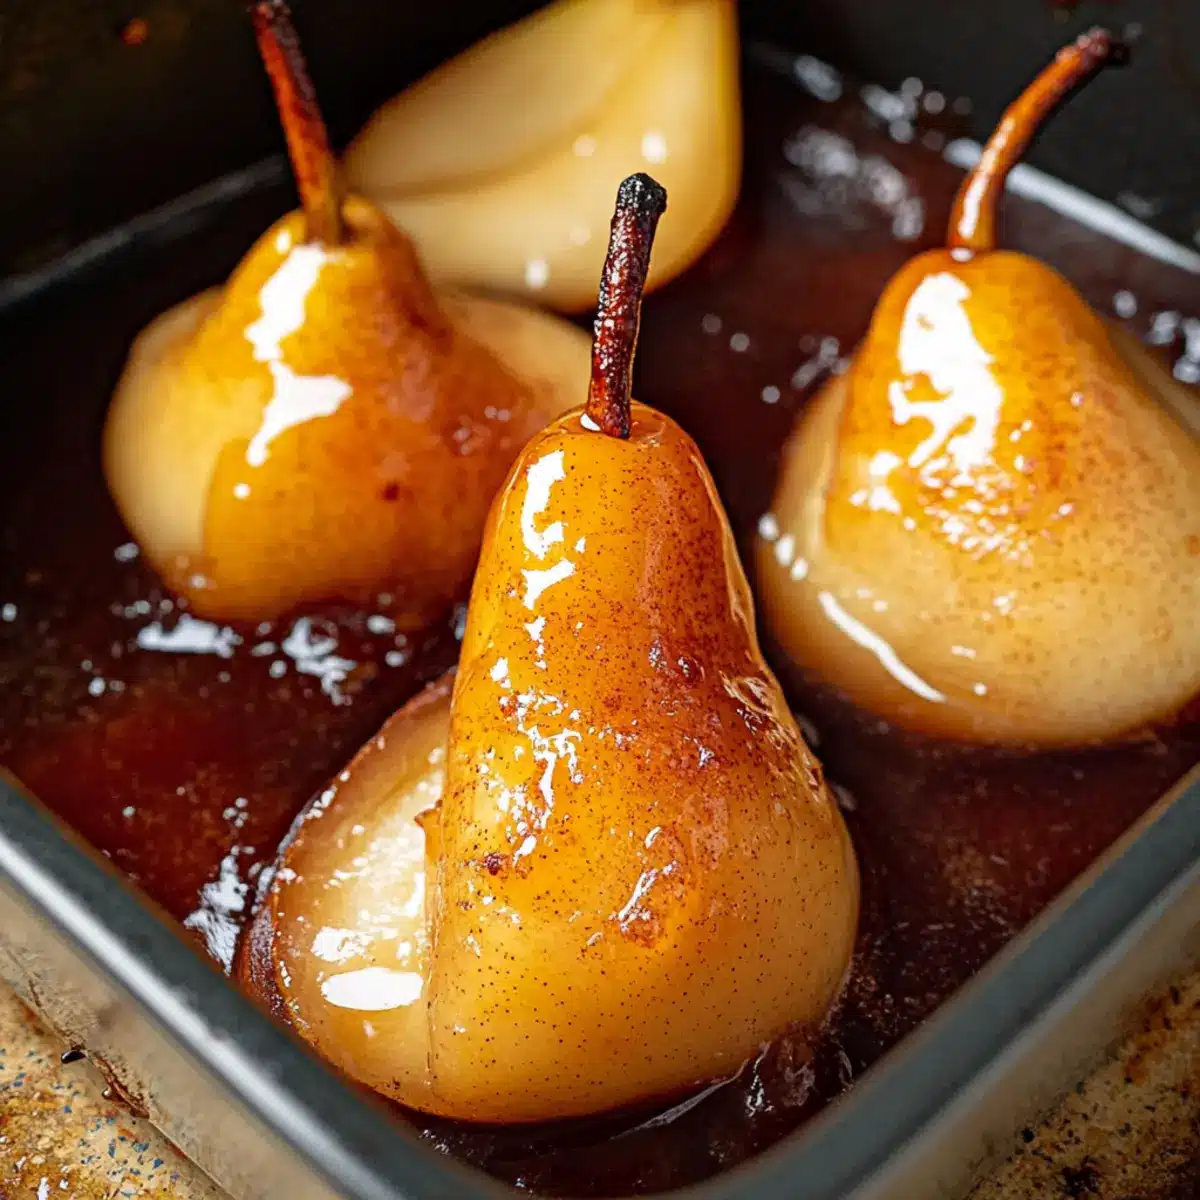
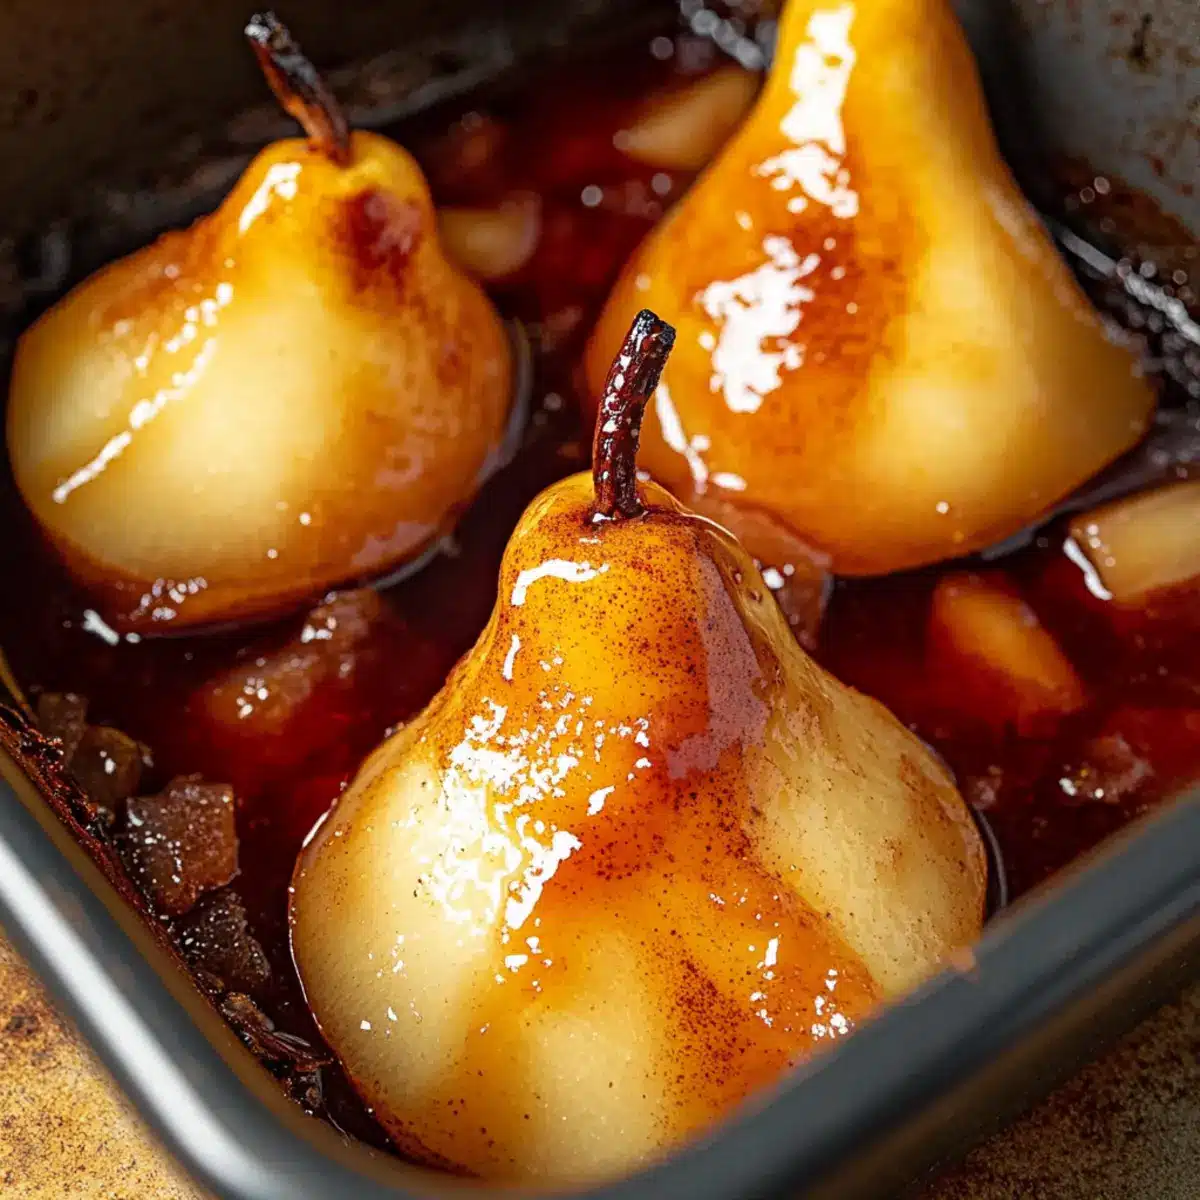
Next, take your chosen firm pears, such as Bosc or Anjou, and carefully peel them, leaving the stems intact for presentation. Core each pear, making sure to remove the seeds, then place them cut-side up in the prepared baking dish. Arrange them in a snug formation to maximize caramelization, as they embark on their baking journey.
Step 3: Add Flavorful Toppings
Drizzle a bit of fresh lemon juice over the prepared pears to enhance their natural sweetness and prevent browning. Sprinkle each pear generously with brown sugar, aiming to create a delightful caramel layer. For added warmth, dust with ground cinnamon and nutmeg, along with a pinch of kosher salt. Finally, dot each pear with small pieces of unsalted butter, which will melt into a rich sauce.
Step 4: Bake the Pears
Slide your baking dish into the preheated oven and let the pears bake for 30 minutes. Keep an eye on them as they begin to caramelize and soften, filling your kitchen with a heavenly aroma. Once this first baking time is complete, carefully flip each pear cut-side down, allowing them to soak in the caramel sauce that has begun to form.
Step 5: Finish Baking and Serve
Return the dish to the oven for an additional 20 to 50 minutes, depending on the firmness of your pears and your preferred sauce thickness. The pears should become fork-tender and the sauce should thicken beautifully. Once done, remove the dish from the oven and allow the pears to cool slightly before serving. These stunning Brown Sugar Baked Pears are now ready to delight your family and friends!
What to Serve with Brown Sugar Baked Pears
The enchantment of warm, sweet baked fruit deserves some delightful companions to create a memorable feast.
-
Vanilla Ice Cream: The creamy coldness of ice cream contrasts beautifully with warm pears, creating a heavenly bite. It’s a classic combination that never disappoints.
-
Greek Yogurt: A tangy dollop of Greek yogurt enhances the flavors of the caramelized pears while adding a rich, creamy texture that’s both light and satisfying.
-
Crème Fraîche: This slightly tangy cream adds a luxurious touch that cuts through the sweetness of the pears, balancing each bite elegantly.
-
Toasted Nuts: Sprinkle some toasted walnuts or pecans for a delightful crunch. Their nutty flavor adds depth and contrasts beautifully with the tender fruit.
-
Fresh Berries: A side of fresh raspberries or blueberries provides a burst of tartness, brightening the dish and adding a refreshing element to each bite.
-
Spiced Tea or Cider: Pair your dessert with a warm cup of spiced tea or apple cider. The warm spices echo those in the baked pears, enhancing the cozy experience.
Your Brown Sugar Baked Pears can shine even brighter with these delightful pairings, inviting everyone to savor the flavors of fall together!
Expert Tips for Brown Sugar Baked Pears
- Pear Selection: Choose firm pears like Bosc for the best texture; overly soft varieties may turn mushy and lose their charm during baking.
- Watch the Time: Bake times can vary; adjust based on your pear firmness. Bosc takes longer than Anjou, so check for doneness with a fork.
- Caramel Consistency: For a thicker sauce, let the pears bake longer until the caramel reaches your desired richness; patience pays off!
- Make Ahead: Prep your pears by coring and topping them, then refrigerate for up to 24 hours before baking to save time.
- Serving Suggestions: Enhance your Brown Sugar Baked Pears experience by pairing them with creamy yogurt or a scoop of vanilla ice cream for a decadent treat!
How to Store and Freeze Brown Sugar Baked Pears
Fridge: Store any leftover brown sugar baked pears in an airtight container for up to 3 days to retain their delicious flavor and texture.
Freezer: If you want to store baked pears for longer, freeze them in a single layer on a baking sheet. Once frozen, transfer them to an airtight container or freezer bag for up to 3 months.
Reheating: To enjoy your pears again, reheat them in a 350°F oven for 10-15 minutes to warm through and revive that caramelized goodness, or microwave them until warm.
Make Ahead Options
These Brown Sugar Baked Pears are a wonderful choice for meal prep, making your busy weeknights much easier! You can prepare the pears and top them with all the ingredients—for up to 24 hours in advance—by simply drizzling them with lemon juice, sprinkling brown sugar, and adding your spices and butter. This not only saves you valuable time but also enhances the flavors, as they can marinate in the fridge. When you’re ready to bake, just pop them in the oven at 400°F (200°C) and follow the same baking instructions. They’ll come out just as delicious, with that caramelized allure that everyone loves!
Brown Sugar Baked Pears Variations
Get ready to delight your taste buds with these easy ways to customize your Brown Sugar Baked Pears!
-
Cranberry Twist: Add fresh cranberries for a tart contrast that beautifully complements the sweetness of the pears. The vibrant red hue also adds festive color!
-
Alternative Spices: Swap cinnamon and nutmeg for ginger, cardamom, or allspice to explore different flavor profiles. Each spice brings a unique warmth that brightens the dish in unexpected ways.
-
Apple Variation: Use firm apples like Honeycrisp or Braeburn instead of pears for a classic baked fruit dessert twist. The sweet-tart flavor of apples creates a wonderful variation that everyone will enjoy.
-
Maple Syrup Drizzle: Replace brown sugar with maple syrup for a natural sweetness and unique flavor profile. This swap introduces a lovely richness that will elevate your dessert experience.
-
Nut Toppings: Sprinkle chopped walnuts or pecans on top before serving for a delightful crunch. The toasted nuts introduce a contrasting texture that perfectly complements the soft, warm fruit.
-
Vegan Option: Substitute unsalted butter with melted coconut oil or a plant-based butter. This ensures a rich sauce while keeping the dish vegan-friendly and delicious!
-
Add a Boozy Kick: Drizzle a bit of bourbon or rum over the pears before baking to infuse them with a delightful warmth. This touch adds an intriguing depth of flavor that adult guests will love.
-
Chilled Accompaniments: Serve with a dollop of mascarpone or a scoop of spiced pumpkin ice cream for an added seasonal twist. A cool side creates a sweet balance to the warm baked fruit.
Feel free to explore these variations while you whip up your Brown Sugar Baked Pears, and if you’re looking for more delicious recipes, check out my Baked Breakfast Tacos or discover the warmth of Baked Pumpkin Donuts. Happy baking!
Brown Sugar Baked Pears Recipe FAQs
What type of pears should I use for baking?
For baking, I recommend using firm varieties like Bosc, as they hold their shape beautifully during the baking process. Anjou pears also work well if you prefer a slightly softer texture. It’s best to avoid overly ripe pears like Bartlett, as they may turn mushy when baked.
How should I store leftover Brown Sugar Baked Pears?
Absolutely! Leftover baked pears can be stored in an airtight container in the refrigerator for up to 3 days. To reheat, simply place them in a 350°F oven for about 10-15 minutes, or microwave them until warm. This way, you can enjoy their deliciousness again!
Can I freeze Brown Sugar Baked Pears?
Yes, you can! To freeze, first let the baked pears cool completely. Then, lay them in a single layer on a baking sheet to freeze individually. Once frozen, transfer them to an airtight container or freezer bag. They will keep well in the freezer for up to 3 months. When you’re ready to enjoy them, simply thaw in the refrigerator overnight before reheating.
What if my caramel sauce isn’t thickening?
If your caramel sauce isn’t thickening as expected, don’t worry! You can keep the pears in the oven a bit longer until the sauce reaches your desired consistency. For a richer caramel, spoon some of the sauce over the pears and bake them cut-side down again. It’s a wonderful way to boost flavor and texture!
Are Brown Sugar Baked Pears safe for pets or allergies?
While pears themselves are safe for dogs in moderation, avoid sharing any baked versions with pets, especially due to ingredients like brown sugar and butter. For allergy considerations, ensure you’re aware of any personal sensitivities to the ingredients, particularly to nuts if you’re adding them as toppings. Always opt for ingredients suited to your family’s dietary needs.
Can I make Brown Sugar Baked Pears ahead of time?
Absolutely! You can prep the pears by peeling, coring, and topping them with all the ingredients up to 24 hours in advance. Simply store them covered in the refrigerator until you’re ready to bake, making it super convenient for gatherings or busy weeknights.
Brown Sugar Baked Pears: Your Cozy Fall Dessert Delight
Ingredients
Equipment
Method
- Preheat your oven to 400°F (200°C) and prepare a baking dish with parchment paper.
- Peel the pears and core them, then place cut-side up in the baking dish.
- Drizzle lemon juice over the pears, add brown sugar, spices, salt, and dot with butter.
- Bake pears for 30 minutes, then flip them cut-side down and continue baking for 20-50 minutes.
- Remove from oven, cool slightly, then serve warm with toppings.
Leave a Reply