
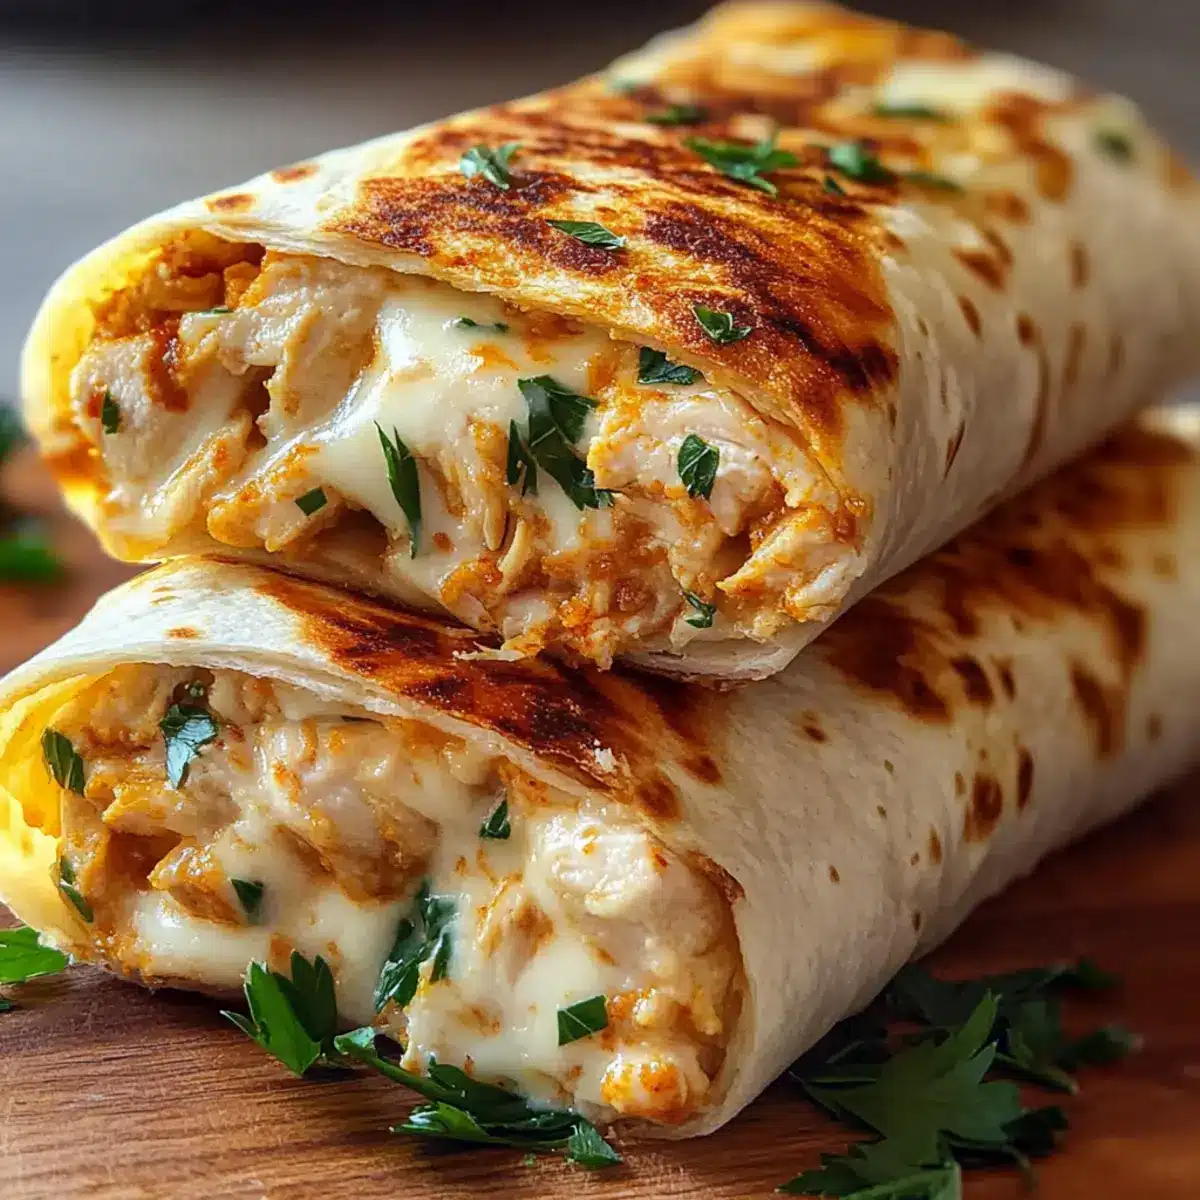
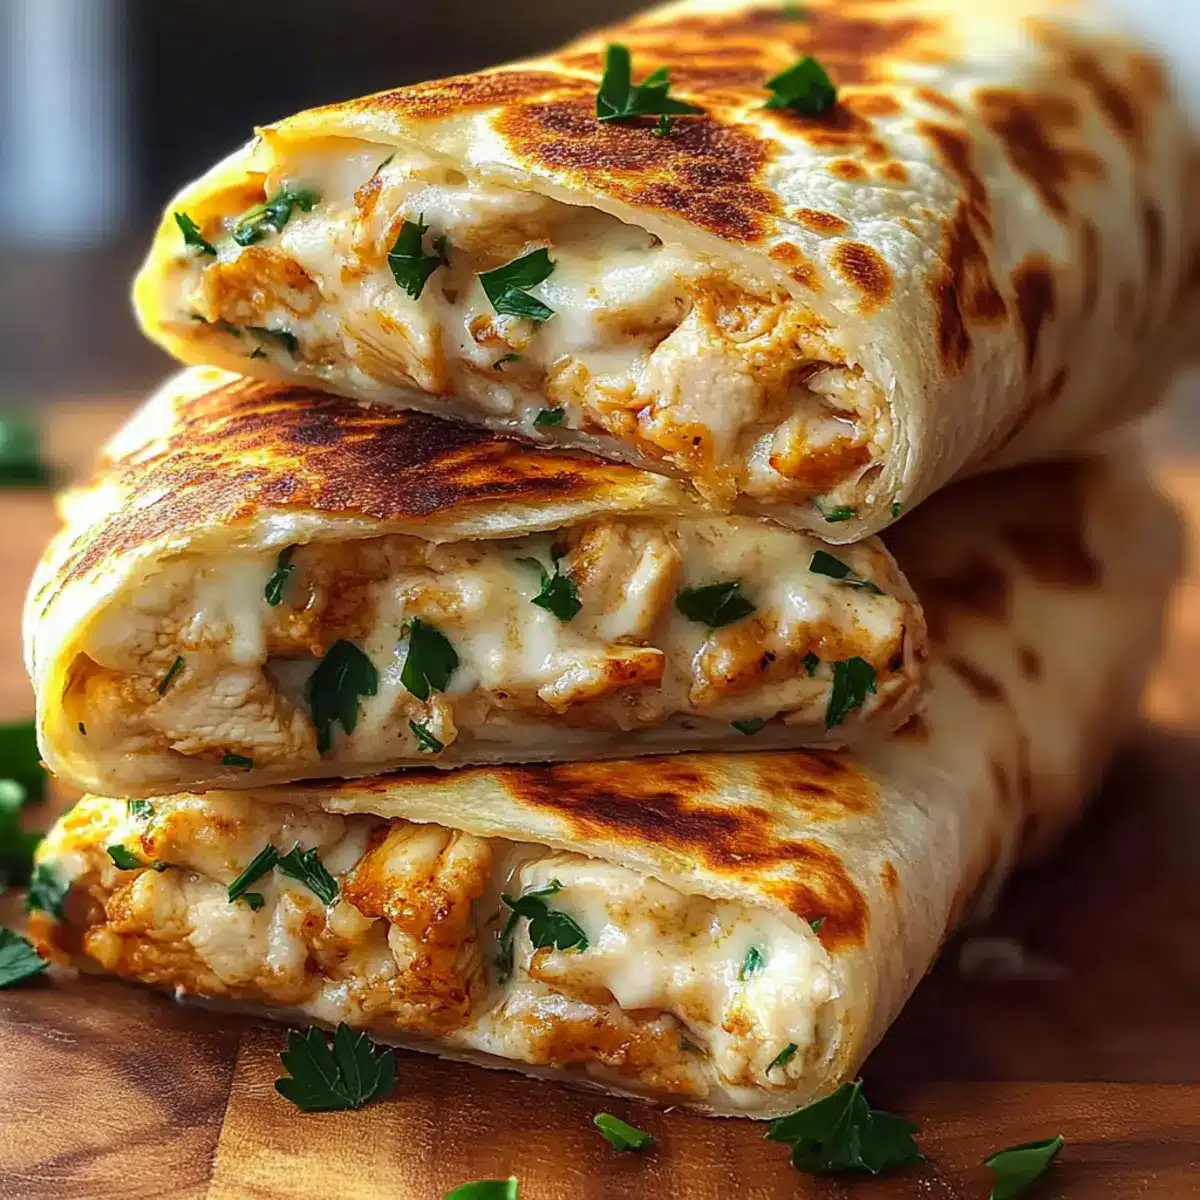
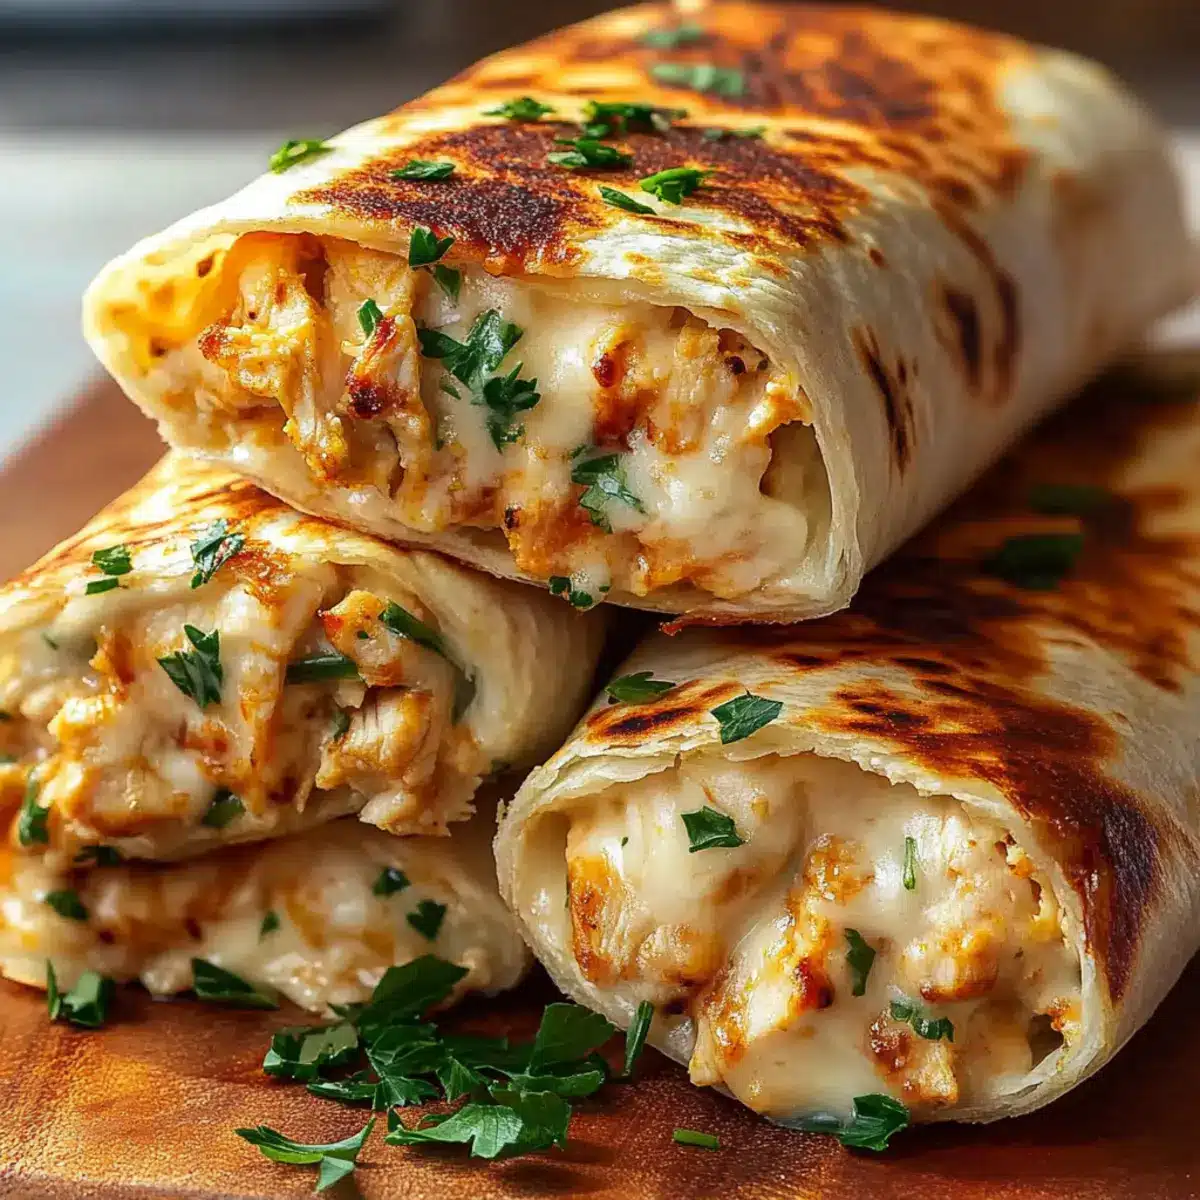
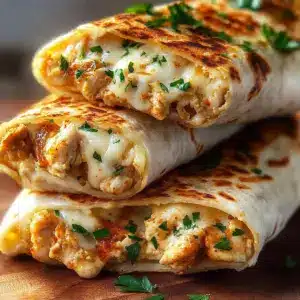
Late nights in the kitchen can sometimes feel like a mini crisis when hunger strikes, but I’ve found a savior in my Cheesy Garlic Chicken Wraps. These delectable handheld delights are not only quick and easy to whip up but also a perfect solution for those busy weeknights when you crave comfort food without the fuss. Imagine juicy chicken harmonizing with ooey-gooey cheese and fragrant garlic, all snugly nestled in a warm tortilla. You can customize these wraps to suit your taste, adding veggies or varying the cheese for extra flair. Plus, they can easily become gluten-free if needed! So, are you ready to transform your dinner routine into something effortlessly delicious? Let’s dive in!
Why Are Cheesy Garlic Chicken Wraps A Must-Try?
Simplicity makes these wraps a go-to recipe, perfect for both novice and experienced cooks. Irresistible flavors of cheesy garlic and juicy chicken mingle to create a delightful bite. Customizable options allow you to personalize your wraps, whether you prefer sautéed veggies or a different cheese like pepper jack. Quick prep time means you can enjoy this comfort food on even the busiest weeknights. Plus, they’re kid-approved and can easily be packed for lunch or served alongside a fresh green salad or some seasoned potato wedges. Want more delightful wraps? Try out my Baked Chicken Chimichangas or Oven Baked Cheesy Tacos for a varied weeknight menu!
Cheesy Garlic Chicken Wraps Ingredients
Here’s everything you’ll need to make your very own delicious cheesy garlic chicken wraps!
For the Filling
- Chicken – Adds protein and substance; substitute with rotisserie chicken or cooked ground chicken for convenience.
- Garlic – Provides bold flavor; use fresh minced garlic for the best aroma or garlic powder for a quicker option.
- Cheese (e.g., mozzarella, cheddar) – Contributes creaminess and flavor; substitute with pepper jack for heat or gouda for a richer taste.
- Parsley – Fresh garnish for color and brightness; optional, but recommended for presentation.
For the Wraps
- Tortilla – Encases the filling; use flour tortillas, or opt for gluten-free, whole wheat, or low-carb versions based on dietary needs.
- Butter – For toasting wraps to golden perfection; can be replaced with oil for a lighter option.
For Sautéing
- Olive Oil – Used for sautéing chicken and garlic; can substitute with vegetable or canola oil.
Step‑by‑Step Instructions for Cheesy Garlic Chicken Wraps
Step 1: Cook Chicken
Begin by preheating your oven to 375°F (190°C) if baking. Season your chicken with salt and pepper, then either grill, sauté, or bake it until the internal temperature reaches 165°F (74°C) and the meat is golden. This should take approximately 6-8 minutes per side for grilling or about 20-25 minutes if baking. Once cooked, let it rest for a moment before dicing into bite-sized pieces.
Step 2: Sauté Garlic
In a medium pan, heat 2 tablespoons of olive oil over medium heat. Once the oil is shimmering, add 2-3 cloves of minced garlic, stirring constantly for 30 seconds to 1 minute, or until it becomes fragrant and lightly golden. Keep an eye on it to avoid burning, as burnt garlic will spoil the flavor of your Cheesy Garlic Chicken Wraps.
Step 3: Combine Filling
Add the diced chicken to the sautéed garlic in the pan. Stir in 1-2 cups of shredded cheese, such as mozzarella or cheddar, allowing it to melt slightly and bind with the chicken and garlic. Cook for an additional 1-2 minutes, ensuring everything is heated through and the cheese is gooey. This filling should be rich, aromatic, and beautifully melded together.
Step 4: Assemble Wraps
Take your tortillas and lay them flat on a clean surface. Spoon a generous portion of the cheesy chicken filling into the center of each tortilla, making sure not to overfill. Fold the sides inward, then roll from the bottom up tightly, similar to a burrito, ensuring the filling is securely wrapped inside. This step is crucial for keeping your Cheesy Garlic Chicken Wraps intact.
Step 5: Toast Wraps
In the same pan over medium heat, melt 1 tablespoon of butter until it sizzles. Place the wraps seam-side down in the skillet, and toast for 2-3 minutes until golden brown. Flip the wraps carefully and cook for another 2-3 minutes on the other side. The goal is to achieve a crispy exterior while keeping the inside warm and gooey.
Step 6: Rest & Serve
Once your Cheesy Garlic Chicken Wraps are beautifully toasted, let them rest for a minute to settle. Use a sharp knife to cut them in half diagonally, revealing the gooey filling inside. If desired, garnish with fresh parsley for an added touch of color, then serve them warm alongside your favorite dipping sauce or a fresh salad for a delightful meal.
Storage Tips for Cheesy Garlic Chicken Wraps
Room Temperature: Enjoy your cheesy garlic chicken wraps fresh, but if left out, consume them within 2 hours to ensure food safety.
Fridge: Store wraps in an airtight container for up to 3 days. Reheat in a skillet over medium heat for the best texture.
Freezer: Freeze wraps individually in plastic wrap and then in a freezer bag for up to 2 months. Thaw overnight in the fridge before reheating.
Reheating: For optimal results, reheat wraps in a skillet or toaster oven to restore their crispy texture. Avoid microwaving, as this may make them soggy.
What to Serve with Cheesy Garlic Chicken Wraps
Elevate your meal experience by pairing these delightful wraps with complementary sides and drinks that enhance their comforting flavors.
- Fresh Green Salad: Bright, crisp greens tossed in a vinaigrette provide a refreshing contrast to the warm, cheesy chicken wraps.
- Seasoned Potato Wedges: Crispy, golden wedges seasoned with herbs create a satisfying crunch alongside the gooey wraps.
- Garlic Butter Breadsticks: Soft, warm breadsticks brushed with garlic butter echo the savory garlic theme and are perfect for dipping.
- Tomato Soup: A velvety tomato soup offers a comforting and nostalgic feel, making these wraps perfect for dipping.
- Roasted Vegetables: Vibrant roasted zucchini, bell peppers, and carrots not only add color but also a nutritious component that balances the richness.
- Crisp Pickles or Jalapeños: The tangy crunch from pickles or spiced jalapeños pair beautifully, providing a burst of flavor with each bite.
- Iced Tea or Lemonade: A cold glass of iced tea or zesty lemonade refreshes the palate, enhancing the flavors of your cheesy garlic chicken wraps.
- Chocolate Chip Cookies: End on a sweet note with warm cookies that contrast the savory wraps, creating a delightful finishing touch to your meal.
Expert Tips for Cheesy Garlic Chicken Wraps
-
Chicken Selection: Use boneless, skinless chicken breasts for a leaner option. Avoid cooking frozen chicken directly to ensure even cooking.
-
Garlic Choice: Fresh minced garlic adds the most flavor, but if using garlic powder, be mindful about the quantity, as it’s more concentrated.
-
Prevent Spillage: When folding your wraps, ensure they’re tightly rolled to minimize leaks while toasting. Save any leftover filling for a quick snack!
-
Toasting Time: Keep an eye on the heat; too high can burn the tortillas before the filling is heated through properly.
-
Flavor Play: Feel free to add spices like paprika or seasoned salt to the chicken before cooking for an extra flavor boost in your cheesy garlic chicken wraps.
Cheesy Garlic Chicken Wraps Variations
Feel free to let your creativity shine and tailor these wraps to suit your tastes!
-
Dairy-Free: Substitute cheese with dairy-free alternatives like cashew cheese or nutritional yeast for a flavor-packed option. You can still achieve that creamy texture without the dairy.
-
Vegetable-Packed: Add sautéed spinach, bell peppers, or mushrooms to the filling for extra nutrients and flavor. These vibrant veggies not only enhance the taste but also bring color to your wraps!
-
Gluten-Free: Use gluten-free tortillas for a delicious alternative that doesn’t compromise on taste. This makes the wraps accessible for those with dietary restrictions without sacrificing any flavor.
-
Spice Level: Ignite your flavors by adding diced jalapeños or a sprinkle of cayenne pepper to the filling. Just a little kick will elevate your cheesy garlic chicken wraps to new heights!
-
Herb Infusion: Add fresh herbs like basil or cilantro to the filling for a burst of freshness. The herbs will bring a bright, aromatic quality that complements the savory flavors beautifully.
-
Unconventional Cheeses: Experiment with bold cheeses like feta or blue cheese for a unique twist. These cheeses can add a delightful tanginess that transforms the wrap into gourmet territory.
-
Ultimate Crunch: Add crushed tortilla chips or crispy onions into the filling for a satisfying crunch with each bite. This will give your wraps an added layer of texture that keeps things exciting.
-
Chicken Twist: Substitute shredded chicken with leftover rotisserie chicken or even diced turkey for a super convenient and equally delicious option. It makes the preparation even quicker on those busy weeknights!
For more ways to enjoy cheesy goodness, don’t forget to check out my Chicken Avocado Melt or Chicken Pitas Herby, as these recipes also offer customizable flavor experiences!
Make Ahead Options
These Cheesy Garlic Chicken Wraps are a fantastic choice for meal prep enthusiasts looking to save time during busy weeknights! You can prepare the filling—diced chicken mixed with sautéed garlic and cheese—up to 3 days in advance. Simply store it in an airtight container in the refrigerator for optimal freshness. When you’re ready to enjoy your wraps, assemble them and toast in a skillet for crispiness. To prevent the tortillas from getting soggy, avoid assembling them until just before toasting, or wrap them tightly in plastic wrap if prepared. You’ll find they still taste just as delicious and make your dinner routine a breeze!
Cheesy Garlic Chicken Wraps Recipe FAQs
What type of chicken should I use for the wraps?
Absolutely! I recommend using boneless, skinless chicken breasts for a lean option, but you can also use rotisserie chicken or cooked ground chicken for quick preparation. Just ensure that whatever you choose, it’s cooked through to an internal temperature of 165°F (74°C) for safety.
How do I store leftover Cheesy Garlic Chicken Wraps?
To store your wraps, place them in an airtight container in the fridge for up to 3 days. When you’re ready to enjoy them again, simply reheat in a skillet over medium heat to maintain that delightful crispy texture. Avoid microwaving, as it can make them soggy!
Can I freeze Cheesy Garlic Chicken Wraps?
Certainly! To freeze your wraps, individually wrap them in plastic wrap and then place them in a freezer bag. They can be frozen for up to 2 months. When ready to eat, thaw overnight in the fridge and reheat in a skillet or toaster oven for the best results. This helps keep them crunchy and delicious!
What if my garlic starts to burn while sautéing?
Very! If your garlic starts to brown too quickly, immediately lower your heat to prevent burning. Burnt garlic can impart a bitter taste to your wraps. Keep stirring it continuously and don’t walk away for the best results. If it does burn, discard it and start over to keep the flavor of your wraps intact.
Are there any dietary considerations for these wraps?
For sure! The Cheesy Garlic Chicken Wraps can be made gluten-free by simply using gluten-free tortillas. Additionally, if you have allergies, make sure to check the cheese and any seasoning blends for potential allergens. Always choose cheese varieties and wraps that align with your dietary needs, ensuring everyone at the table can enjoy a tasty meal!

Cheesy Garlic Chicken Wraps That'll Make Dinner Dreams Come True
Ingredients
Equipment
Method
- Preheat your oven to 375°F (190°C) if baking. Season chicken with salt and pepper, then grill, sauté, or bake until cooked through, approximately 6-8 minutes per side for grilling or 20-25 minutes in the oven. Let rest and dice.
- In a medium pan, heat olive oil over medium heat. Add minced garlic and sauté for 30 seconds to 1 minute until fragrant.
- Add diced chicken to the garlic in the pan, then stir in shredded cheese and cook for 1-2 minutes until melted and combined.
- Lay tortillas flat, spoon filling into each, fold sides in, and roll tightly to enclose the filling.
- Melt butter in the same pan, toast wraps seam-side down for 2-3 minutes until golden, then flip and toast on the other side.
- Let wraps rest for a minute, cut in half and garnish with parsley if desired, serve warm.
Leave a Reply