
As I pulled the first batch from the oven, the sweet aroma of melting chocolate enveloped my kitchen, instantly transporting me to a sunlit spring afternoon. Easter Chocolate Chip Cookies are not just a treat; they’re a celebration in cookie form, adorned with vibrant pastel hues that reflect the season’s joyful spirit. With their soft, chewy centers and gooey chocolate chunks, these cookies are a guaranteed crowd-pleaser that can turn any gathering into a festive occasion. Plus, they come together quickly, making them a perfect last-minute addition to your Easter celebrations or a delightful snack just because. Curiosity piqued? Let’s dive into how to create these colorful delights that will brighten your dessert table!
Why Are These Cookies So Special?
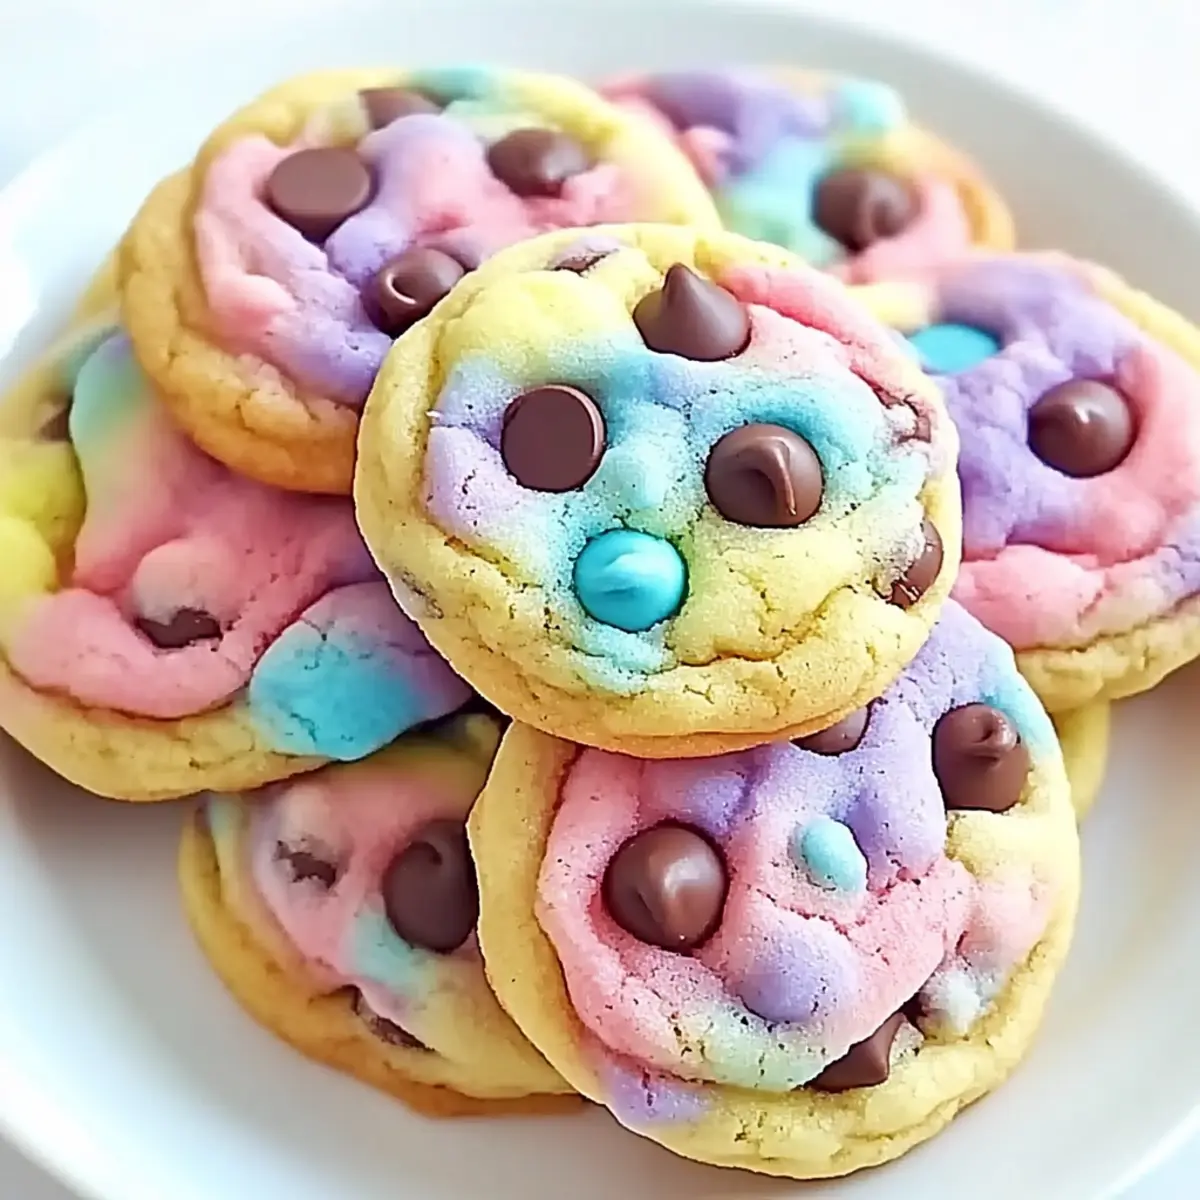
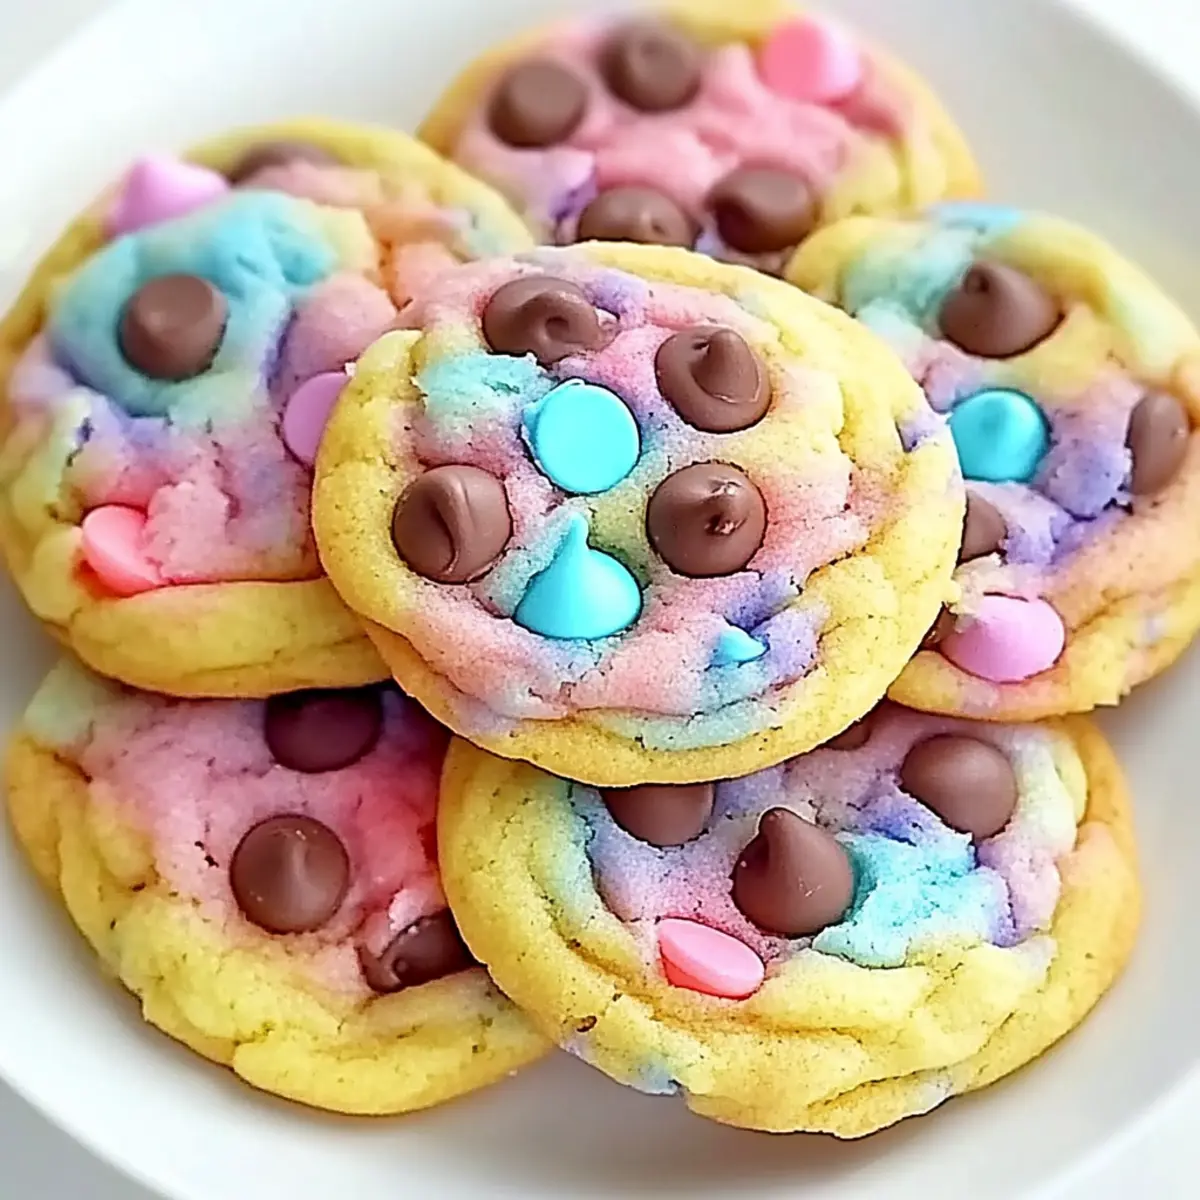
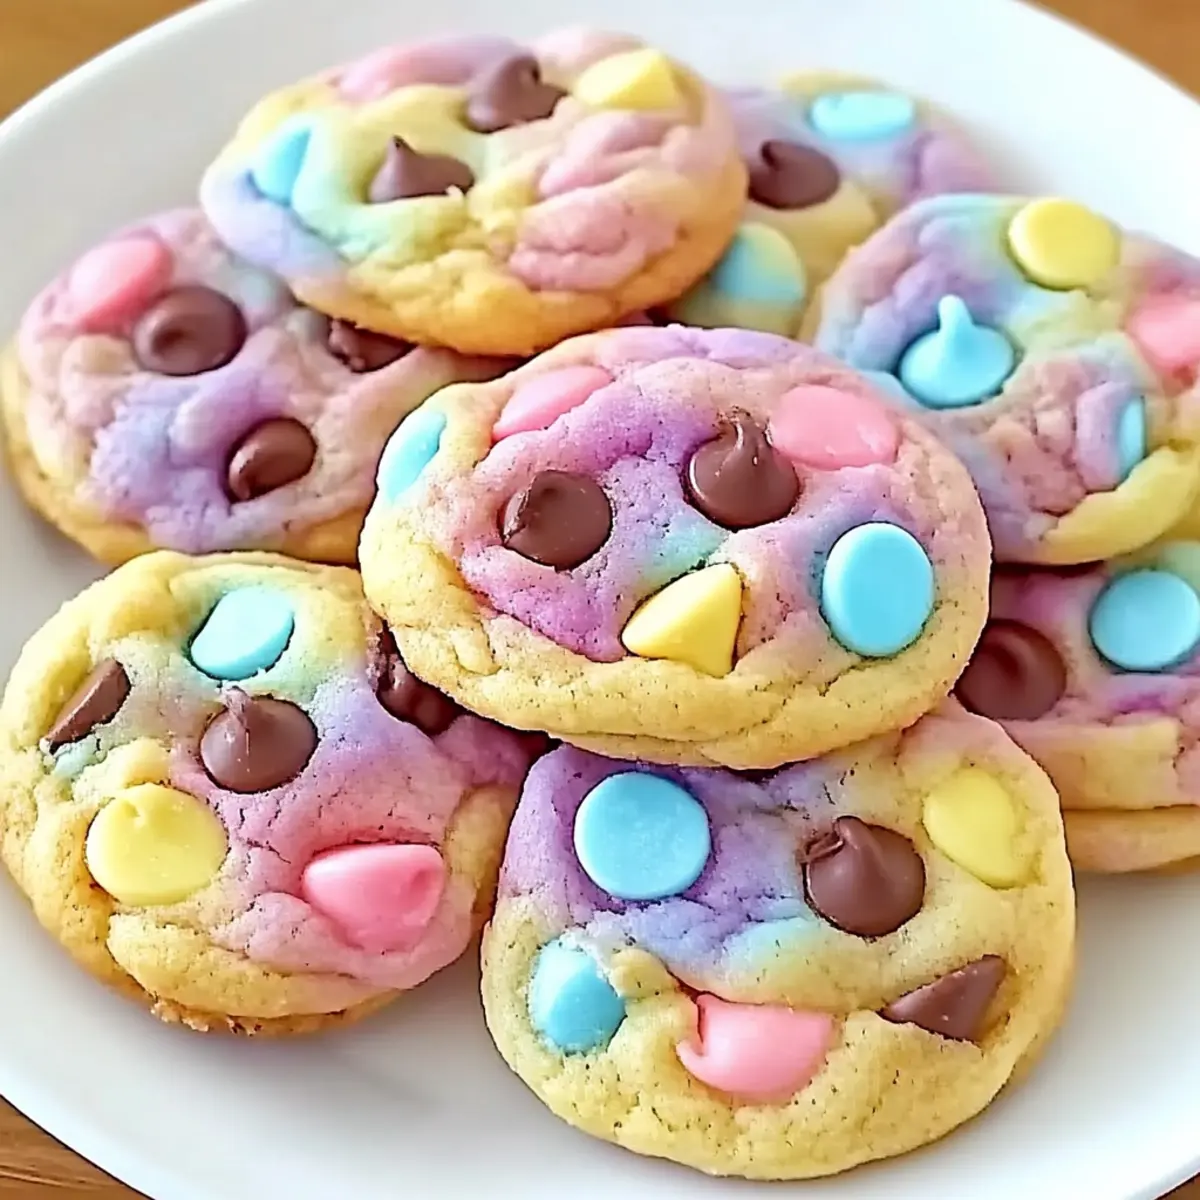
Vibrant Colors: These Easter Chocolate Chip Cookies are not just delicious, they’re a feast for the eyes with their stunning pastel hues—perfect for spring celebrations.
Chewy Texture: The soft, chewy centers paired with gooey chocolate chunks create a delightful contrast that melts in your mouth.
Quick and Easy: With simple ingredients and a straightforward process, you can whip these up in no time—ideal for those last-minute gatherings.
Crowd-Pleasing: Each cookie is a little piece of joy, making them perfect for Easter festivities or any occasion that calls for a sweet treat.
Customizable: Feeling adventurous? Swap the chocolate chips for white chocolate or butterscotch chips, or add nuts for an extra crunch.
Easter Chocolate Chip Cookie Ingredients
For the Cookie Dough
- All-Purpose Flour – Provides the essential structure for these Easter Chocolate Chip Cookies, ensuring they hold their shape.
- Baking Soda – Helps the cookies rise beautifully while keeping them soft and chewy.
- Salt – Balances the sweetness and enhances the overall flavors of the cookies.
- Unsalted Butter – Creates a rich, buttery texture; feel free to use coconut oil for a lighter twist.
- Granulated Sugar – Adds sweetness and contributes to slightly crisp edges for texture perfection.
- Brown Sugar – Introduces moisture and a deeper flavor profile; you can substitute with coconut sugar for a healthier alternative.
- Large Eggs – Acts as a binding agent, giving the cookies the rise they need to stay fluffy.
- Vanilla Extract – Infuses a warm, comforting flavor; opt for pure vanilla for the best results.
For the Color
- Gel Food Coloring – Vital for creating those vibrant pastel shades; avoid liquid food coloring as it may alter the texture.
For the Chocolate
- Chocolate Chips – Essential for that gooey, melty goodness in every bite; using high-quality chocolate chips will elevate the flavor.
Step‑by‑Step Instructions for Easter Chocolate Chip Cookies
Step 1: Preheat the Oven
Begin by preheating your oven to 350°F (175°C), allowing it to reach the ideal baking temperature. While the oven warms up, line a baking sheet with parchment paper to ensure that your Easter Chocolate Chip Cookies do not stick and bake evenly. This preparation step is crucial for a smooth baking process.
Step 2: Mix the Dry Ingredients
In a medium bowl, whisk together 2 cups of all-purpose flour, 1 teaspoon of baking soda, and ½ teaspoon of salt. Ensure these ingredients are well combined to create a uniform dry mix that will help your cookies rise properly. This step sets the foundation for the light and chewy texture you aim for in your Easter Chocolate Chip Cookies.
Step 3: Cream Butter and Sugars
In a large mixing bowl, use an electric mixer to beat together ¾ cup of unsalted butter, ½ cup of granulated sugar, and ¾ cup of brown sugar. Mix on medium speed until the mixture is light and fluffy, about 2-3 minutes. This creaming process incorporates air into the dough, giving your cookies that delightful softness.
Step 4: Incorporate Eggs and Vanilla
Next, add 2 large eggs, one at a time, mixing well after each addition to achieve a smooth batter. Then, pour in 1 teaspoon of pure vanilla extract and mix until fully combined. This step enhances the flavor profile of your Easter Chocolate Chip Cookies, making them even more irresistible.
Step 5: Combine Ingredients
Gradually add the dry ingredient mixture into the wet mixture, stirring gently until just combined. Take care not to overmix, as this could result in tough cookies. The dough should look soft and slightly sticky, with little visible flour remaining for perfectly chewy Easter Chocolate Chip Cookies.
Step 6: Add Color
Divide the dough into four equal portions. In separate bowls, mix each portion with a few drops of gel food coloring, blending until you achieve desired pastel hues. This fun step brings your Easter Chocolate Chip Cookies to life visually, making them perfect for your spring celebrations.
Step 7: Shape the Cookies
Scoop out small portions of each colored dough and roll them into balls, about 1 tablespoon each. Gently flatten each ball and place them onto the prepared baking sheet. Top each with a generous sprinkle of chocolate chips, ensuring that they’re evenly distributed for that ooey-gooey goodness you’ll love in every bite.
Step 8: Bake the Cookies
Transfer the baking sheet to the preheated oven and bake for 10-12 minutes, or until the edges turn golden brown while the centers remain soft. Keep an eye on them during the last few minutes; you want that perfect balance of chewy and soft in your Easter Chocolate Chip Cookies.
Step 9: Cool and Serve
Once baked, remove the cookies from the oven and let them cool on the baking sheet for about 5 minutes. This slight cooling time allows them to set before transferring them to a wire rack to cool completely. Serve warm or at room temperature to bring a smile to everyone’s face during your Easter celebrations!

How to Store and Freeze Easter Chocolate Chip Cookies
Room Temperature: Store your Easter Chocolate Chip Cookies in an airtight container at room temperature for up to 1 week to maintain their softness and flavor.
Fridge: If you prefer a longer shelf life, you can refrigerate the cookies in an airtight container for up to 2 weeks, but let them come to room temperature before serving.
Freezer: For longer storage, freeze the cookies in a single layer on a baking sheet, then transfer to a freezer-safe bag for up to 3 months. Thaw at room temperature before enjoying.
Reheating: When ready to indulge, reheat in the microwave for about 10-15 seconds to revive the gooey chocolate centers in these delightful Easter Chocolate Chip Cookies.
Expert Tips for Easter Chocolate Chip Cookies
-
Use Gel Food Coloring: Opt for gel food coloring for that vivid pastel effect; avoid liquid versions, which can change your dough’s texture.
-
Mind the Mix: Be careful not to overmix your dough. Mixing just until combined ensures soft, chewy Easter Chocolate Chip Cookies that are melt-in-your-mouth good.
-
Quality Chocolate Matters: Invest in high-quality chocolate chips. Combining semi-sweet and milk chocolate can enhance the gooey goodness and flavor of these cookies.
-
Chill the Dough: For cookies that hold their shape, chill the dough for about 30 minutes before baking; this helps prevent spreading and keeps them fluffy.
-
Watch the Bake Time: Keep a close eye on your cookies as they bake. You want the edges golden while the centers stay soft for the perfect texture.
Make Ahead Options
These Easter Chocolate Chip Cookies are perfect for busy families looking to save time during the festive season! You can prepare the cookie dough up to 24 hours in advance by mixing all the ingredients and then refrigerating it. This not only deepens the flavors but also prevents the cookies from spreading too much while baking. When you’re ready to bake, simply scoop out the dough, shape into balls, and bake as instructed. Additionally, if you’d like to prep even further, you can freeze the shaped cookie balls for up to 3 months. Just remember to thaw them in the fridge overnight before baking for delicious, fresh cookies just in time for your Easter celebration!
Easter Chocolate Chip Cookies Variations
Feel free to get creative and customize your Easter Chocolate Chip Cookies to suit your taste buds!
-
Healthier Option: Swap unsalted butter for coconut oil to create a lighter cookie without sacrificing flavor. The tropical hint complements the chocolate beautifully.
-
Sweet Twist: Substitute chocolate chips with white chocolate or butterscotch chips for a different flavor profile that adds sweetness and fun to your cookies.
-
Nutty Goodness: Add ½ cup of chopped walnuts or pecans to the dough for an extra crunch, giving every bite a delightful texture contrast.
-
Fruit Infusion: Toss in ½ cup of colorful sprinkles or mini pastel M&Ms to enhance the festive approach and offer a pop of flavor with each cookie.
-
Gluten-Free: Use a 1:1 gluten-free flour blend instead of all-purpose flour, letting everyone enjoy these cookies without gluten concerns. It’s a simple switch for tasty outcomes!
-
Spiced Up: Add 1 teaspoon of cinnamon to the dry ingredients for a warm, cozy flavor that beautifully complements the chocolate and enhances the sweetness.
-
Baking Boost: Drizzle your cooled cookies with melted white chocolate to create a pretty finish and an additional layer of sweetness that makes them even more irresistible.
-
Fruity Surprise: Fold in ½ cup of mini-dried fruits, like cranberries or cherries, for a delightful fruity surprise in your cookies. The chewy textures blend with your festive theme perfectly.
For additional ideas like delicious Chocolate Chip Banana or Almond Flour Cookies, let your imagination run wild!
What to Serve with Easter Chocolate Chip Cookies
Indulge in a delightful array of pairings that beautifully complement these vibrant cookies and elevate your festive gatherings.
-
Milk: The classic choice! A cold glass of milk enhances the sweet chocolate and balances the rich flavors perfectly.
-
Vanilla Ice Cream: Serve these cookies warm alongside a scoop of vanilla ice cream. The creamy texture and sweet vanilla meld beautifully with the cookies.
-
Fruit Salad: A refreshing bowl of seasonal fruits adds a burst of freshness to contrast the sweetness of the cookies, making for a well-rounded dessert experience.
-
Coffee or Espresso: The rich, bold flavors of coffee or espresso create a delightful balance with the sweetness of the cookies, leaving you craving a second one.
-
Chocolate Fondue: For an indulgent treat, pair these cookies with chocolate fondue. Dip pieces of the cookies for an extra layer of chocolate decadence!
-
Carrot Cake: Embrace the season with a slice of moist carrot cake. Its spiced flavors beautifully complement the sweet, chocolatey goodness of your Easter Chocolate Chip Cookies.
-
Lemonade: A chilled glass of lemonade provides a tart contrast to the sweetness, making it a refreshing sip between bites of cookie bliss.
Easter Chocolate Chip Cookies Recipe FAQs
How do I choose the right ripeness for the ingredients?
Absolutely! For the best texture and flavor in your Easter Chocolate Chip Cookies, make sure your butter is at room temperature—this helps it cream well with the sugars. Fresh eggs are crucial, so pick large eggs that are not close to their expiration date. Quality chocolate chips will enhance the cookie, so opt for high-quality brands over generic ones.
What is the best way to store Easter Chocolate Chip Cookies?
To keep your cookies fresh, store them in an airtight container at room temperature for up to 1 week. They stay soft and delicious this way! If you want to extend their life, refrigerate them in a sealed container for up to 2 weeks. Be sure to let them come to room temperature before serving to enjoy their full, soft texture.
Can I freeze Easter Chocolate Chip Cookies?
Yes, you can! To freeze these cookies, first place them in a single layer on a baking sheet to freeze them individually; this prevents them from sticking together. Once frozen solid, transfer the cookies to a freezer-safe bag or container where they can last for up to 3 months. When you’re ready to enjoy, simply thaw them at room temperature or reheat them briefly in the microwave to revive those gooey chocolate centers.
What should I do if my cookies spread too much while baking?
If you find that your Easter Chocolate Chip Cookies are spreading too much, it may be due to a few reasons. First, ensure your butter isn’t too soft; it should be creamy but not melted. If it feels very soft, refrigerate the dough for about 30 minutes before shaping and baking the cookies to help them hold their shape. Additionally, make sure you’re measuring your flour accurately; too little flour can lead to excess spreading.
Are Easter Chocolate Chip Cookies safe for pets or individuals with allergies?
It’s important to consider that these cookies contain ingredients that are not suitable for pets, especially chocolate, which is toxic to dogs and cats. As for allergies, if you or someone you’re serving has allergies, it’s best to check individual components. For example, you can substitute regular butter with a dairy-free alternative or use gluten-free flour if necessary, but these changes may affect the final texture.
Can I modify the color of my Easter Chocolate Chip Cookies?
Very! You’re welcome to experiment with the gel food coloring to achieve your desired pastel tones. You might also consider omitting it completely if you prefer a more traditional look. Additionally, you could swap out some of the chocolate chips for colorful Easter-themed candies for a festive touch. The more the merrier when it comes to adding visual delight to your cookies!
Easter Chocolate Chip Cookies Bursting with Spring Colors
Ingredients
Equipment
Method
- Preheat your oven to 350°F (175°C) and line a baking sheet with parchment paper.
- Whisk together flour, baking soda, and salt in a medium bowl.
- Cream together butter, granulated sugar, and brown sugar until light and fluffy.
- Add eggs one at a time and mix in vanilla extract until smooth.
- Gradually combine dry ingredients with wet mixture until just combined.
- Divide dough and mix each portion with gel food coloring for pastel hues.
- Shape dough into balls, flatten slightly, and place on the baking sheet.
- Bake for 10-12 minutes until edges are golden brown and centers remain soft.
- Cool cookies on the baking sheet for 5 minutes before transferring to a wire rack.
Leave a Reply